
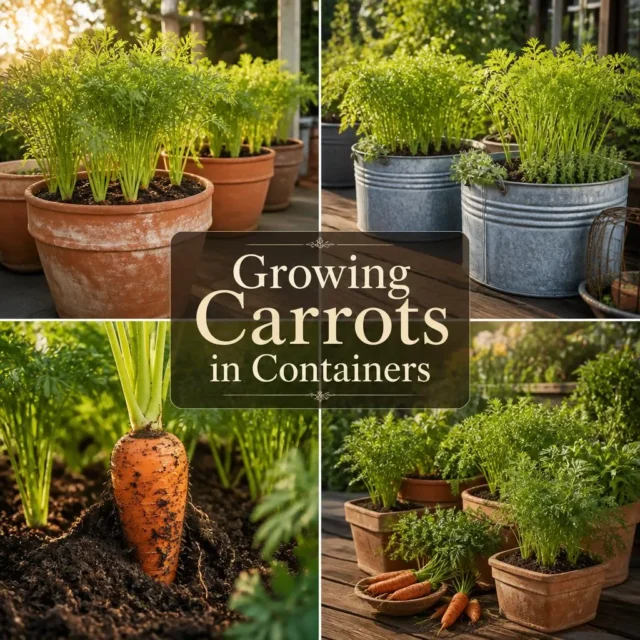

You do not need a backyard or a raised bed to grow carrots in containers that taste sweeter and crunchier than anything from a produce aisle. A deep enough pot, a loose, stone free potting mix, and a few weeks of steady watering are really all it takes to turn a balcony, patio, or sunny windowsill into a small but productive carrot patch. This guide walks through the entire process: picking a container that actually fits the variety you want to grow, mixing a soil blend that lets roots grow straight instead of forked, sowing and thinning seedlings correctly, and knowing exactly when to pull your first carrot. Whether your abode is a rented apartment or a suburban patio, these techniques are built for real container gardens, not sprawling vegetable beds.
Why Containers Work So Well for Carrots
Carrots have a reputation for being fussy in the ground, and containers solve most of the reasons why. In-ground soil is often compacted, rocky, or heavy with clay, and any of those conditions can stop a taproot in its tracks or send it forking around an obstacle. A container lets you build the soil from scratch, so the growing medium is exactly as loose and stone free as a carrot needs.
Containers also solve a space problem. Renters, apartment dwellers, and anyone without a dedicated vegetable bed can still grow a real harvest on a balcony rail, a porch step, or a sunny patio corner. Because pots are portable, you can chase the sun through the day, move plants under cover ahead of a hailstorm, or shift a container indoors if an unexpected cold snap threatens young seedlings.
There is also a pest management upside. Carrot rust fly, one of the most common carrot pests, is a low flying insect that struggles to reach containers raised up on a table, stand, or railing, so simply growing above ground level removes some of the pressure without a single spray. It is exactly the kind of practical thinking behind most of Sunday Abode’s home and garden ideas: work with the space and conditions you actually have, rather than the ones a traditional vegetable garden would assume.
Choosing the Right Container for Carrots
The container is the single decision that determines whether your carrots grow long and straight or short and stubby, so it is worth treating as a small garden design decision rather than an afterthought. The general rule, confirmed by University of Maryland Extension’s container vegetable research, is to choose a pot at least one and a half times deeper than the mature length of the carrot variety you plan to grow. A variety that matures at 4 inches (10 cm) long needs roughly 6 inches (15 cm) of soil depth; a variety that matures at 8 inches (20 cm) needs closer to 12 inches (30 cm).
As a practical starting point:
- Round or baby varieties: 6 to 8 inches (15 to 20 cm) deep
- Medium, stump-rooted varieties: 10 to 12 inches (25 to 30 cm) deep
- Long, standard varieties: 14 to 16 inches (35 to 40 cm) deep or more
Width matters almost as much as depth. Give each carrot roughly 3 inches (7 to 8 cm) of surface area, so a container 12 inches (30 cm) across can comfortably support a dozen or more roots once thinned.
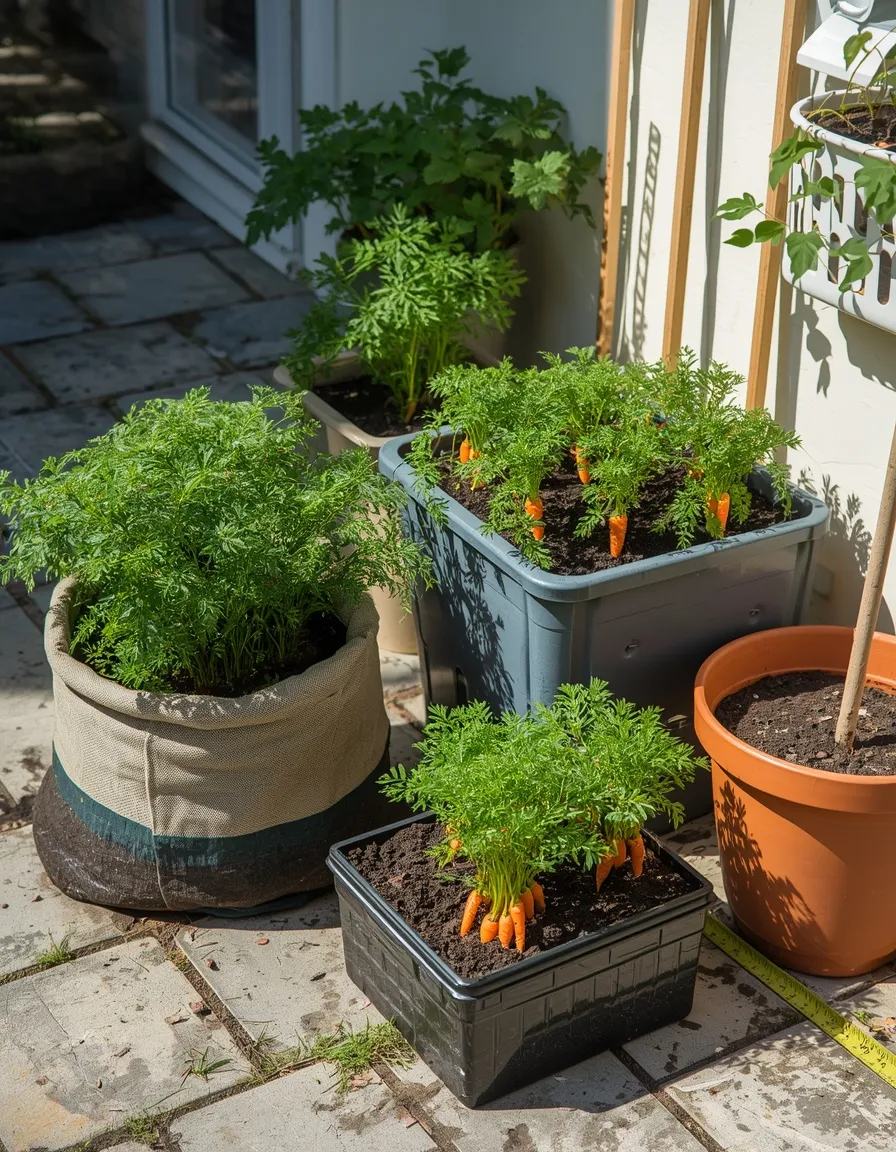
Material affects how often you will need to water. Unglazed terracotta looks beautiful but is porous and dries out fastest, so it suits gardeners who can check pots daily. Food grade plastic containers and fabric grow bags hold moisture longer and are lighter to move, which makes them a good match for balconies and upper floor patios. Galvanized metal tubs make striking planters but can heat up quickly in full sun, so line them or add extra drainage in hot climates. Whatever material you choose, drainage holes are non negotiable: carrots grown in waterlogged soil rot and split, so a container without existing holes needs at least four to six drilled into the base. Wear eye protection when drilling into metal or hard plastic, since both can send small fragments flying.
Containers also come in handy for pet owning households, since raising the growing area up and out of paw reach keeps curious dogs from digging up seedlings before they establish. For peace of mind, the ASPCA lists garden carrots as non-toxic to dogs, cats, and horses, though the leafy tops can occasionally irritate sensitive skin, so it is still worth positioning pots where pets are not grazing on them constantly.
Best Carrot Varieties for Container Growing
Not every carrot variety is suited to a pot, and choosing one bred for shallow or restricted soil will save you from disappointing, stubby harvests. These varieties consistently perform well in containers:
- Thumbelina: A round, golf-ball shaped baby carrot that matures in about 55 to 60 days and needs only 6 inches (15 cm) of soil, making it ideal for shallow window boxes.
- Paris Market (Parisian): Another round variety with a mild, sweet flavor, well suited to wide, shallow bowls and even to compacted or clay-leaning soil mixes.
- Adelaide: A fast baby variety, often ready in under 50 days, useful for gardeners who want an early first harvest to test their setup.
- Little Finger: A miniature Nantes-type carrot, about 4 inches (10 cm) long, sweet and tender, and a reliable performer in 8 to 10 inch (20 to 25 cm) pots.
- Danvers Half Long: A medium, stump-rooted variety bred to tolerate heavier soils, a good match for a 10 to 12 inch (25 to 30 cm) container.
- Nantes types: Cylindrical with a blunt tip and notably tender texture, best reserved for deeper containers of 12 inches (30 cm) or more.
- Chantenay Red Core: Another stump-rooted, heavy-soil tolerant type that performs reliably in 8 to 10 inch (20 to 25 cm) pots.
If container depth is limited, lean toward the round and baby varieties. If you have a genuinely deep pot or a half barrel, a standard Nantes or Imperator type will reward you with the classic long, tapered carrot shape.
Building the Perfect Potting Mix
Skip garden soil entirely. Even good garden soil compacts inside a container, and any leftover stones or clumps will deflect a growing taproot and cause it to fork. Carrots want a mix that is loose from top to bottom and completely free of debris.
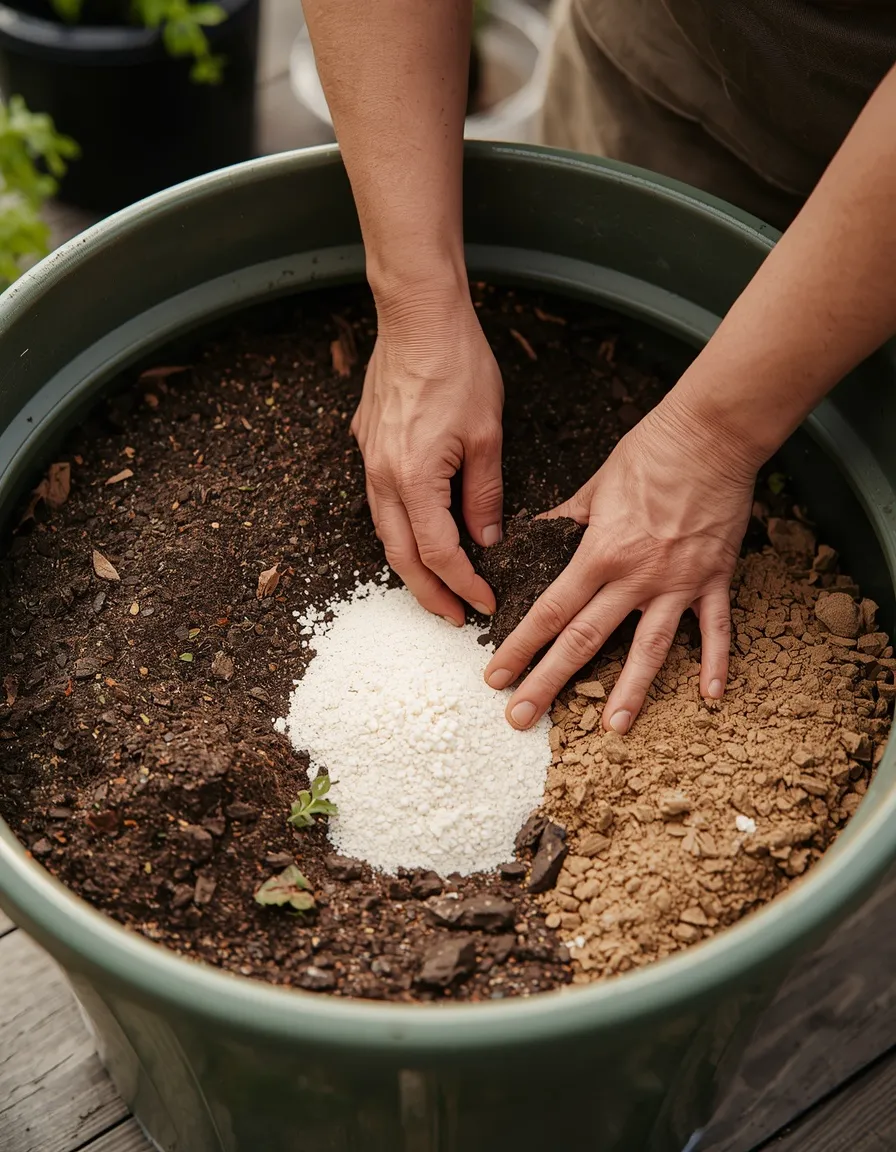
A reliable container mix combines roughly 40 percent high-quality, peat-free potting mix, 30 percent mature compost for nutrition and moisture retention, and 30 percent coarse sand or perlite for drainage and looseness. Before filling the container, run the finished mix through your hands, or a garden sieve for larger batches, to catch any twigs, stones, or hard clumps that slipped in.
Aim for a soil pH between 6.0 and 6.8, which suits most carrot varieties without any special amendment in typical potting mixes. Avoid working fresh manure or high-nitrogen fertilizer into the mix before planting: nitrogen-heavy soil pushes carrots to grow lush, leafy tops at the expense of the root, and often results in forked or hairy roots covered in fine side shoots. A light application of a balanced, or slightly phosphorus- and potassium-leaning organic fertilizer, mixed in before sowing, is a better foundation.
If you are reusing an older container, particularly an inherited wooden planter box, check that the wood has not been treated with older-style chemical preservatives, since some can leach into edible crops over time. When in doubt, line the interior with a food-safe liner before adding your mix.
Sowing Carrot Seeds Step by Step
Carrot seeds are small, slow to germinate, and unforgiving of dry soil, so a little care at sowing time pays off for the rest of the season.
- Time it by soil temperature, not the calendar. Carrot seeds germinate anywhere between 40 and 85 degrees Fahrenheit (4 to 29 degrees Celsius), but they come up fastest and most evenly between 55 and 65 degrees Fahrenheit (13 to 18 degrees Celsius). For a spring crop, sow two to three weeks before your last expected frost. For a fall crop, sow ten to twelve weeks before your first expected frost, since carrots are frost tolerant and often taste sweeter after a light chill.
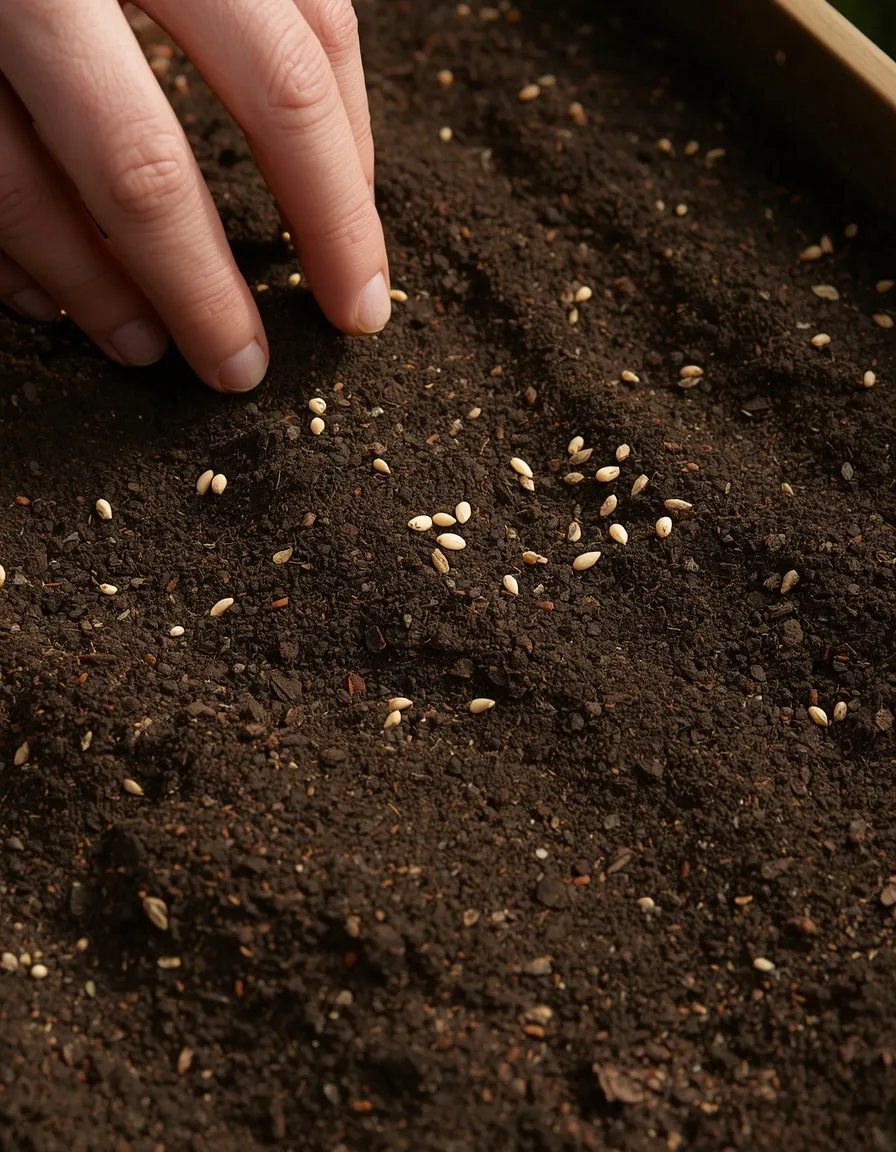
- Sow shallow. Plant seeds about a quarter inch (0.6 cm) deep and cover lightly with fine potting mix, sifted compost, or vermiculite, which resists forming a hard crust the way plain soil sometimes does.
- Scatter, do not obsess over spacing. Distribute seeds evenly across the container surface, roughly one seed per square inch (2.5 cm), rather than trying to place each one precisely. You will thin to the correct spacing once seedlings appear.
- Keep the surface consistently damp. Germination takes 14 to 21 days and often happens unevenly, so the top inch of mix needs to stay moist the entire time, misted or lightly watered as needed rather than left to dry and crust over. A classic trick borrowed from in-ground growers is to scatter a few fast-germinating radish seeds in with the carrots; the radishes pop up first and mark exactly where moisture is needed most.
- In hot weather, chill the seed first. If you are sowing during a summer heat spell, refrigerating the seed packet for a few days before sowing can improve germination rates in warm soil.
Sunlight, Watering, and Feeding
Sunlight
Carrots want at least 6 hours of direct sun a day, and 8 to 10 hours produces the fastest, sweetest crop. In hot summer climates, roughly USDA zone 9 and warmer, or anywhere summer highs regularly exceed 85 degrees Fahrenheit (29 degrees Celsius), a little afternoon shade helps prevent bitter flavor and premature bolting. In cooler, shorter-season regions, prioritize the sunniest spot available even if it falls short of the ideal.
Watering
Container soil dries out considerably faster than ground soil, so this is the step most container growers underestimate. Check the top inch of mix daily during warm weather, and water deeply enough that moisture reaches the full depth of the root zone rather than just wetting the surface. Irregular watering, letting the mix go bone dry and then soaking it, is the single most common cause of split or cracked roots, so a consistent schedule matters more than the total volume of water. Ease off slightly, without letting the mix dry out completely, in the final week or two before harvest; a bit less moisture at that stage tends to concentrate sweetness rather than diluting it.
Feeding
Container mixes lose nutrients faster than garden soil because frequent watering washes them out. Work a balanced, low-nitrogen fertilizer into the mix at planting, then follow up with a light monthly feeding once true leaves appear. Skip high-nitrogen formulas entirely; they encourage leafy top growth at the expense of the root and are a common cause of forked, stunted carrots.
Thinning Seedlings Without Losing the Harvest
Thinning is the step new container gardeners most often skip, and it is the reason so many first attempts produce a tangle of skinny, twisted little roots instead of a proper harvest. Carrot seedlings that are left crowded compete for the same narrow column of soil, and none of them ever get the room to size up.
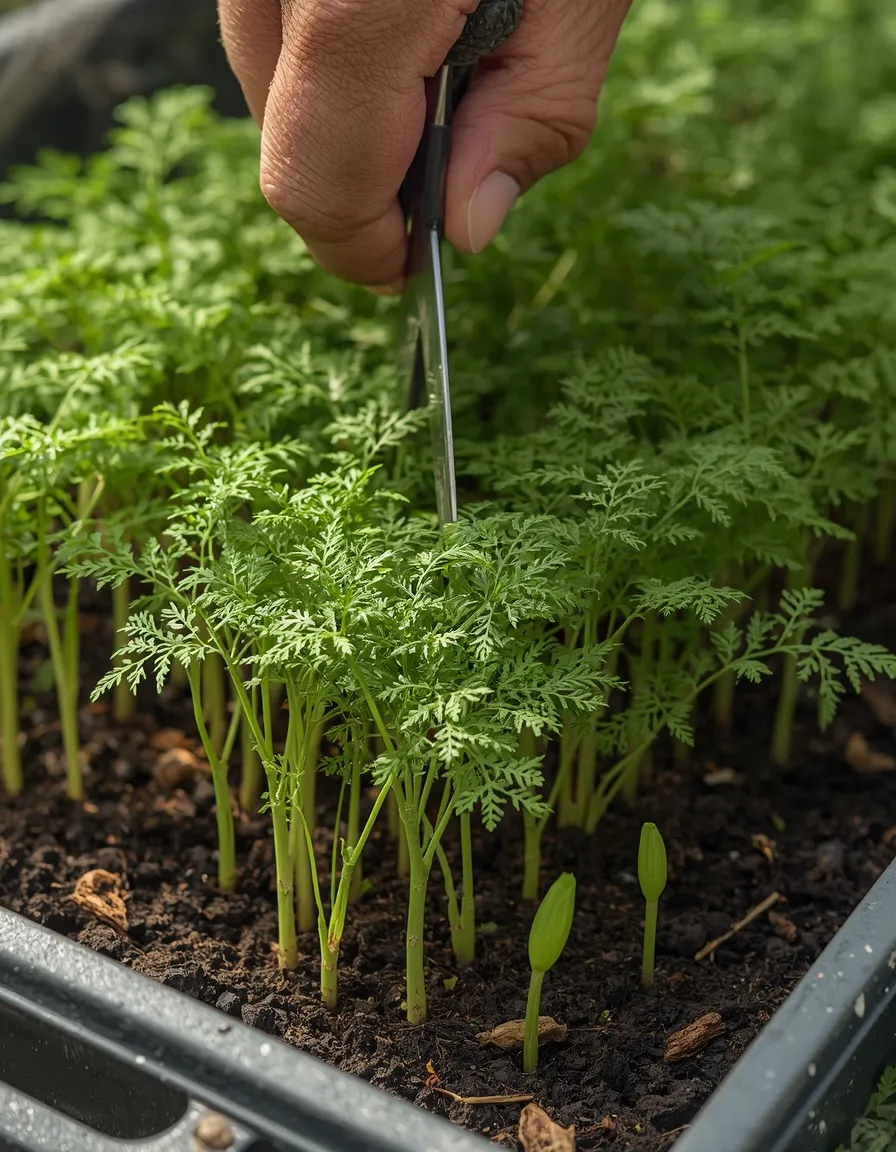
Start thinning once seedlings reach about 2 inches (5 cm) tall with two to three true leaves. Rather than pulling seedlings out, which disturbs the roots of their neighbors, snip the unwanted ones off at soil level with small scissors. Work toward a final spacing of 2 to 3 inches (5 to 7 cm) between plants for most round and medium varieties, or 3 to 4 inches (7 to 10 cm) for larger standard types. It usually takes two rounds of thinning, once when seedlings are small and again a couple of weeks later, to reach the right final spacing without overdoing it in one pass.
A genuinely useful bonus: the thinnings are edible. The tiny carrot tops taste like a milder, more delicate version of mature carrot greens and make a good addition to a salad, so nothing from this step goes to waste.
Growing Carrots in Containers Indoors
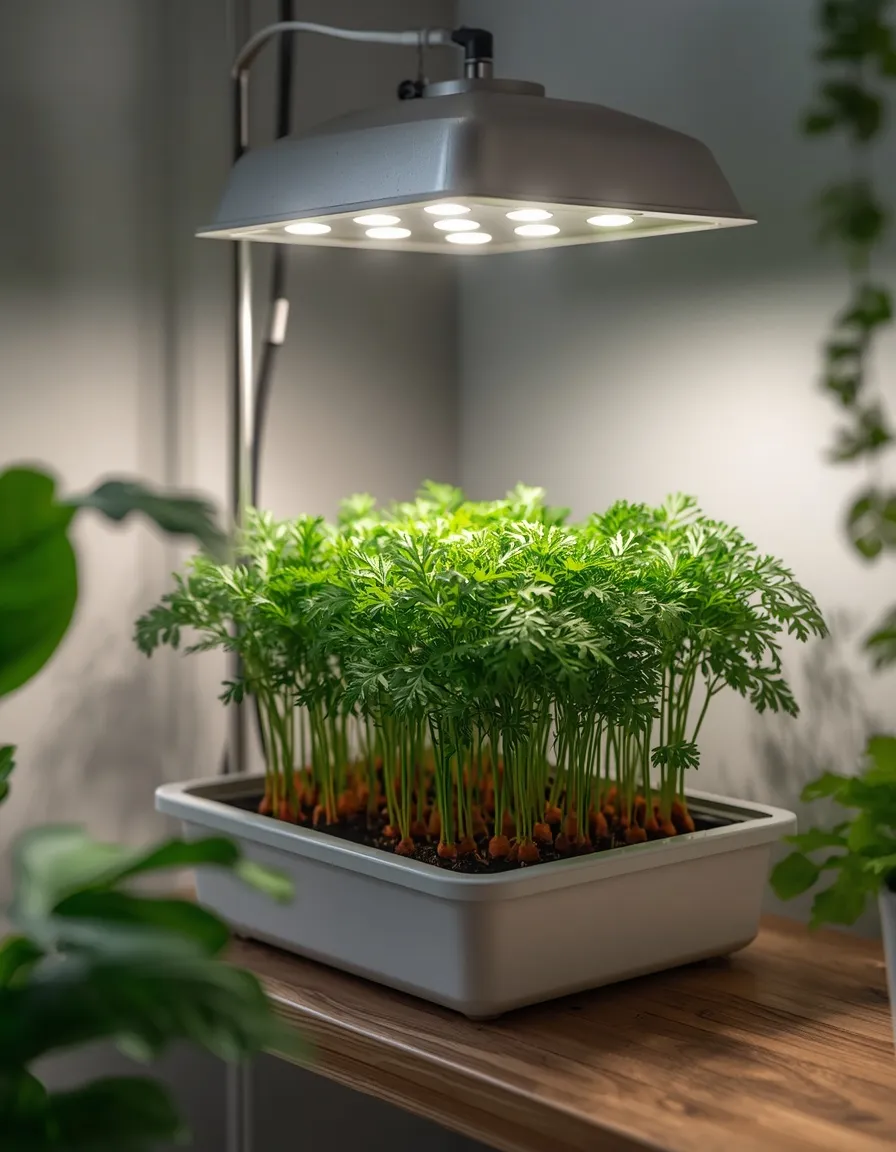
Growing carrots indoors is possible, but it comes with two hurdles most windowsills cannot clear on their own: light and temperature.
Light
Most indoor windows, even bright south-facing ones in the Northern Hemisphere, or north-facing in the Southern Hemisphere, fall well short of the 6 or more hours of direct sun carrots want. A basic grow light positioned 6 to 12 inches (15 to 30 cm) above the seedlings and run for 12 to 14 hours a day closes that gap reliably. Without supplemental light, indoor-grown carrots tend to produce plenty of leafy top growth and disappointingly thin roots.
Temperature
Indoor rooms, especially kitchens, often run warmer than the range carrots prefer for steady growth. Keep containers away from heating vents and radiators, and aim for a room that stays in the 60 to 70 degree Fahrenheit (16 to 21 degree Celsius) range rather than a consistently warm space.
Best Varieties for Indoor Growing
Fast, compact round types such as Thumbelina, Paris Market, and Romeo suit indoor containers particularly well, since their shallower root run and quicker 50 to 60 day maturity make them more forgiving of imperfect indoor light than a long, standard carrot would be.
If you already keep houseplants on a bright windowsill, container carrots are a natural next step for that same spot. The same instincts that keep something like a jade plant thriving, reading the light, avoiding overwatering, and rotating for even growth, transfer directly to a pot of carrots parked beside it.
Troubleshooting Common Container Carrot Problems
Even with a good setup, container carrots occasionally run into trouble. Most problems trace back to one of five causes, and each has a straightforward fix.
Forked or Twisted Roots
The taproot has hit an obstacle, whether a stone, a clump of unmixed compost, or the wall or base of the container itself. Sift the potting mix thoroughly before filling the pot, and match container depth to the mature length of the variety you are growing so the root has room to grow straight down without hitting bottom early.
Stunted or Undersized Carrots
Usually a spacing or light problem. Overcrowded seedlings that were not thinned properly compete for the same narrow soil column and never size up, and insufficient sun, under 5 to 6 hours, has a similar stunting effect. Thin more aggressively and, if possible, move the container somewhere it gets more direct light.
Split or Cracked Roots
Almost always caused by inconsistent watering, specifically a dry spell followed by a heavy soak. Carrots absorb water quickly once it is available, and a sudden influx after drought stress can split the root faster than it can expand to accommodate the moisture. A consistent watering schedule, checked daily in warm weather, prevents this far more reliably than trying to fix it after the fact.
Green, Bitter Shoulders
When the top of a carrot root, known as the shoulder, is exposed to direct sunlight as it pushes up out of the soil, it turns green and develops a distinctly bitter, sometimes mildly irritating flavor and texture. As roots swell and shoulders start to show above the surface, mound a little extra potting mix over the exposed tops every week or two to keep them covered.
Pests
Carrot rust fly and aphids are the two most likely visitors. Carrot rust fly is a low-flying insect, so containers raised on a table, stand, or railing are naturally harder for it to reach than an in-ground bed, which is one of the quiet advantages of growing in pots. Aphids clustering on the ferny tops usually respond to a firm spray of water or a light application of insecticidal soap. Whatever product you reach for, choose the mildest effective option first, follow the label instructions exactly, and keep it away from pets and children until it has dried.
Harvesting Container-Grown Carrots
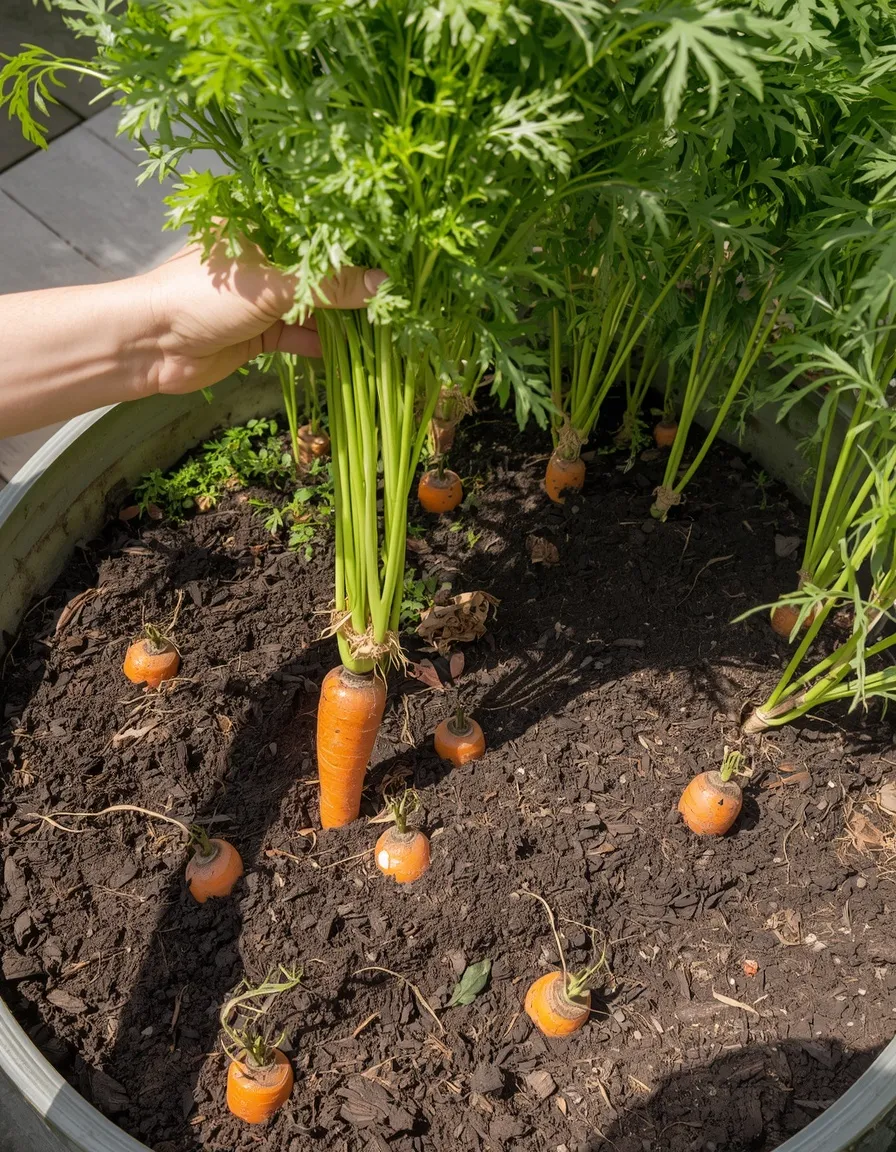
Most container varieties mature between 50 and 75 days from sowing, with round and baby types finishing fastest and standard long types taking the full stretch, so check the specific days to maturity on your seed packet as a baseline. The most reliable indicator, though, is visual: look for the shoulders, the top of the root, becoming visible right at the soil surface, roughly 0.5 to 0.75 inches (1.5 to 2 cm) across for standard varieties, or a fully rounded shape for baby types.
To harvest, water the container well the day before, which loosens the mix and makes roots far easier to pull without snapping. Grip the base of the foliage close to the crown and pull straight up with steady, even pressure. If you feel real resistance, stop and loosen the surrounding mix with your fingers or a small hand fork first rather than forcing it.
Container carrots do not need to come out all at once. Because you can see and feel the shoulders at the surface, it is easy to harvest gradually, pulling the largest roots first and leaving smaller ones to keep sizing up, which naturally thins the remaining planting as you go.
In colder climates, carrots left in place through a light frost often taste noticeably sweeter, since cold triggers the plant to convert stored starches into sugars. To stretch the harvest into early winter, mulch the container’s surface heavily or move the pot into an unheated garage or shed, just be sure the growing mix itself never freezes solid, which will damage the roots.
After harvesting, twist or cut the leafy tops off within a day; left attached, they continue drawing moisture out of the root, which speeds up wilting. Store unwashed roots in a perforated bag in the refrigerator’s crisper drawer for a couple of weeks, or layer them in slightly damp sand in a cool spot for longer-term storage.
Companion Planting and Succession Sowing for a Longer Harvest
A single container sown all at once produces a single harvest all at once, which is rarely what a home cook actually wants. Staggering plantings solves that.
Succession Sowing
Sow a new small container, or a fresh section of a larger one, every 2 to 3 weeks throughout the cool part of your growing season. Several smaller pots started on a rotation are genuinely easier to manage than one large container sown in a single batch, since each pot matures on its own separate timeline and you are never stuck harvesting more carrots than you can use in one week.
Companion Planting
Space allowing, a few chives or a single compact lettuce planted at the edge of a carrot container can work well together: lettuce shades the soil surface and helps the mix hold moisture without competing for root depth. Avoid pairing carrots with dill in the same container. Mature dill can suppress carrot growth, and because both belong to the same plant family, they tend to attract overlapping pests, concentrating the very problems a container is otherwise good at avoiding.
Season Extension
In mild-winter regions, a container sown in early fall can often overwinter with basic frost protection, a row cover draped over the top, or the pot moved against a sheltered, insulated wall, stretching the harvest window well past what an in-ground planting in the same climate would allow.
Final Thoughts
Growing carrots in containers really comes down to a handful of controllable variables: a pot deep enough for the variety, a loose, stone free mix, water applied on a steady schedule, and seedlings thinned properly instead of left to crowd each other. Get those right, and even a single grow bag on a balcony can produce a slow, steady trickle of sweet, crunchy carrots for months rather than one overwhelming harvest all at once. For more small-space growing techniques that apply the same garden design thinking to other crops, keep an eye on Sunday Abode’s wider garden coverage. Sketch out your container setup this week, so the next warm stretch of weather finds you ready to sow.
6. FAQs
Q1. How deep does a container need to be to grow carrots?
Depth should be about one and a half times the mature length of the variety you are growing. Round or baby types like Thumbelina need only 6 to 8 inches (15 to 20 cm) of soil, while standard long varieties need 14 to 16 inches (35 to 40 cm) or more to grow straight instead of forked.
Q2. Can you grow carrots in containers indoors without a garden or balcony?
Yes, but a sunny windowsill alone usually is not enough on its own. Supplement natural light with a grow light run 12 to 14 hours a day, positioned 6 to 12 inches (15 to 30 cm) above the seedlings, and choose a fast, compact variety like Thumbelina or Paris Market for the best results.
Q3. Why are my container-grown carrots small, forked, or oddly shaped?
These problems almost always trace back to the container or the soil rather than the variety. Forking typically comes from stones or clumps in the mix or a pot that is too shallow, while stunted growth usually means seedlings were not thinned enough or the container is not getting sufficient sunlight.
Q4. How long does it take to grow carrots in containers?
Most container varieties mature in 50 to 75 days from sowing, with round and baby types finishing fastest. The clearest sign of readiness is seeing the top of the root, known as the shoulder, become visible right at the soil surface.
Q5. Do container carrots need more water than carrots grown in the ground?
Generally yes, since potting mix dries out faster than garden soil. Checking the top inch of mix daily during warm weather and watering consistently, rather than letting it dry out and then soaking it, prevents the split and cracked roots that irregular watering commonly causes.
Q6. Can I reuse the same potting mix for a second batch of carrots?
It is better not to reuse mix as is, since it loses structure and nutrients after one growing cycle. Refresh it with 30 to 50 percent fresh compost and potting mix between plantings, and avoid resowing carrots, or related crops like parsley and dill, back to back in the exact same soil to reduce the buildup of pests and disease.
Q7. What is the best container material for growing carrots?
Fabric grow bags and food grade plastic containers hold moisture longer and work well for gardeners who cannot check pots daily, while unglazed terracotta looks attractive but dries out fastest. Whatever material you choose, drainage holes are essential, since waterlogged soil causes rot and splitting.