
Introduction
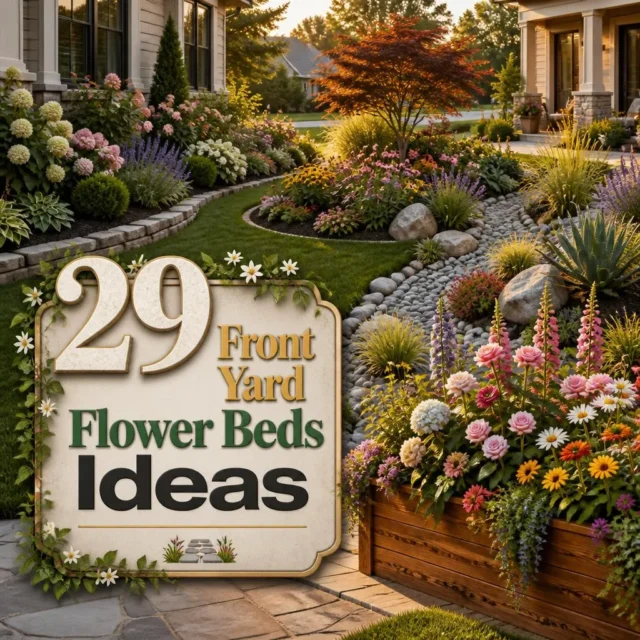
A front yard flower bed is the first thing anyone sees, and the difference between a good one and a forgettable one is rarely the plants. These front yard flower beds ideas cover complete designs, shape, edging, materials, and planting working together, from budget gravel gardens and river rock borders to raised timber beds and full no-grass front gardens.
Below are 29 designs spanning foundation borders, curved island beds, driveway and walkway strips, mailbox and lamp post plantings, tiered slopes, and pollinator gardens, with notes on cost, maintenance, and which light conditions each needs. The final entry covers the preparation sequence that makes any of them work. Consider it a guide to a front garden that makes your abode look cared for from the curb.
Before any digging, one essential step: Front gardens are where water, gas, electricity, and telecoms lines enter a house, often shallower than people expect. Contact your national utility locating service before you break ground, it’s 811 in the United States, and most countries run an equivalent free service. Marking is usually free and takes a few working days, and hitting a buried line is dangerous as well as expensive. This applies to any bed involving digging, edging trenches, or post holes.
29 Front Yard Flower Beds Ideas
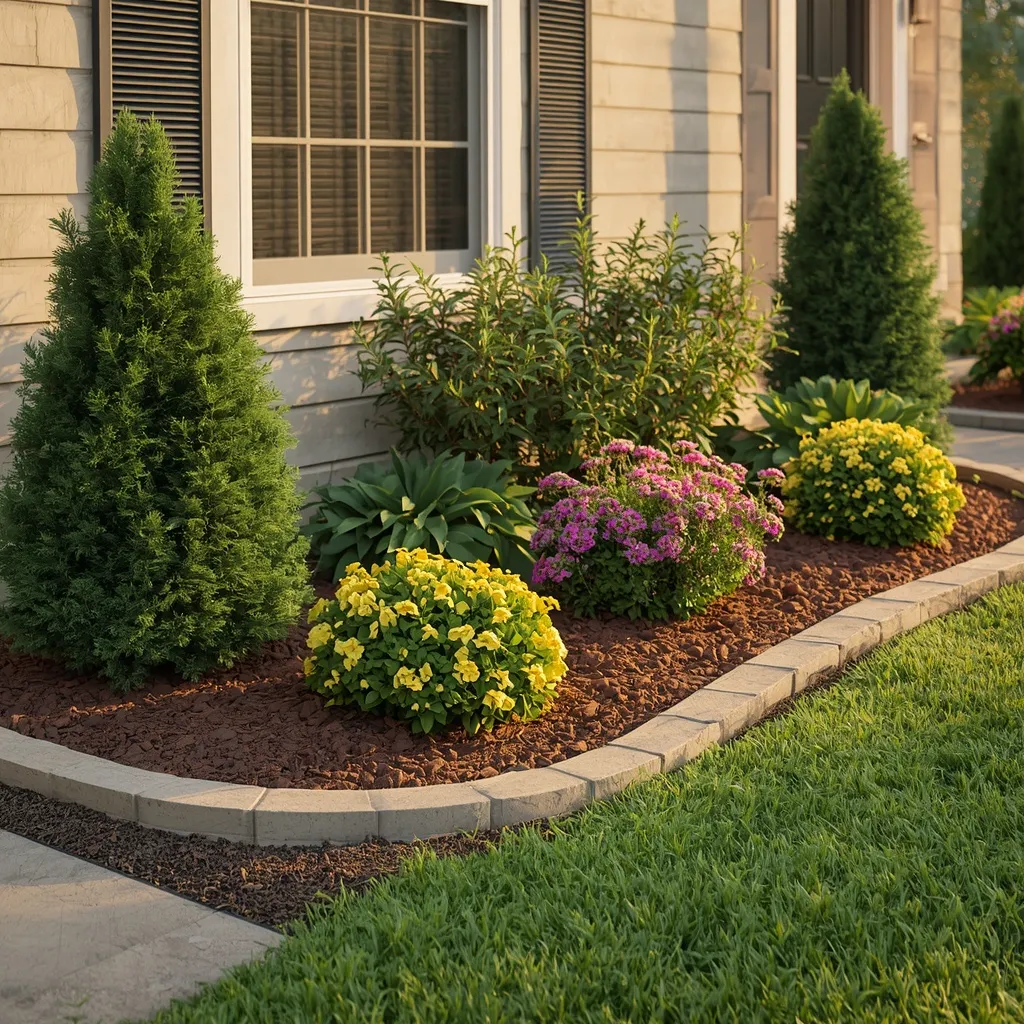
1. Classic Foundation Border
A foundation border runs along the front of the house: low evergreens anchoring the corners, flowering perennials in the middle layer, and a clean mulched edge tying it together. Tidy and traditional, this is the bed most houses want first. Structured, green, and reliable.
Build in three layers, low evergreens at 30–45 cm (12–18 in), mid-height perennials behind, and taller shrubs at the corners only, and keep the whole bed at least 90 cm (3 ft) from the wall. That clearance matters: plants pressed against siding trap moisture, block airflow, and make painting or repairs miserable. Never pile mulch against the wall or a trunk; leave a gap of several centimeters. This suits most houses and beginners wanting a dependable starting point.
- Why it works: A 90 cm wall gap prevents the moisture and access problems that plague tight foundation planting.
- Best for: Most houses; first-time front beds.
- Key elements: three planting layers, 90 cm wall clearance, corner anchors, mulch kept off walls and trunks.
2. Curved Island Bed
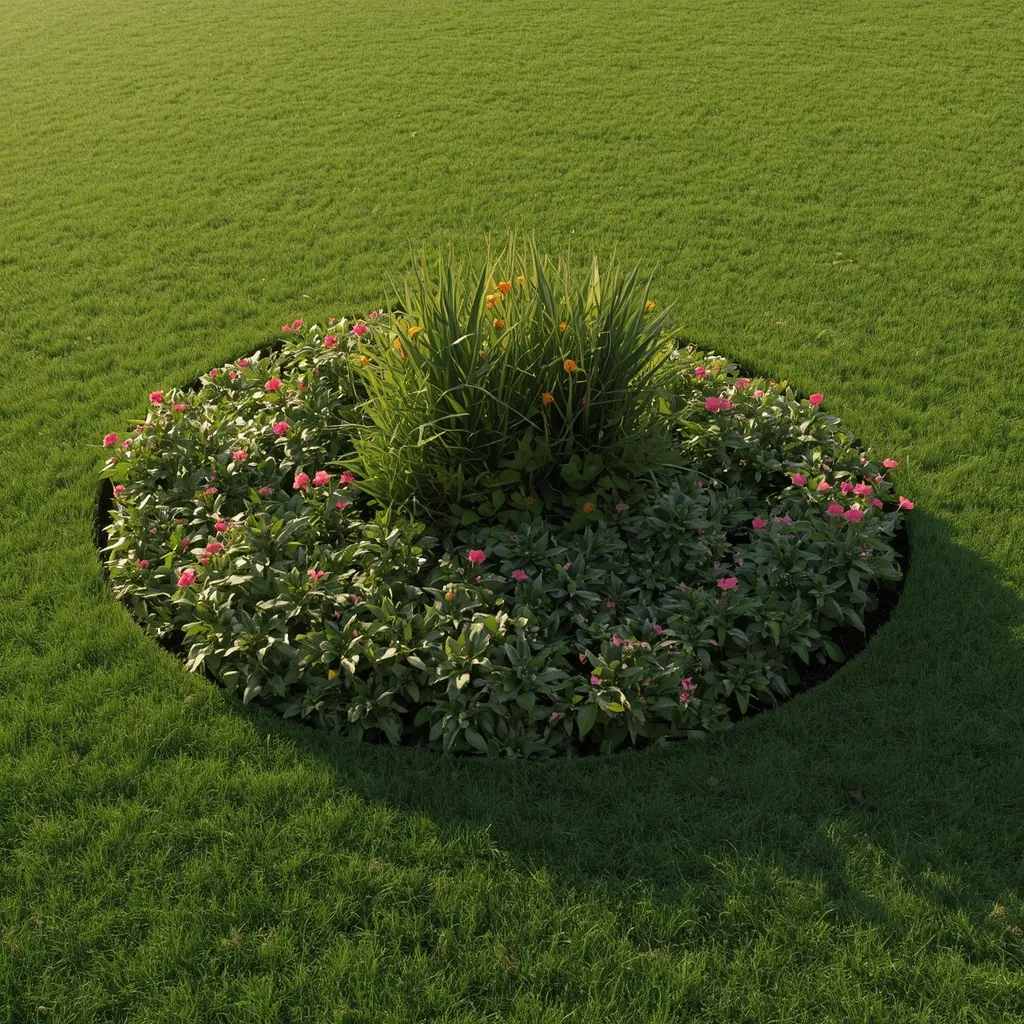
A curved island bed floats in the lawn as a standalone shape: a gentle kidney or teardrop curve, taller planting through the center, and lower flowers falling away to the edges. Sculptural and softening, curves break up a flat rectangular yard. Flowing, generous, and eye-catching.
Lay a garden hose on the ground to trial the curve before cutting, walking the shape from the street and the front door to check it reads well from both. Plant tallest through the middle so the bed works from every angle, unlike a border which has a clear back. Make it wider than feels necessary, a bed under about 1.2 m (4 ft) across looks like an accident rather than a design. This suits larger lawns and anyone wanting to break up flat grass.
- Why it works: Center-tall planting makes an island bed work from every viewing angle, unlike a one-sided border.
- Best for: Larger lawns; flat rectangular yards.
- Key elements: hose-trialled curve, center-tall planting, minimum 1.2 m width, viewed from street and door.
3. Cottage-Style Front Border
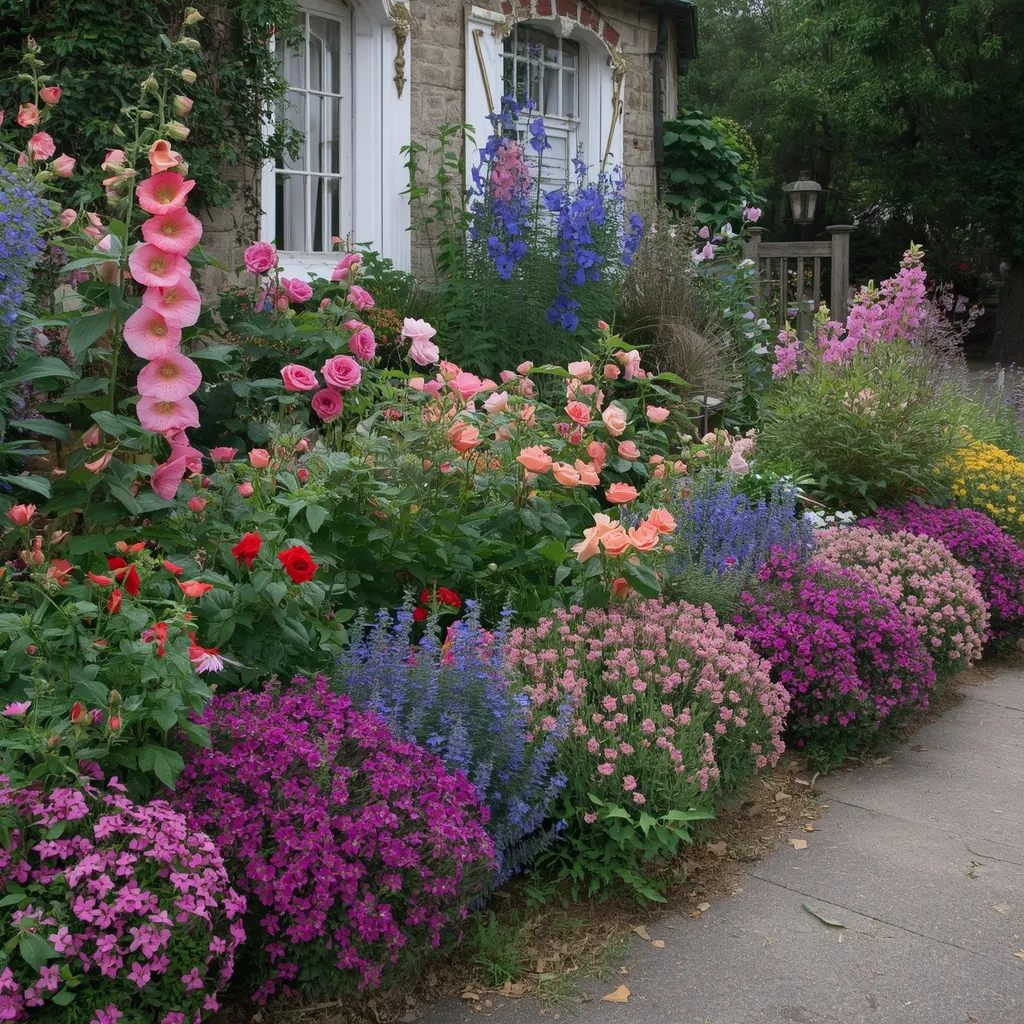
A cottage front border is generous and informal: hollyhocks and delphiniums at the back, roses and salvia through the middle, and catmint and hardy geraniums spilling over the edge. Romantic and abundant, cottage borders look best slightly untamed. Full, colorful, and charming.
Plant in drifts of three or five of each variety rather than singles, letting them knit together as they mature, that repetition is what separates a designed cottage border from a plant collection. Choose long-flowering workhorses like Nepeta ‘Six Hills Giant’, Salvia nemorosa, and hardy geraniums, which flower for months and re-bloom after a mid-season cut back. Deadhead through summer to keep flowers coming. This suits sunny front yards and gardeners happy with regular tidying.
- Why it works: Drifts of three or five knit together where single plants read as a collection.
- Best for: Sunny yards; hands-on gardeners.
- Key elements: drifts of 3–5, tall-to-low layering, Nepeta and Salvia, edge spillers, summer deadheading.
4. Low-Maintenance Evergreen Bed
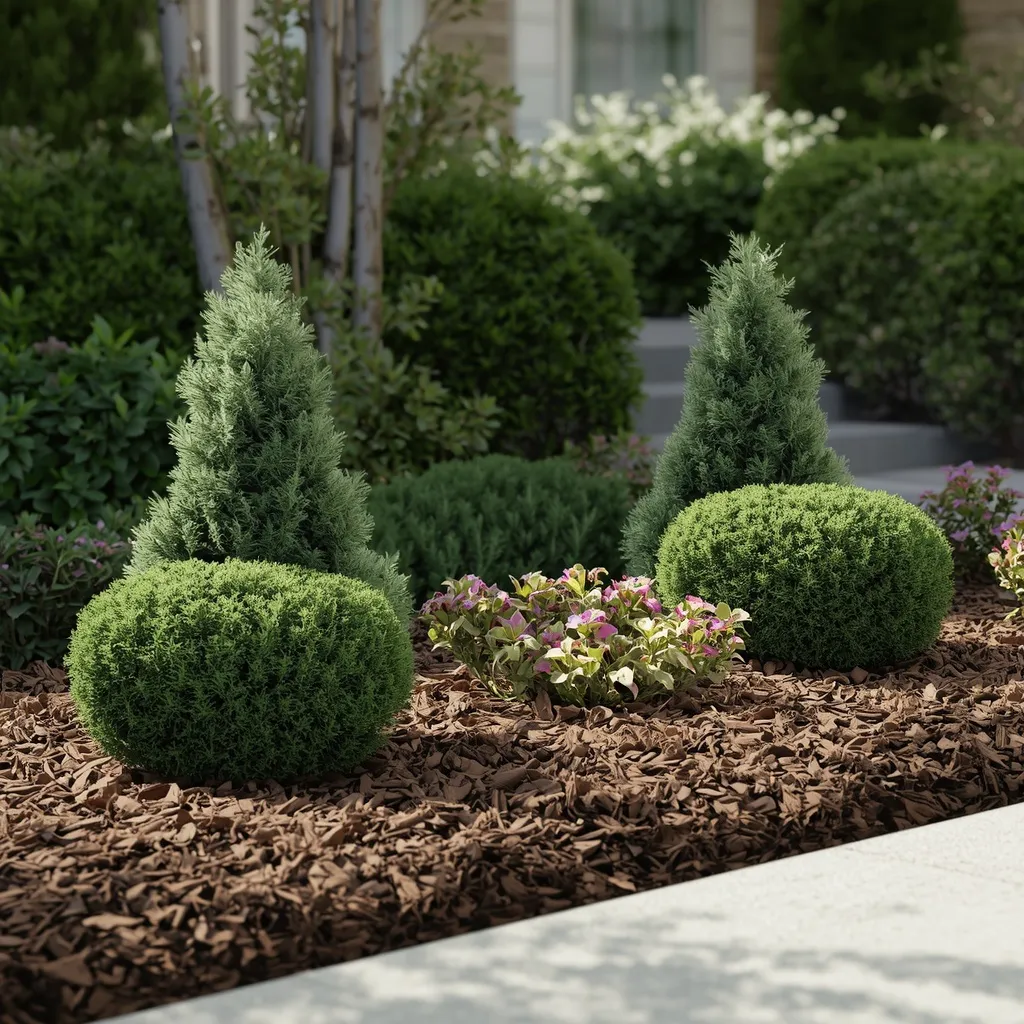
A low-maintenance evergreen bed stays presentable all year with almost no work: clipped boxwood or dwarf conifers, a few tough perennials, and a deep mulch layer suppressing weeds. Neat and undemanding, this bed forgives neglect. Green, tidy, and year-round.
Choose structural evergreens with slow growth, dwarf conifers, compact hebe, or boxwood alternatives if box blight is a problem in your area, and fill gaps with drought-tolerant perennials rather than annuals needing replacement. Apply mulch 5–8 cm (2–3 in) deep, which is the depth that genuinely suppresses weeds; thinner layers don’t work and thicker ones can starve roots of air. Top up annually. This suits busy households, second homes, and anyone who travels.
- Why it works: Mulch at 5–8 cm is the depth that actually suppresses weeds, unlike thinner decorative layers.
- Best for: Busy households; low-effort gardens.
- Key elements: slow-growing evergreens, drought-tolerant perennials, 5–8 cm mulch, annual top-up.
5. No-Grass Full Front Garden
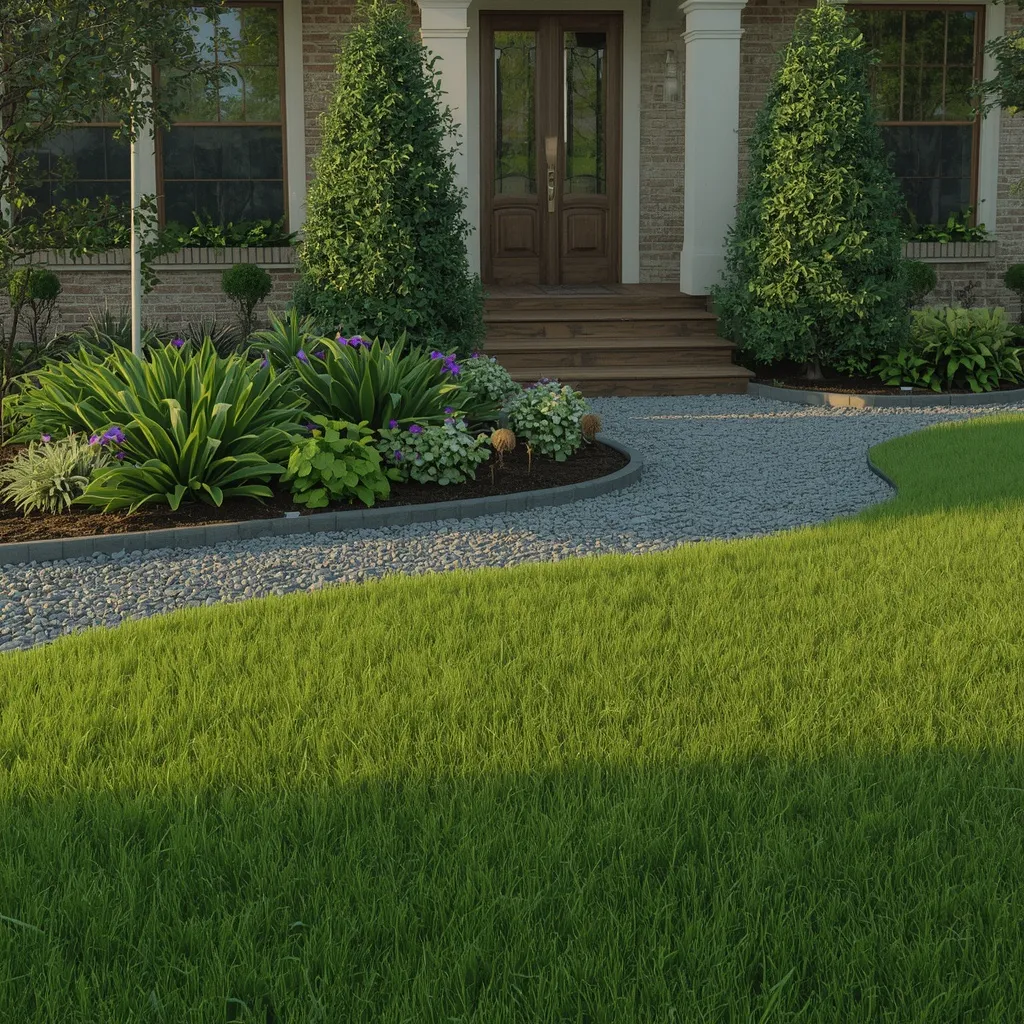
Replacing the lawn entirely turns the whole front yard into planting: sweeping beds, a defined path to the door, gravel or stepping stones where you walk, and greenery from boundary to boundary. Bold and water-wise, no-grass fronts look intentional when planned properly. Lush, low-water, and distinctive.
Keep a clear, generous path to the front door, at least 90 cm (3 ft) wide, and 1.2 m (4 ft) where two people pass, because a no-grass front fails when access feels awkward. Divide the remaining space into planted areas and permeable surfaces rather than filling it all with beds. Check local rules first, since some neighborhoods and homeowner associations regulate front yard planting and lawn removal. This suits dry climates, low-water gardening, and anyone tired of mowing.
- Why it works: A generous defined path is what keeps a lawn-free front garden feeling designed rather than overgrown.
- Best for: Dry climates; water-wise gardeners; mowing-averse households.
- Key elements: 90–120 cm path, mixed beds and permeable surfaces, local rules checked.
6. River Rock Boho Bed
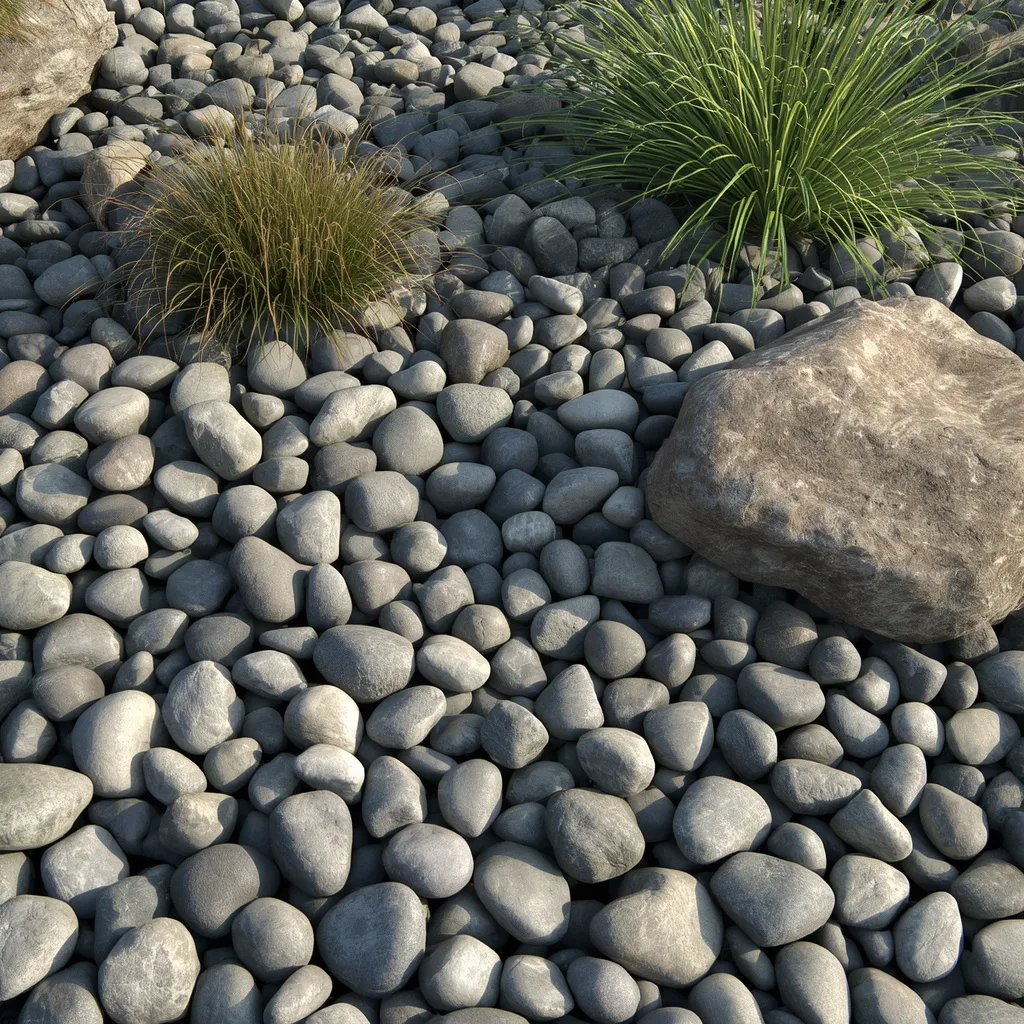
A river rock bed pairs smooth stone with relaxed, textural planting: rounded pebbles as the ground surface, grasses and succulents rising through, and a few larger boulders anchoring the composition. Naturalistic and boho, river rock reads softer than angular gravel. Textured, earthy, and low-water.
Use rounded river rock of mixed sizes, roughly 4–8 cm (1.5–3 in) for the main surface with a few larger stones for punctuation, since uniform stone looks manufactured. Plant through the rock rather than dotting plants on top: dig planting pockets, plant into soil, then draw the stone back around. One caveat worth knowing: rock is not a maintenance-free surface, as leaves and dust build up between stones and weeds root in that debris, so plan on an annual clean-out. This suits dry climates and modern or boho front gardens.
- Why it works: Mixed stone sizes with planting pockets read natural where uniform rock looks manufactured.
- Best for: Dry climates; boho and modern fronts.
- Key elements: 4–8 cm mixed river rock, larger anchor stones, planting pockets, annual debris clean-out.
7. Raised Timber Bed
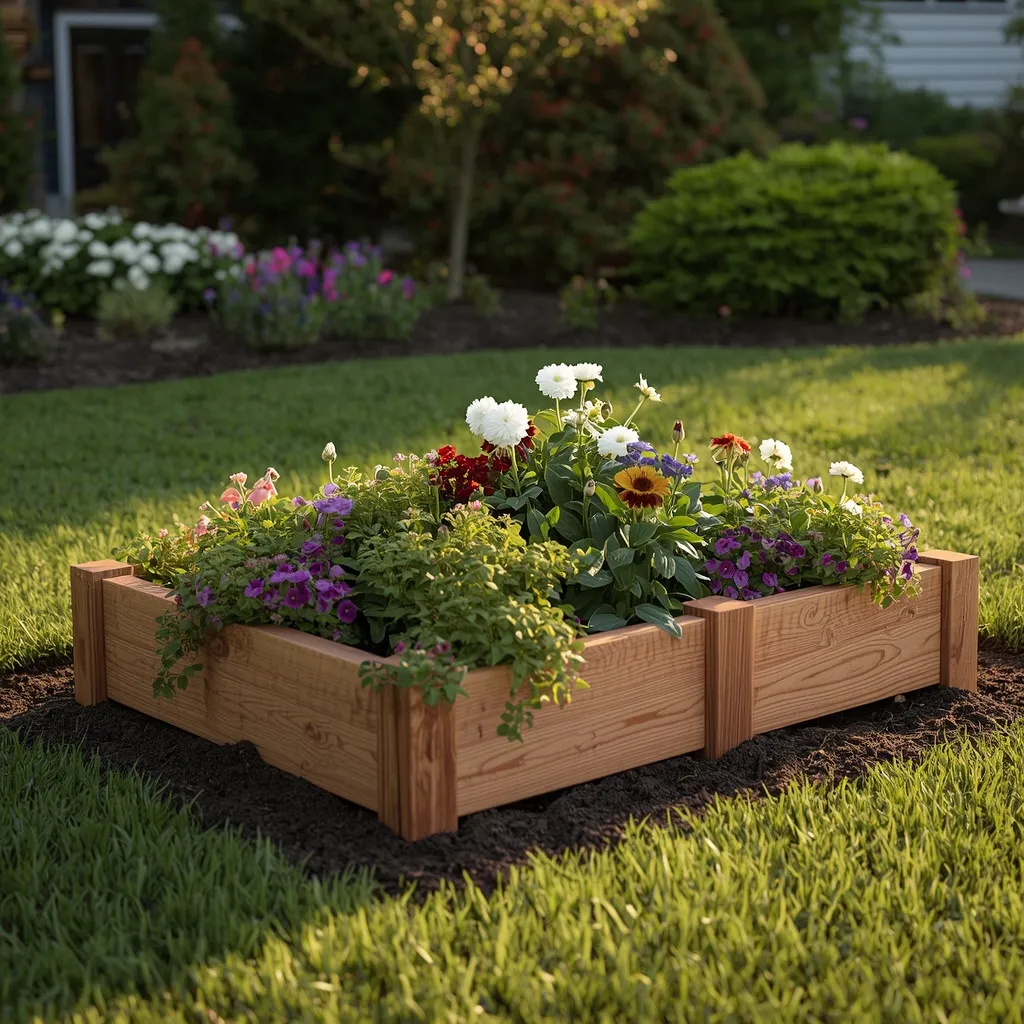
A raised timber bed gives a front garden instant structure: a low framed rectangle in cedar or treated pine, filled with good soil and planted densely enough to spill over the edges. Defined and productive, raised beds solve poor soil in one move. Neat, contained, and practical.
Build to 30–45 cm (12–18 in) high, which is enough to improve drainage and reduce bending without needing engineered retaining. Use naturally durable timber like cedar, or timber treated for ground contact, and line the inside faces with landscape fabric to slow moisture damage while leaving the base open for drainage. Raised beds dry out faster than ground soil, so expect more frequent watering in summer. This suits poor or compacted soil, and gardeners wanting less bending.
- Why it works: 30–45 cm gives real drainage and access benefits without needing engineered retaining walls.
- Best for: Poor or compacted soil; reduced-bending gardening.
- Key elements: 30–45 cm height, cedar or ground-contact treated timber, fabric-lined sides, open base, more watering.
8. Stone-Edged Raised Bed
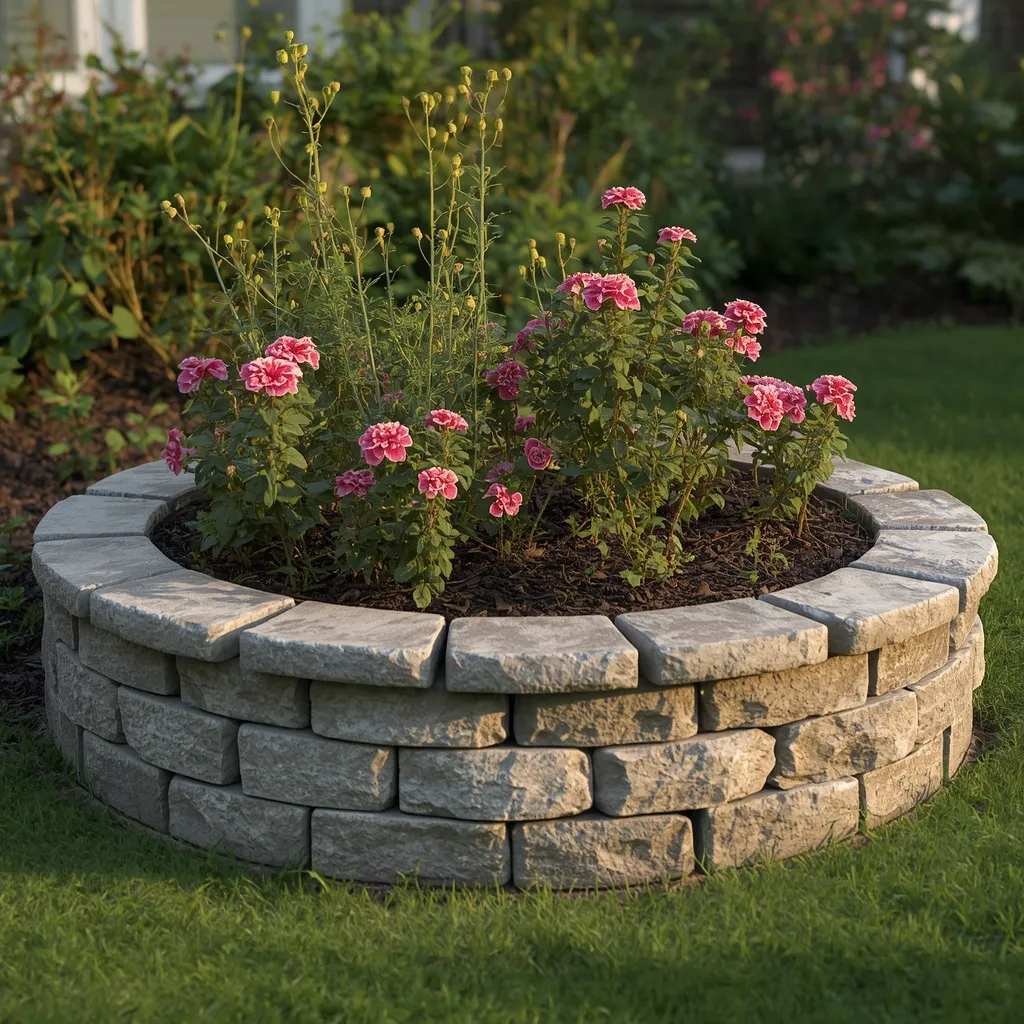
A dry-stacked stone edge gives a raised bed permanence and weight: natural stone courses laid without mortar, planting tumbling over the top, and a solid, settled look from the street. Substantial and timeless, stone edges outlast every other material. Solid, natural, and handsome.
Dry-stack natural stone to a maximum of about 60 cm (2 ft) without engineering, setting the first course into a shallow trench and stepping each course very slightly back into the slope for stability. Anything taller becomes a retaining wall, which in many areas needs professional design and sometimes a permit, check local requirements before building higher. Stone is heavy, so lift with your legs, wear gloves and sturdy boots, and get help with larger pieces. This suits permanent front gardens and slopes.
- Why it works: Stepping each course slightly back into the slope is what keeps a dry-stacked edge stable.
- Best for: Permanent gardens; gentle slopes; traditional houses.
- Key elements: dry-stacked natural stone, max 60 cm unengineered, trenched first course, stepped-back courses, safe lifting.
9. Paver-Edged Formal Bed
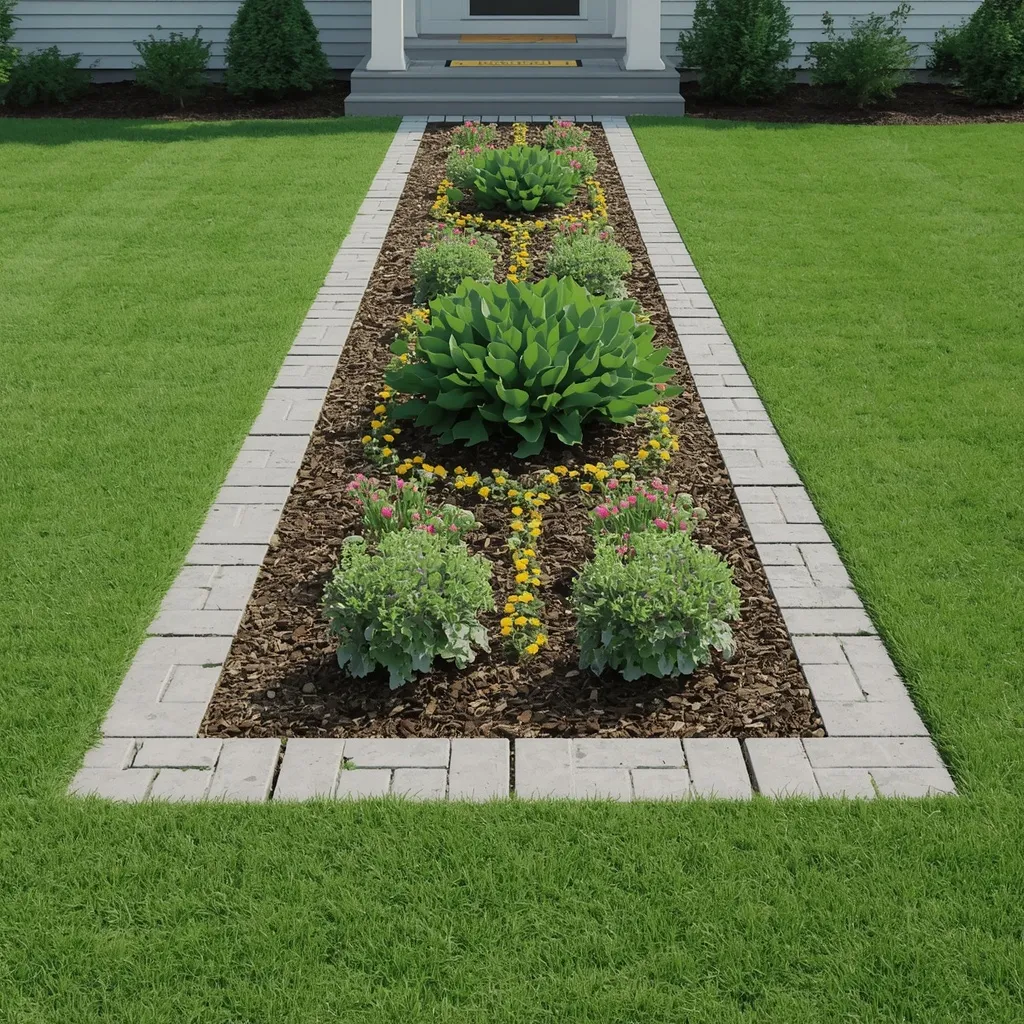
A paver-edged bed reads crisp and architectural: concrete or clay pavers set flush around a geometric bed, with symmetrical planting inside and a mowing strip that makes edging effortless. Sharp and orderly, pavers suit formal front elevations. Clean, geometric, and practical.
Set pavers flush with the lawn surface on a compacted base with a bedding layer of sharp sand, creating a mowing strip so wheels can run straight over the edge, that detail alone removes most edge-trimming work. Keep the bed geometry simple and repeat planting symmetrically for a formal look. The most common error is setting pavers proud of the lawn, which defeats the mowing-strip purpose entirely. This suits formal houses, tidy gardeners, and anyone who dislikes edging.
- Why it works: Pavers set flush create a mowing strip that eliminates most edge trimming.
- Best for: Formal houses; low-effort maintenance; tidy gardeners.
- Key elements: flush-set pavers, compacted base and sand bed, geometric shape, symmetrical planting.
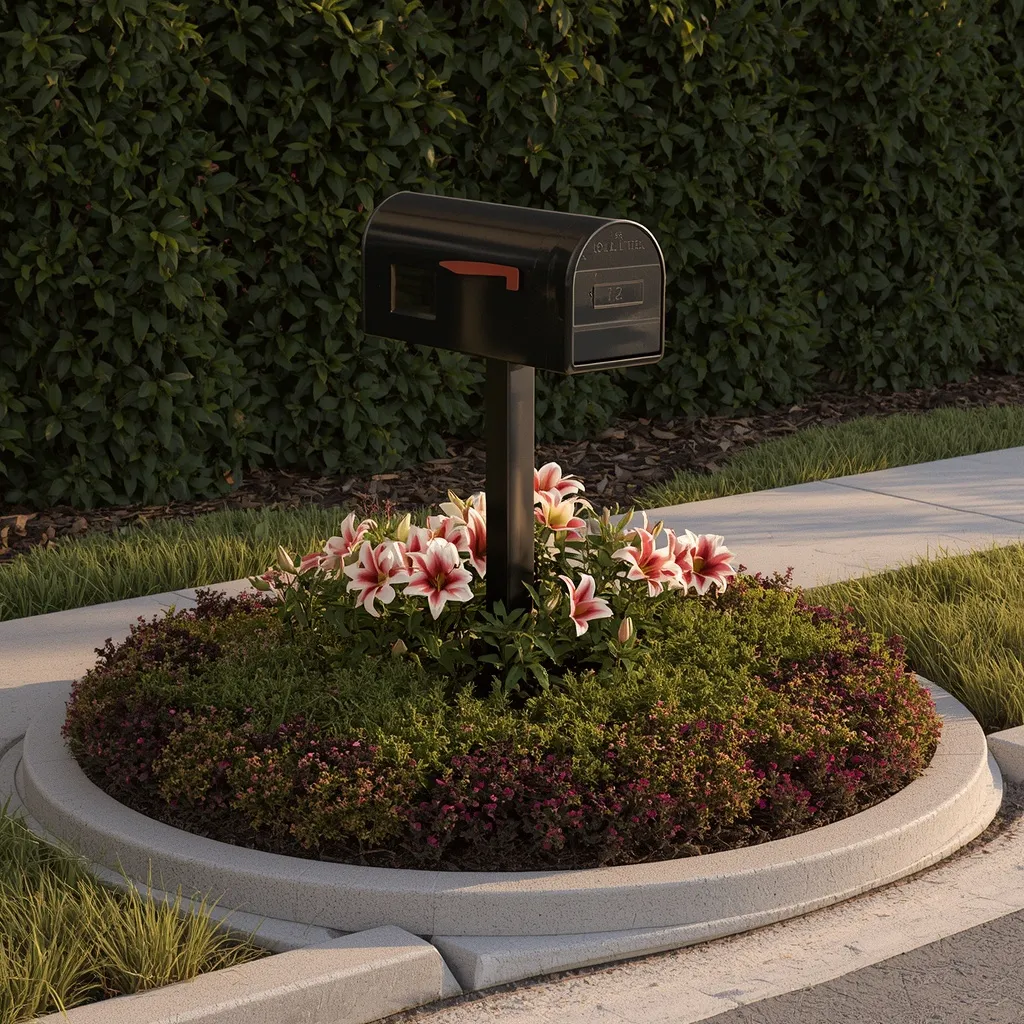
10. Mailbox Base Planting
A planted mailbox base turns a functional post into a small feature: a compact circular bed with mounding flowers, something trailing at the front, and a tidy edge holding the shape. Small and cheerful, this is the fastest curb appeal win available. Compact, colorful, and quick.
Keep the bed circle roughly 90–120 cm (3–4 ft) across so the planting reads as intentional rather than an afterthought, and choose tough, heat-tolerant plants, a mailbox base is usually a hot, dry, reflected-heat spot near paving. Daylilies, sedum, and hardy geraniums cope well. Keep planting clear of the mailbox opening and any road-side access. Check that the bed doesn’t obstruct sight lines or the mail carrier’s approach. This suits every house with a post-mounted box, and small budgets.
- Why it works: A 90–120 cm circle reads as a designed feature where a tight ring looks like an afterthought.
- Best for: Any post-mounted mailbox; smallest budgets; quick wins.
- Key elements: 90–120 cm circle, heat-tolerant plants, access kept clear, tidy edge.
11. Lamp Post Circle Bed
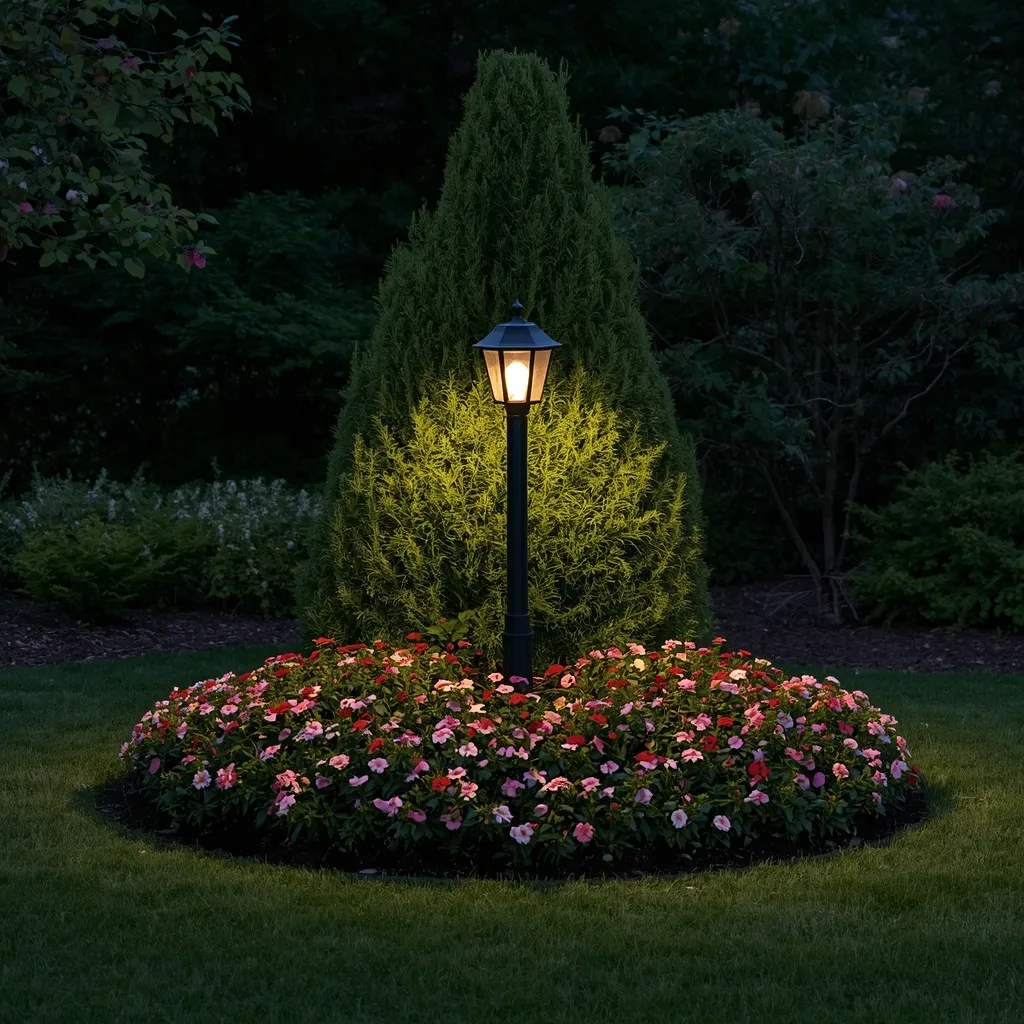
A lamp post bed gives a front yard a lit focal point after dark: a circular planting around the base, low mounding flowers catching the light, and something evergreen holding the shape through winter. Warm and welcoming, lit planting extends curb appeal into the evening. Glowing, circular, and inviting.
Plant a circle roughly 1–1.5 m (3–5 ft) across with low, mounding plants that won’t obscure the light, keeping taller growth away from the fitting. Two safety points matter here: lamp posts have buried supply cable running to them, so contact your utility locating service and dig carefully near the base, and any new or altered outdoor wiring should be installed by a qualified electrician using fittings rated for outdoor use. Solar lights avoid wiring entirely. This suits front yards with existing posts and evening curb appeal.
- Why it works: Low mounding planting catches light without obscuring it, extending curb appeal after dark.
- Best for: Yards with existing lamp posts; evening appeal.
- Key elements: 1–1.5 m circle, low mounding plants, buried cable located first, qualified electrician for wiring.
12. Driveway Border Strip
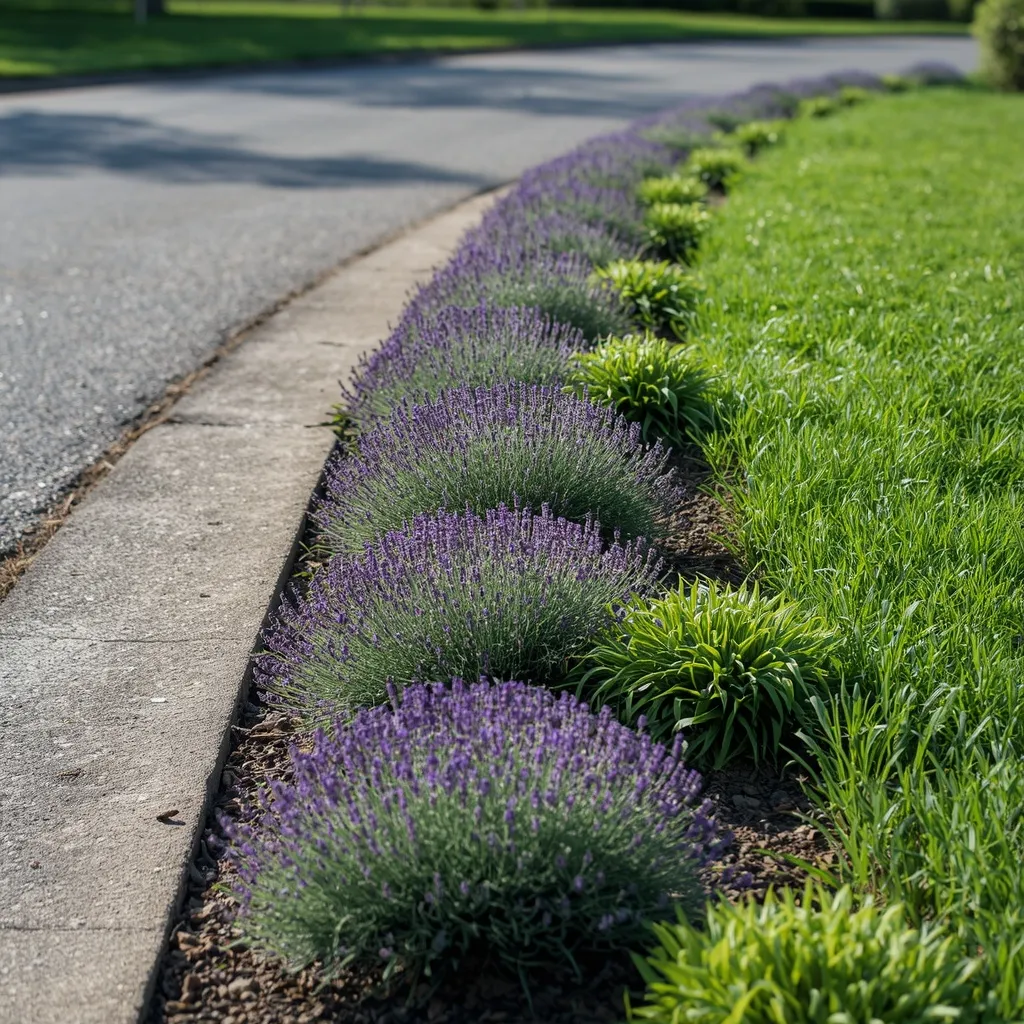
A driveway border softens a hard expanse of concrete or asphalt: a long narrow bed running the length of the drive, planted with tough, low growers that tolerate heat and the occasional car door. Practical and softening, driveway strips fix the ugliest part of most front yards. Linear, hardy, and neat.
Choose heat- and drought-tolerant plants, since driveway edges get reflected heat and often poor, compacted soil, sedum, lavender, and ornamental grasses all cope. The critical rule is height: keep planting below about 75 cm (30 in) near the street end so sight lines stay clear when reversing out, since a tall bed at a driveway mouth is a genuine safety hazard. Keep plants far enough back that car doors open freely. This suits every driveway, especially long or wide ones.
- Why it works: Keeping planting under 75 cm at the street end preserves the sight lines you need when reversing.
- Best for: Any driveway; hot, compacted edge conditions.
- Key elements: heat and drought-tolerant plants, under 75 cm near street, car-door clearance.
13. Walkway Ribbon Bed
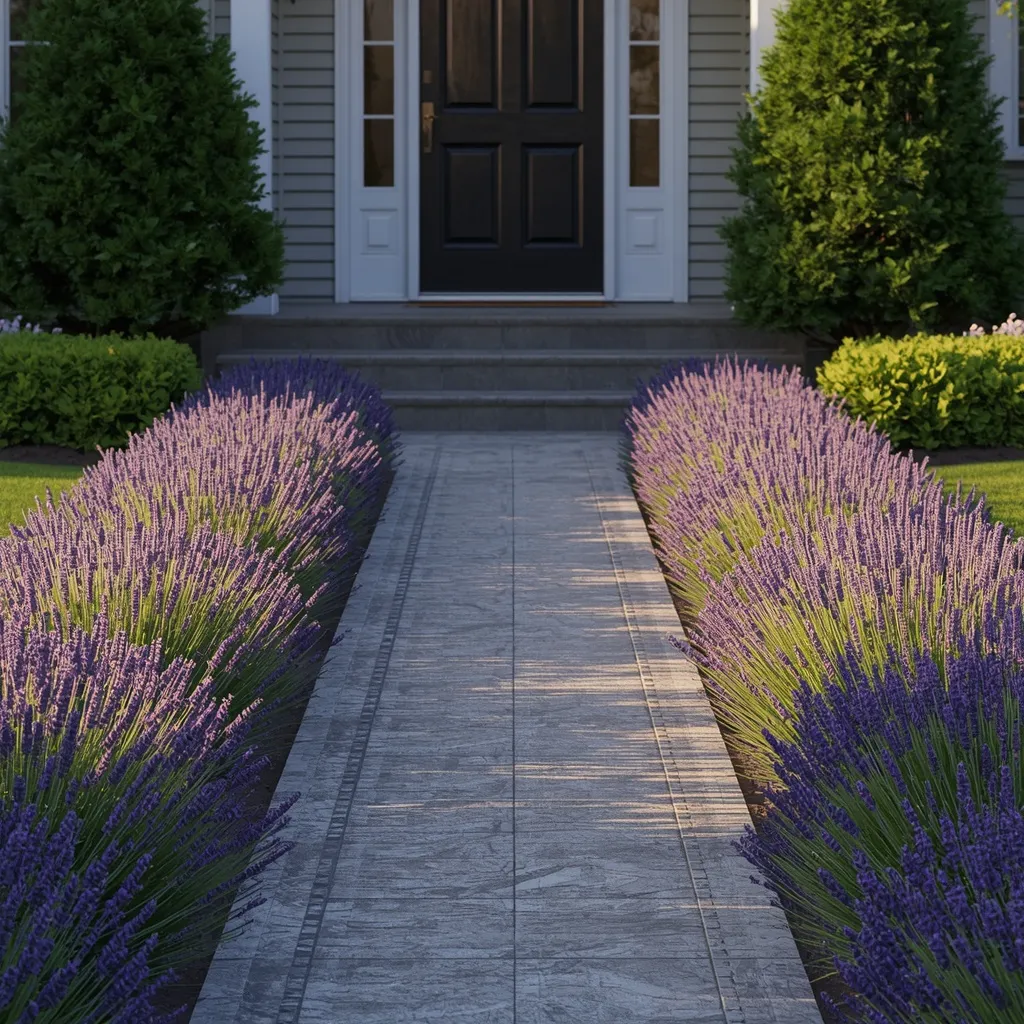
A walkway bed guides visitors to the door: planting running along both sides of the path, low at the front edge and rising behind, with something fragrant placed where people brush past. Welcoming and directional, path planting does real navigational work. Framed, scented, and generous.
Keep the lowest planting right at the path edge so nothing flops across the walking surface after rain, plants that lean over a wet path are both untidy and a slip risk. Place fragrant varieties like lavender or dianthus where people pass within arm’s reach. Maintain a clear walking width of at least 90 cm (3 ft), or 1.2 m (4 ft) if the path is the main approach. This suits every front path and anyone wanting a welcoming approach.
- Why it works: Lowest planting at the edge stops rain-flopped foliage crossing the path and creating a slip risk.
- Best for: Main front approaches; welcoming entrances.
- Key elements: low edge planting rising behind, fragrance at arm’s reach, 90–120 cm clear walking width.
14. Entrance Symmetry Pair
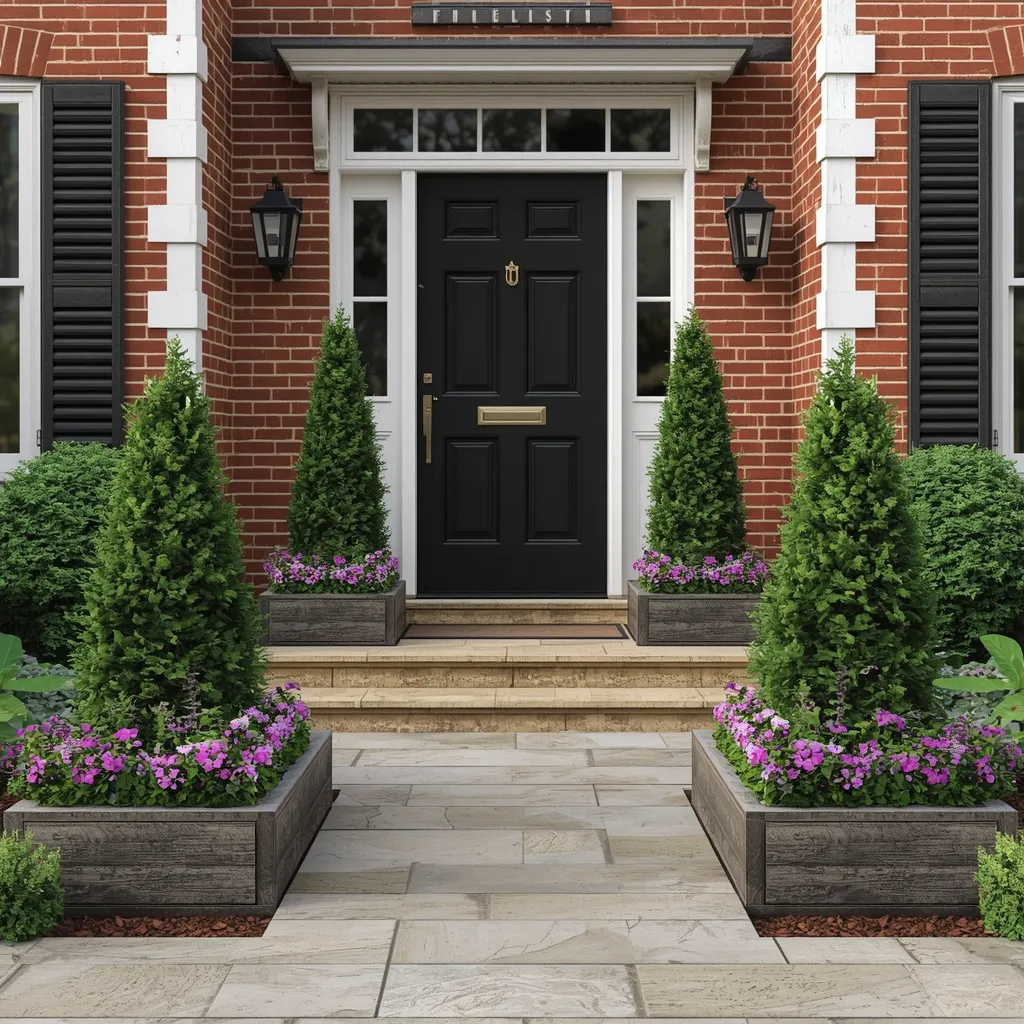
A symmetrical entrance frames the front door: matching beds either side, mirrored planting, and a pair of anchor shrubs or containers marking the threshold. Formal and confident, symmetry reads as deliberate from the street. Balanced, framed, and elegant.
Mirror the planting exactly on both sides, same varieties, same positions, since near-symmetry looks like a mistake while true symmetry looks designed. Anchor each side with one structural evergreen or a matched pair of containers, keeping everything else lower so the door stays the focal point. This works best on symmetrical house fronts; on an asymmetrical elevation, balance by visual weight instead of exact mirroring. This suits formal houses and anyone wanting an elegant entrance.
- Why it works: True mirroring reads as designed where near-symmetry reads as an error.
- Best for: Symmetrical house fronts; formal entrances.
- Key elements: exactly mirrored planting, matched anchor shrubs or containers, door kept as focal point.
15. Rock Garden Slope Bed
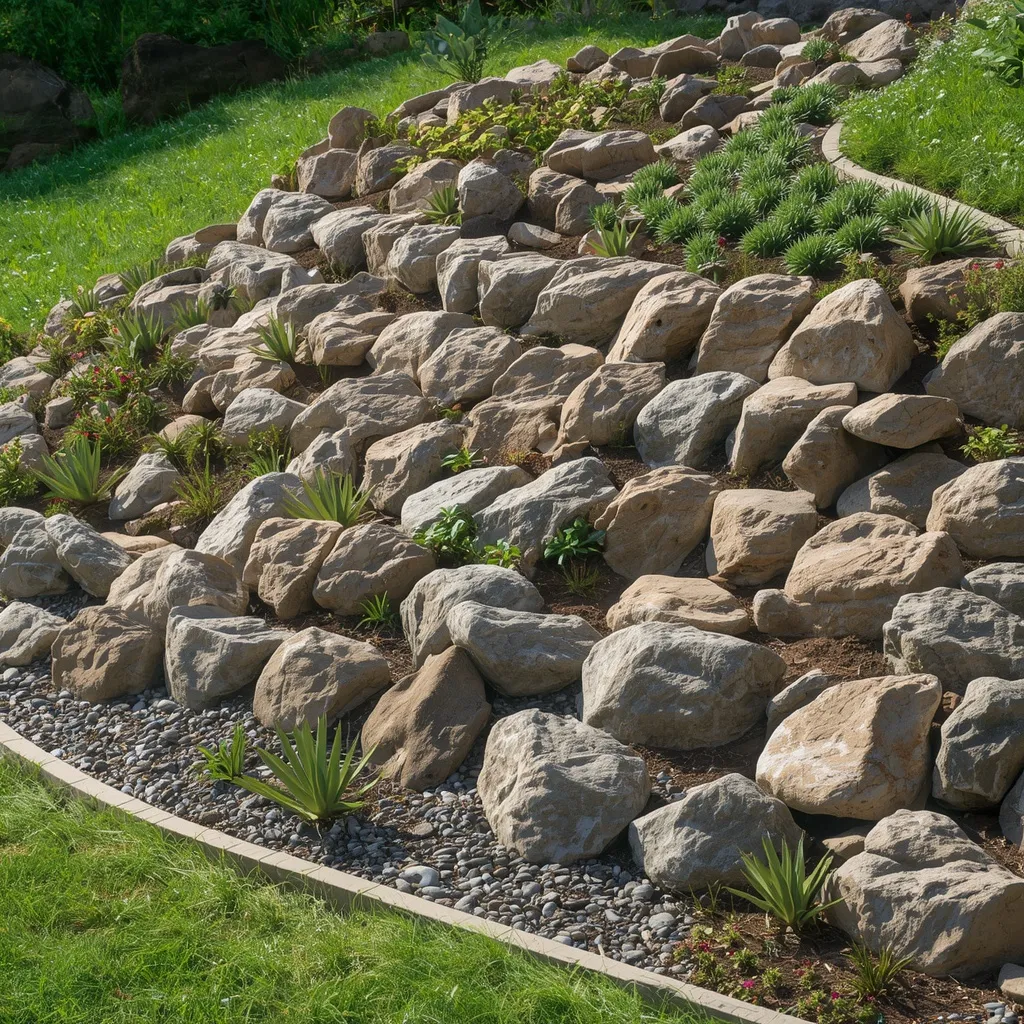
A rock garden turns an awkward slope into an asset: stone set into the gradient, alpines and low succulents tucked between, and gravel mulch holding everything in place. Rugged and drought-proof, rock gardens thrive where lawns fail. Textured, sunny, and characterful.
Bury each stone at least a third of its depth so it looks geologically settled rather than scattered on the surface, that single detail separates a real rock garden from a pile of rocks. Plant alpines, sempervivums, and creeping thyme into gritty, free-draining soil, since most rock garden plants die from winter wet rather than cold. Gravel mulch keeps crowns dry. This suits sunny slopes, poor soil, and low-water gardens.
- Why it works: Burying stones a third deep makes them look geologically settled rather than scattered.
- Best for: Sunny slopes; poor soil; low-water gardens.
- Key elements: stones buried one-third, alpines and sempervivums, gritty free-draining soil, gravel mulch.
16. Gravel Garden Drought Bed
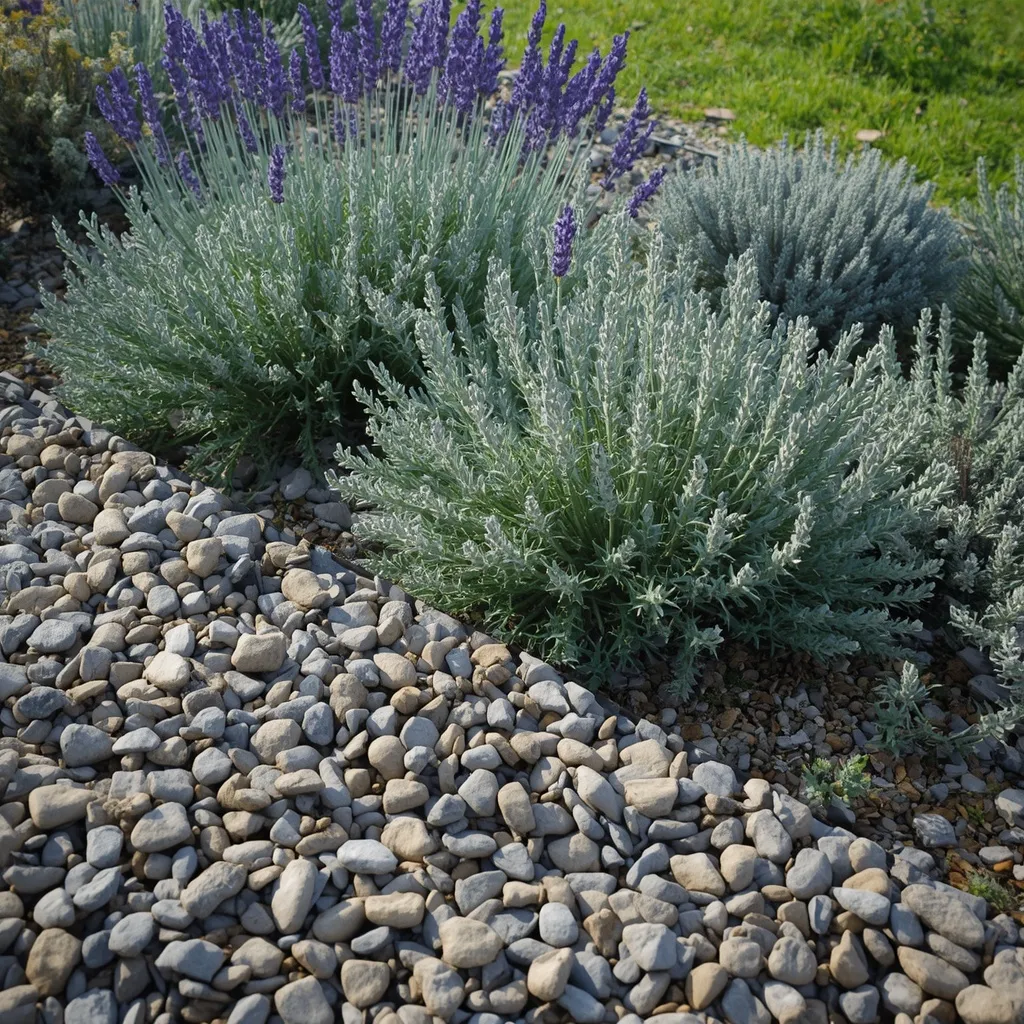
A gravel garden is the most water-wise front bed there is: angular gravel across the surface, Mediterranean plants rising through in loose drifts, and no irrigation once established. Sun-baked and low-input, gravel gardens suit hot, dry fronts perfectly. Silvery, textured, and tough.
Spread gravel 5–8 cm (2–3 in) deep over free-draining soil and plant directly through it, choosing Mediterranean species like lavender, santolina, and phlomis that genuinely prefer lean conditions. Skip landscape fabric under gravel where you intend to plant, it blocks self-seeding, degrades over time, and makes future planting difficult, though it can be useful under purely decorative gravel. Water through the first season only, then let plants establish deep roots. This suits hot dry climates and water restrictions.
- Why it works: Planting directly through gravel without fabric lets Mediterranean species self-seed and root deeply.
- Best for: Hot dry climates; water restrictions; minimal irrigation.
- Key elements: 5–8 cm gravel, Mediterranean species, no fabric in planted areas, first-season watering only.
17. Colorful Annual Show Bed
An annual bed delivers maximum color for one season: massed petunias, marigolds, and zinnias in bold blocks, replanted each year for a completely different look. Vivid and immediate, annuals give more color per square meter than anything else. Bright, dense, and cheerful.
Plant in blocks of a single color rather than mixed punnets, since blocks read from the street while mixed plantings turn to visual noise at a distance. Annuals are hungry and thirsty, feed every two to four weeks through the growing season and water more often than perennials. The trade-off is honest: annuals cost more over time and need replanting, but they let you change the scheme completely each year. This suits color lovers, renters wanting seasonal impact, and gardeners who enjoy replanting.
- Why it works: Single-color blocks read from the street where mixed plantings become visual noise at a distance.
- Best for: Color lovers; seasonal changes; high-impact fronts.
- Key elements: single-color blocks, regular feeding every 2–4 weeks, more watering, annual replanting.

18. Perennial Four-Season Bed
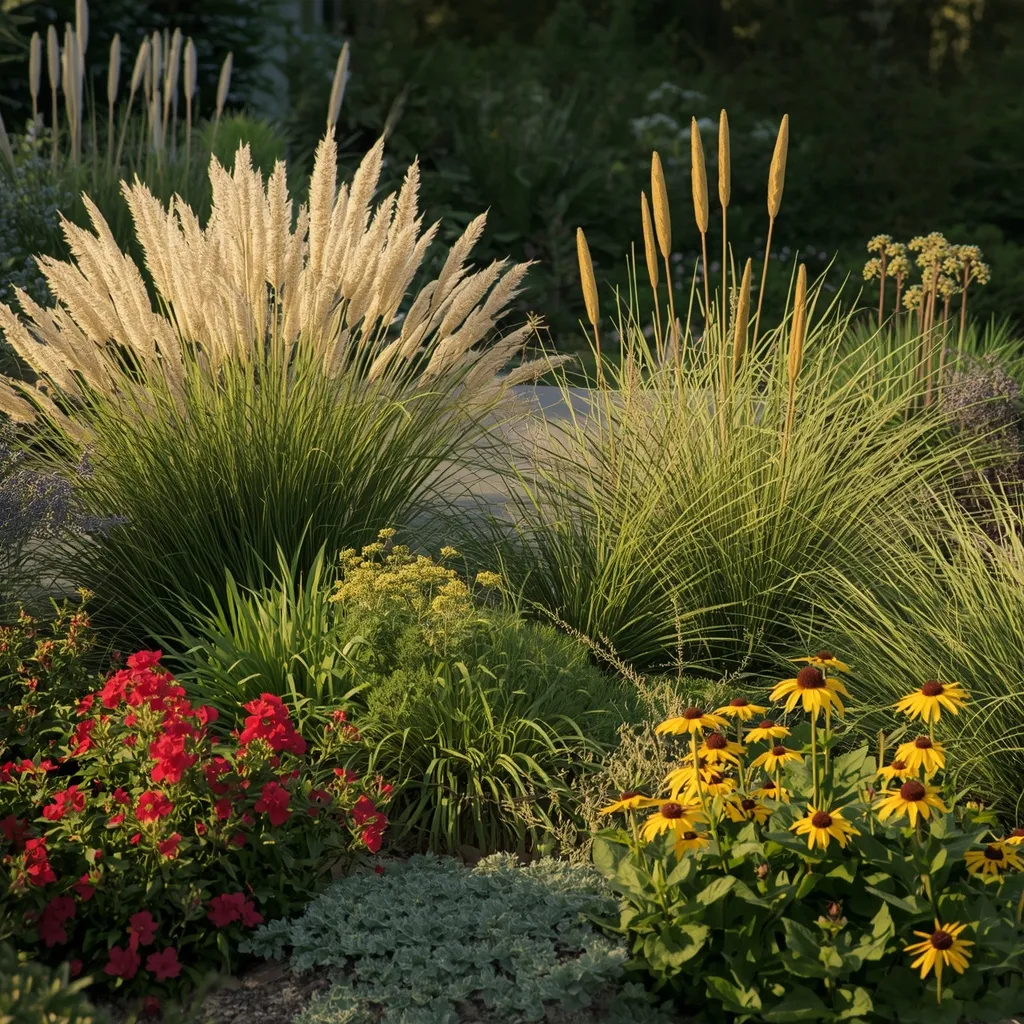
A four-season perennial bed looks intentional every month of the year: spring bulbs, summer perennials, autumn grasses and seedheads, and structural stems left standing through winter. Considered and sustainable, this bed rewards planning. Layered, changing, and long-lived.
Plan for four seasons of interest deliberately, bulbs for spring, long-flowering perennials for summer, grasses and late perennials like Sedum and Rudbeckia for autumn, and seedheads left uncut for winter structure. Leaving stems standing over winter also shelters overwintering insects, so cut back in late winter or early spring rather than autumn. Perennials cost more upfront than annuals but return every year. This suits gardeners planning long-term and wildlife-friendly gardens.
- Why it works: Leaving seedheads until late winter provides structure and shelters overwintering insects.
- Best for: Long-term gardeners; wildlife-friendly fronts.
- Key elements: bulbs, summer perennials, autumn grasses, winter seedheads, late-winter cutback.
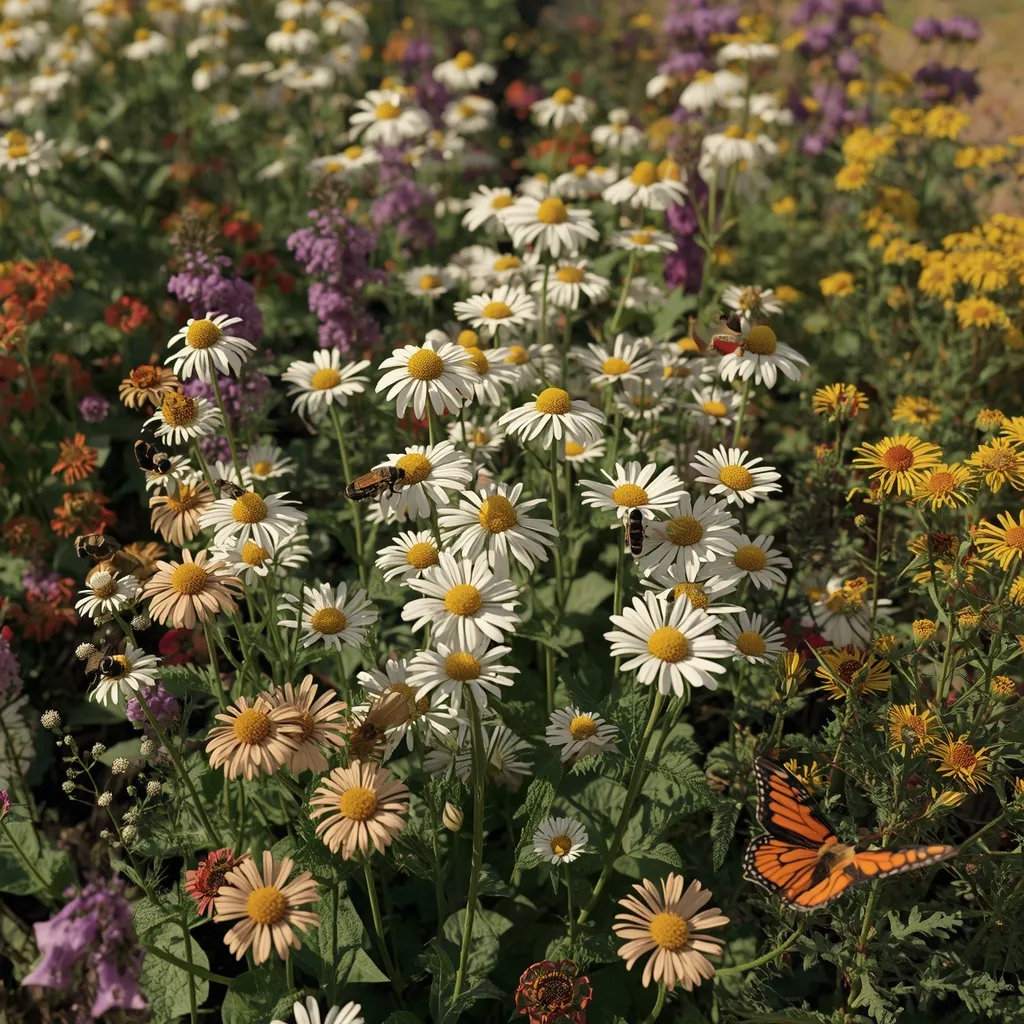
19. Pollinator Native Bed
A pollinator bed is alive with movement: native perennials in generous drifts, flowers from early spring through late autumn, and bees and butterflies working it all day. Purposeful and beautiful, native beds do real ecological work. Buzzing, natural, and rewarding.
Choose species native to your region, local extension services and botanical gardens publish region-specific native plant lists, which are far more reliable than generic recommendations, and plant in drifts of at least three to five so pollinators can forage efficiently. Aim for overlapping bloom periods so something is flowering from early spring to autumn. Avoid pesticide use entirely in a pollinator bed. This suits wildlife-minded gardeners and anyone wanting a bed that supports more than curb appeal.
- Why it works: Drifts of three to five let pollinators forage efficiently, unlike scattered single plants.
- Best for: Wildlife-friendly gardens; ecologically-minded gardeners.
- Key elements: region-specific natives, drifts of 3–5, overlapping bloom spring to autumn, no pesticides.
20. Shade Bed Under Trees
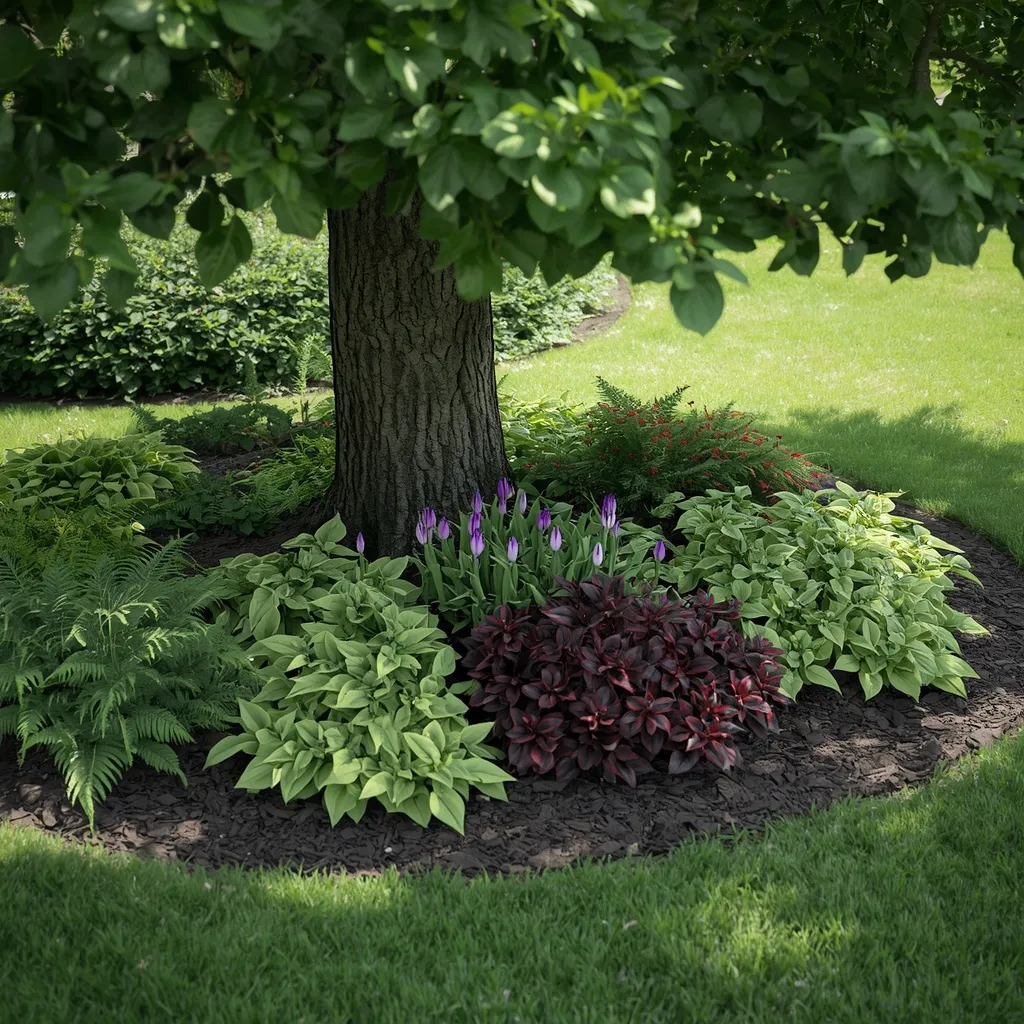
A shade bed makes the dry, dim ground under a front tree productive: hostas, ferns, and heuchera layered in textures, with spring bulbs flowering before the canopy closes. Cool and green, shade beds solve the hardest spot in most front yards. Lush, textural, and calm.
Work with dry shade rather than against it, since ground under established trees is both dark and dry from root competition. Plant in spring or autumn, water through the first two seasons while roots establish, and add organic matter as a surface mulch rather than digging deeply, cutting through tree roots can damage the tree. Spring bulbs flower before deciduous canopies leaf out, giving color the rest of the bed can’t. This suits yards with mature trees and north-facing fronts.
- Why it works: Surface mulching rather than deep digging feeds the bed without damaging tree roots.
- Best for: Yards with mature trees; north-facing fronts.
- Key elements: hostas, ferns and heuchera, spring bulbs, surface mulch only, two seasons of watering.
21. Tiered Sloped Bed
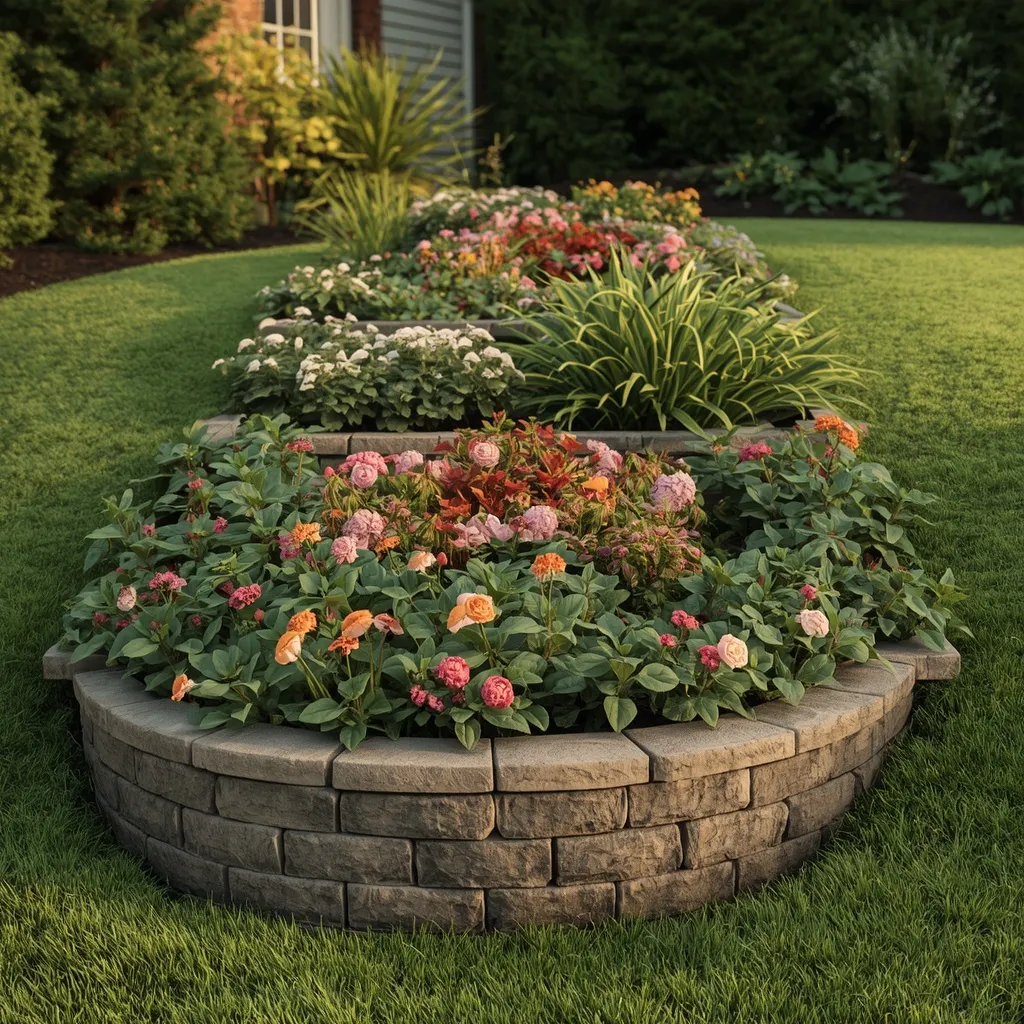
A tiered bed turns a steep front slope into terraced planting: two or three low retaining courses stepping up the gradient, each level planted so the whole face reads as one composition. Structured and problem-solving, terracing makes unusable slopes plantable. Layered, engineered, and striking.
Keep individual tiers low, under about 60 cm (2 ft) each, since taller retaining structures need engineered design and often a permit, and a failed retaining wall is both dangerous and expensive. Step tiers back rather than stacking them vertically, and include drainage behind each course so water pressure doesn’t build up, which is what causes most wall failures. Plant trailing species at each edge to soften the lines. This suits sloped front yards and erosion-prone ground.
- Why it works: Drainage behind each course prevents the water pressure that causes most retaining failures.
- Best for: Sloped front yards; erosion control.
- Key elements: tiers under 60 cm each, stepped back not vertical, drainage behind each course, trailing edge plants.
22. Small Yard Corner Bed
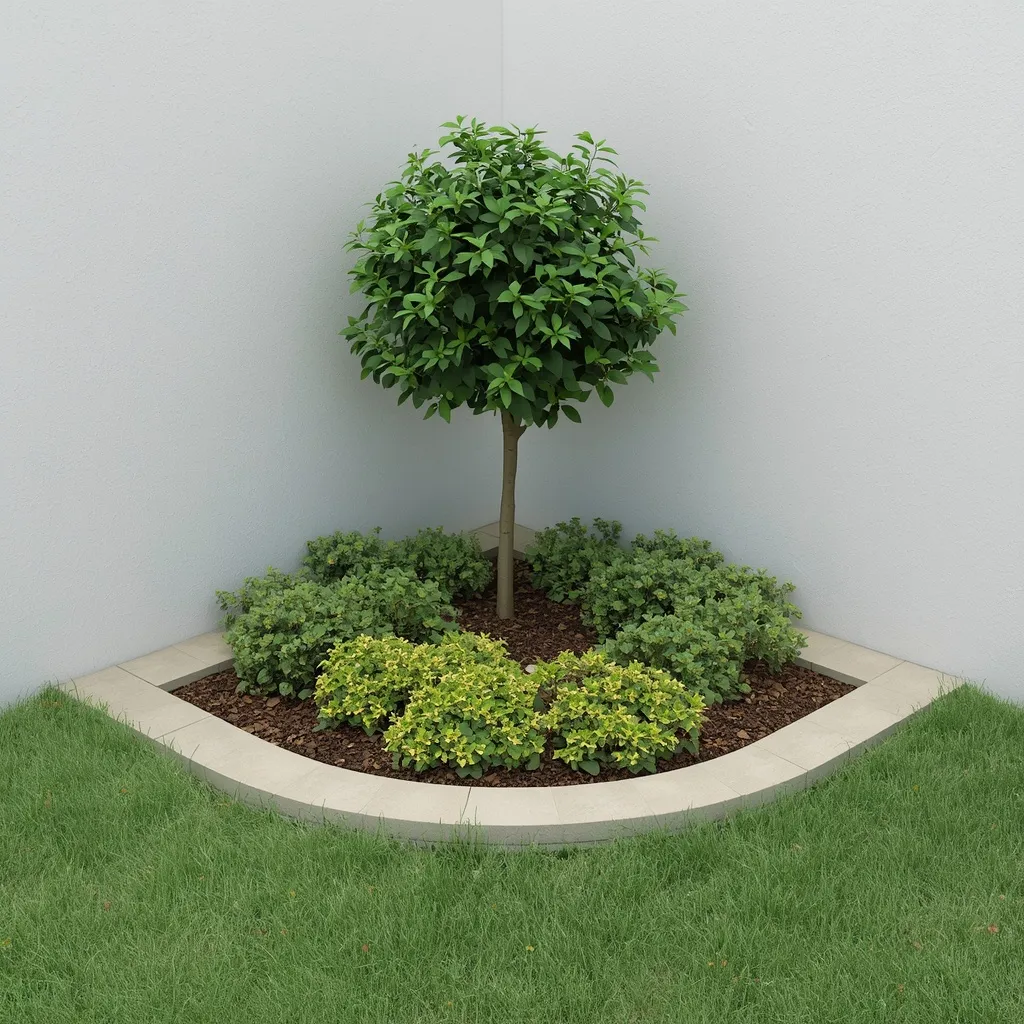
A corner bed makes the most of a compact front yard: a triangular or quarter-circle bed tucked into the boundary corner, planted with a small tree or tall shrub and layered down to the point. Space-efficient and shapely, corner beds add depth where there’s little room. Compact, layered, and clever.
Anchor the corner with the tallest element and step planting down toward the open point, giving the small bed a sense of depth it wouldn’t otherwise have. Keep the front edge curved rather than straight, which makes a small bed feel more generous. Check mature sizes carefully, a corner bed is exactly where an oversized shrub becomes a problem, blocking a path or boundary within a few years. This suits small front yards, townhouses, and tight corner plots.
- Why it works: Anchoring the corner and stepping down toward the point creates depth in a small footprint.
- Best for: Small front yards; townhouses; tight corners.
- Key elements: tall corner anchor, stepped-down layers, curved front edge, mature sizes checked.
23. Berm Mounded Bed
A berm is a raised mound of soil planted as a bed: a gently sloping rise in the middle of a flat lawn, planted through to give height where the ground offers none. Sculptural and screening, berms create dimension from nothing. Rolling, dimensional, and natural.
Build the mound with gentle slopes, roughly a 4:1 ratio of width to height, so a 45 cm (18 in) high berm is about 1.8 m (6 ft) wide, since steep berms erode and look artificial. Use good topsoil rather than subsoil or fill, and plant densely so roots stabilize the mound before heavy rain. Check that a berm won’t redirect surface water toward your house or a neighbor’s, which is the most common berm mistake. This suits flat yards needing dimension or informal screening.
- Why it works: A 4:1 width-to-height ratio keeps a berm stable and natural-looking rather than eroding.
- Best for: Flat yards; informal screening; adding height.
- Key elements: 4:1 slope ratio, quality topsoil, dense planting, water flow checked.
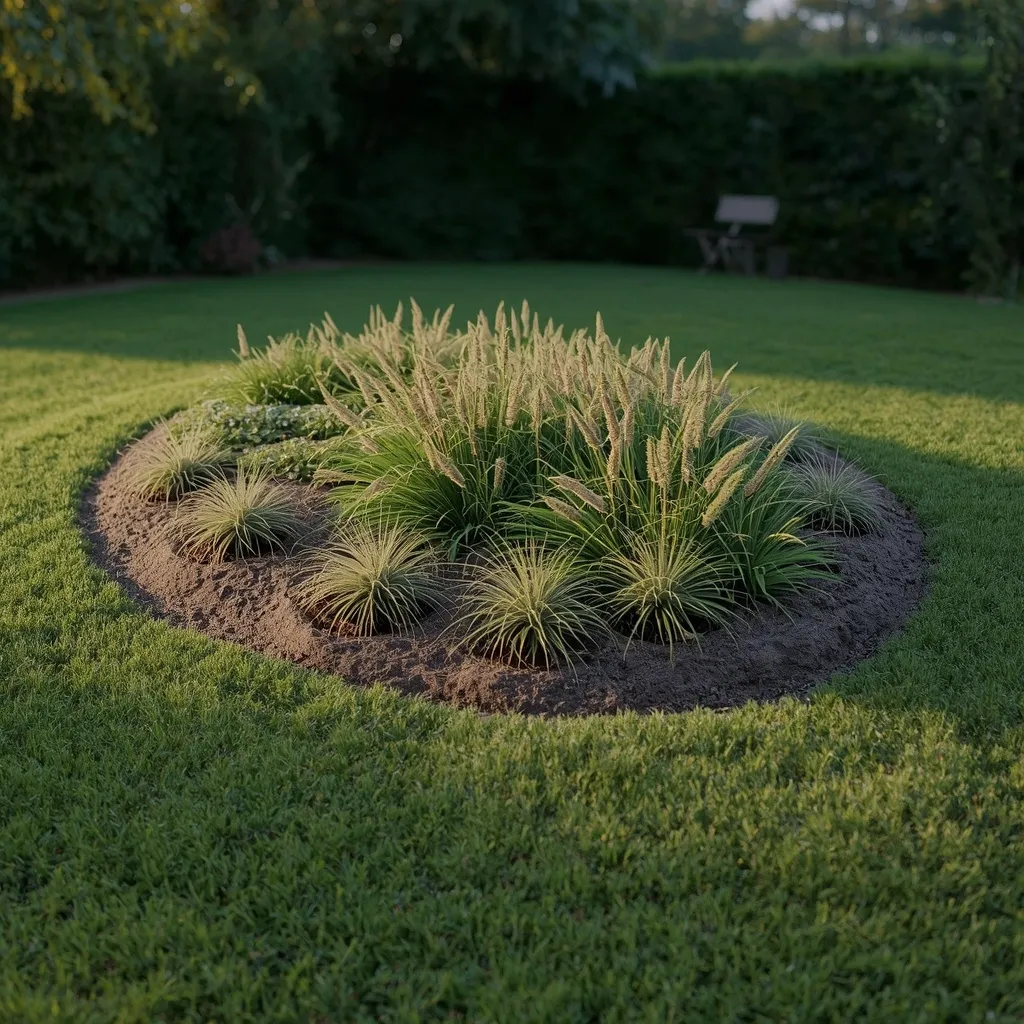
24. Mixed Shrub and Flower Bed
A mixed bed balances permanent structure with seasonal color: flowering shrubs forming the backbone, perennials filling between them, and bulbs threading through for spring. Practical and full, mixed beds give the best of both approaches. Structured, colorful, and manageable.
Use shrubs for roughly a third of the planting to give year-round structure, filling the rest with perennials and bulbs so the bed never looks empty in winter. Space shrubs by their mature width, not their nursery pot size, this is the single most common front yard planting error, and it’s why beds look sparse for a year then become overcrowded by the third. Check the label and trust it. This suits most front yards and gardeners wanting a balance of effort and effect.
- Why it works: A third shrubs gives winter structure while perennials and bulbs carry the seasonal color.
- Best for: Most front yards; balanced effort and effect.
- Key elements: one-third shrubs, perennials and bulbs between, spacing by mature width not pot size.
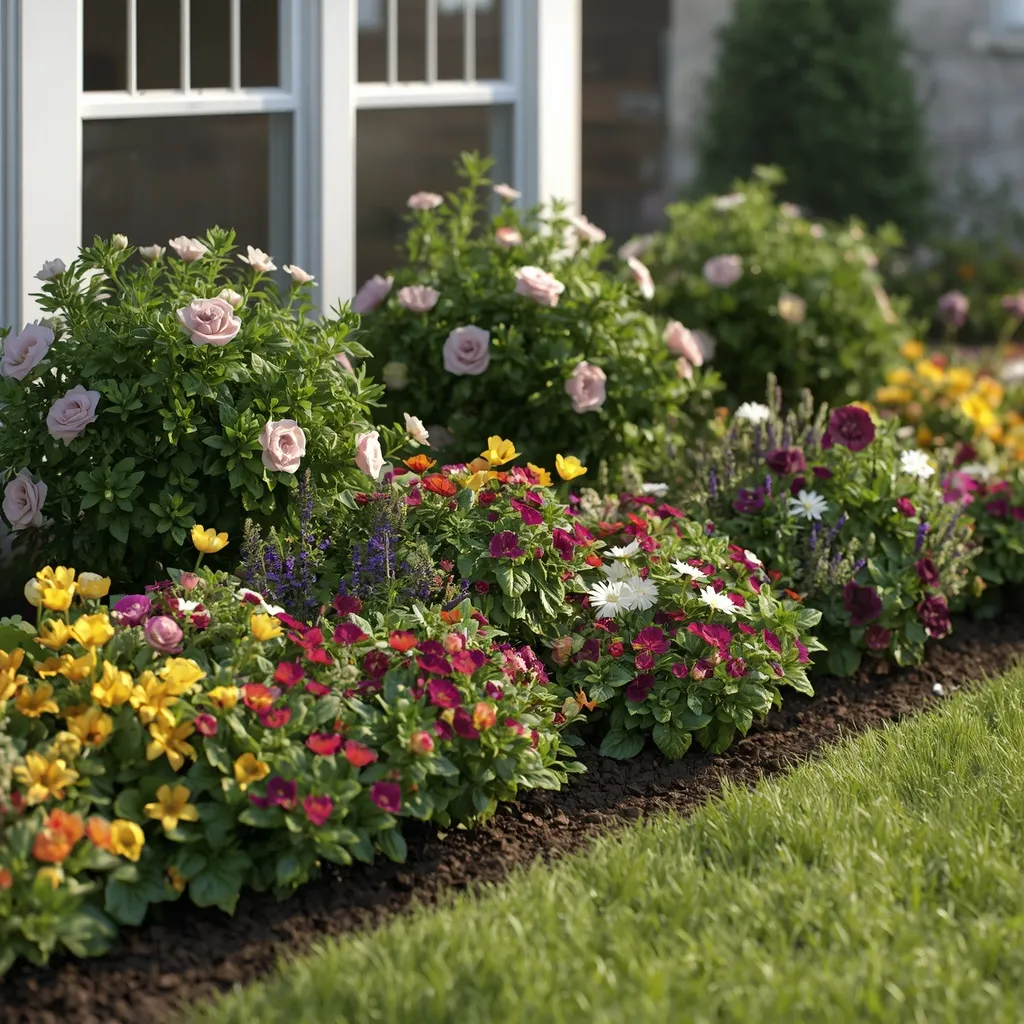
25. White Moon Garden Bed
A moon garden glows after dark: white and cream flowers, silver foliage, and pale-variegated leaves that catch the last light and stay visible long after colored flowers disappear. Luminous and atmospheric, white beds work hardest in the evening. Pale, glowing, and serene.
Plant white and cream flowers alongside silver-leaved plants like artemisia and lamb’s ear, which reflect low light better than any flower. Concentrate the planting where you’ll actually see it at dusk, near the front door, along the path, or below a window. Fragrant evening bloomers like nicotiana and night-scented stock add scent when the light goes. This suits households that arrive home after dark and anyone wanting evening interest.
- Why it works: Silver foliage reflects low light better than flowers, keeping a bed visible well after dusk.
- Best for: Evening arrivals; households home after dark.
- Key elements: white and cream flowers, silver artemisia and lamb’s ear, placed near door or path, evening fragrance.
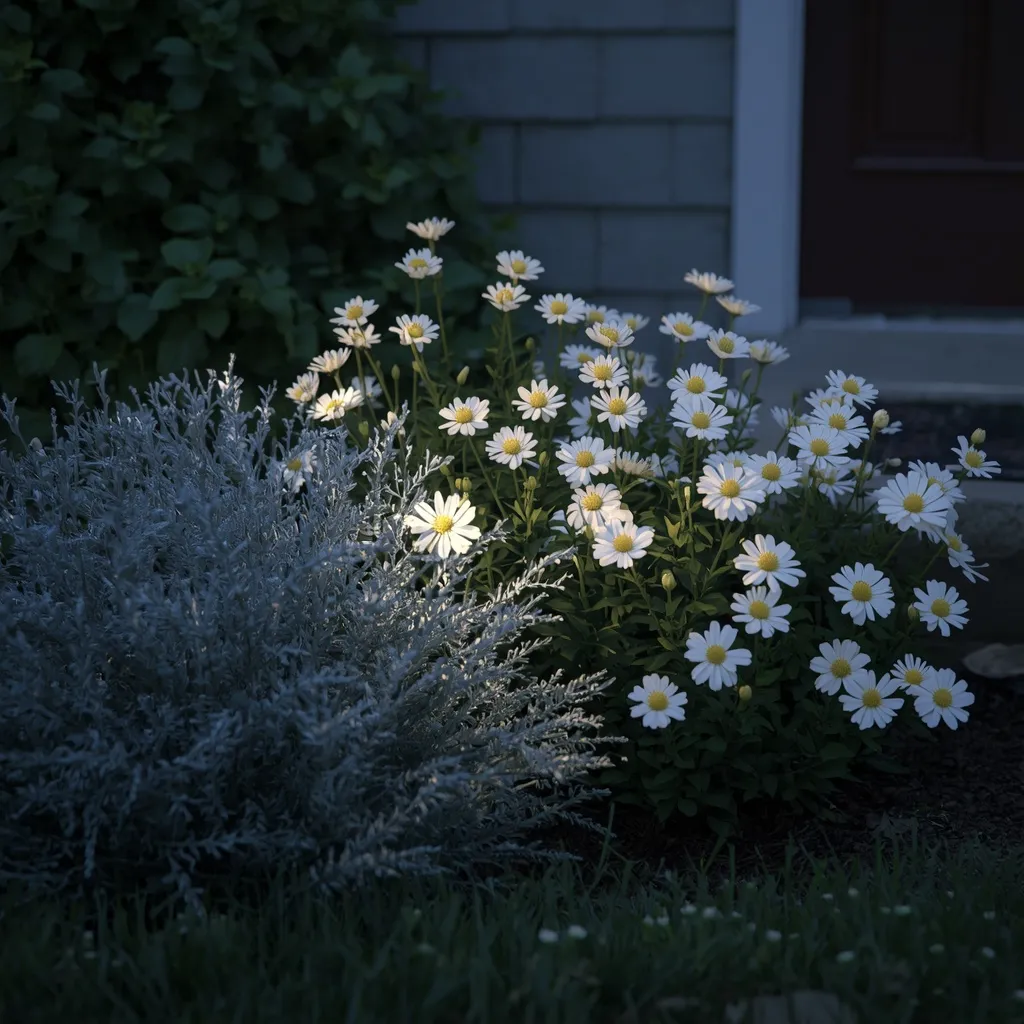
26. Ornamental Grass Modern Bed
A grass-led bed is contemporary and low-input: block-planted ornamental grasses moving in the wind, a few strong perennials for contrast, and a clean gravel or mulch surface. Architectural and kinetic, grasses give front yards movement nothing else offers. Modern, flowing, and easy.
Block-plant grasses in groups of five or more rather than dotting singles, choosing clumping varieties like Miscanthus, Calamagrostis, or Pennisetum rather than running types, which spread aggressively. Cut deciduous grasses back to about 10–15 cm (4–6 in) in late winter, just before new growth begins, that annual cut is essentially the entire maintenance schedule. Check that a chosen grass isn’t invasive in your region before planting. This suits modern houses, low-maintenance gardens, and windy sites.
- Why it works: One late-winter cutback is essentially the entire maintenance schedule for a grass-led bed.
- Best for: Modern houses; low-maintenance and windy sites.
- Key elements: blocks of five-plus, clumping not running varieties, late-winter cut to 10–15 cm, invasiveness checked.
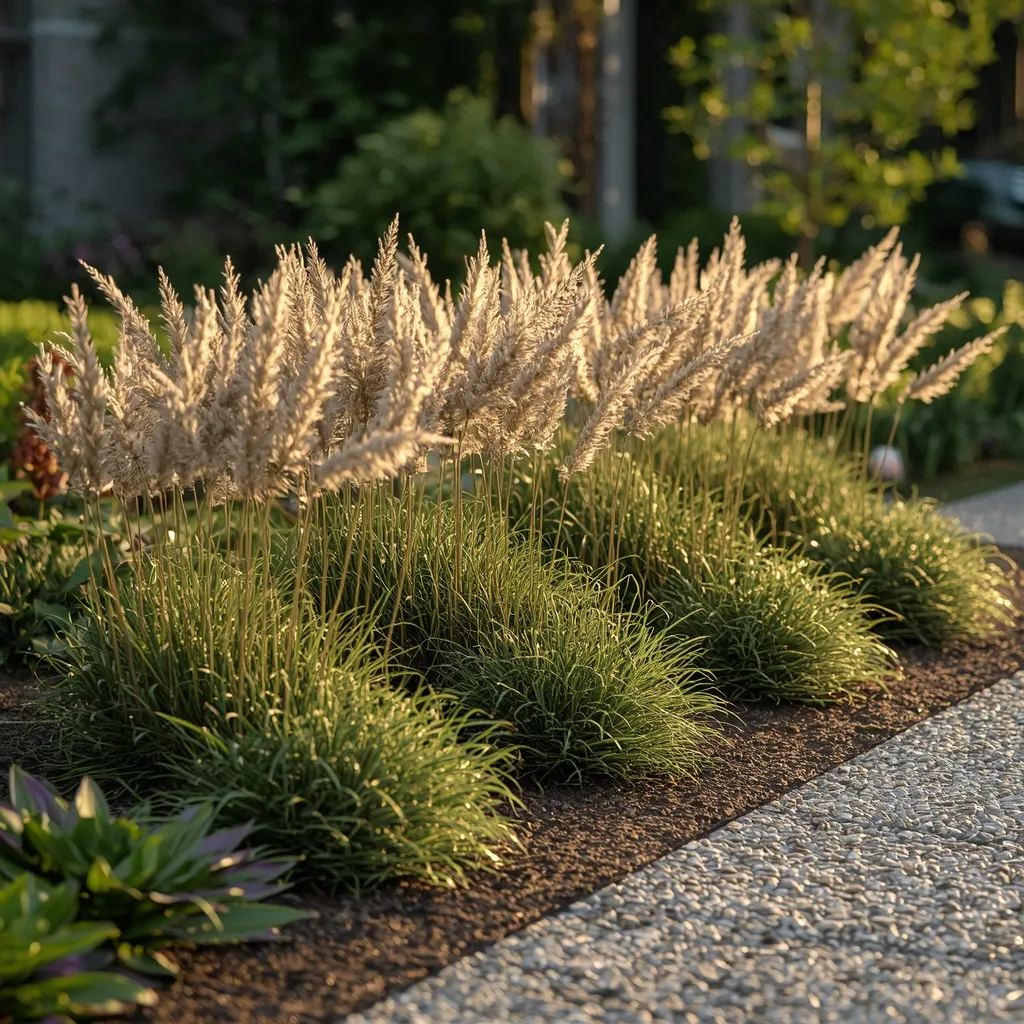
27. Budget First-Year Bed
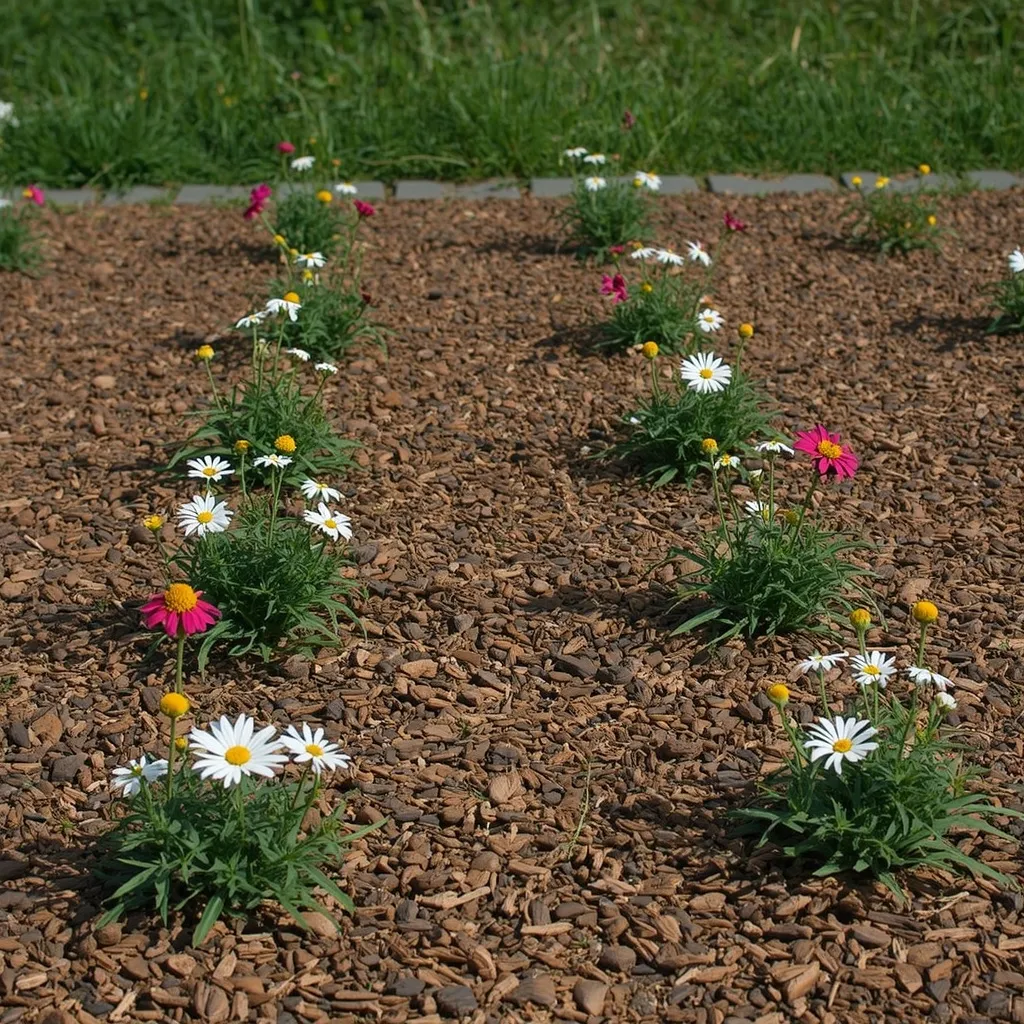
A budget bed proves a front garden doesn’t need a big spend: a well-shaped bed, a few divided perennials, self-sown annuals from seed, and mulch doing the heavy lifting while plants fill in. Thrifty and patient, cheap beds look established within two seasons. Simple, growing, and inexpensive.
Spend on soil preparation and mulch rather than mature plants, since small plants catch up with large ones within two to three seasons while good soil pays back permanently. Grow annuals like cosmos, calendula, and nasturtium from seed for a few coins per packet, and ask neighbors for divisions, most perennials need dividing every three to four years anyway, so gardeners often have spares. Plant small and space correctly for mature size. This suits tight budgets and patient gardeners.
- Why it works: Small plants catch up with mature ones in two to three seasons, while good soil pays back permanently.
- Best for: Tight budgets; patient first-time gardeners.
- Key elements: spend on soil and mulch, seed-grown annuals, neighbor divisions, correct mature spacing.
28. Container and Bed Combination
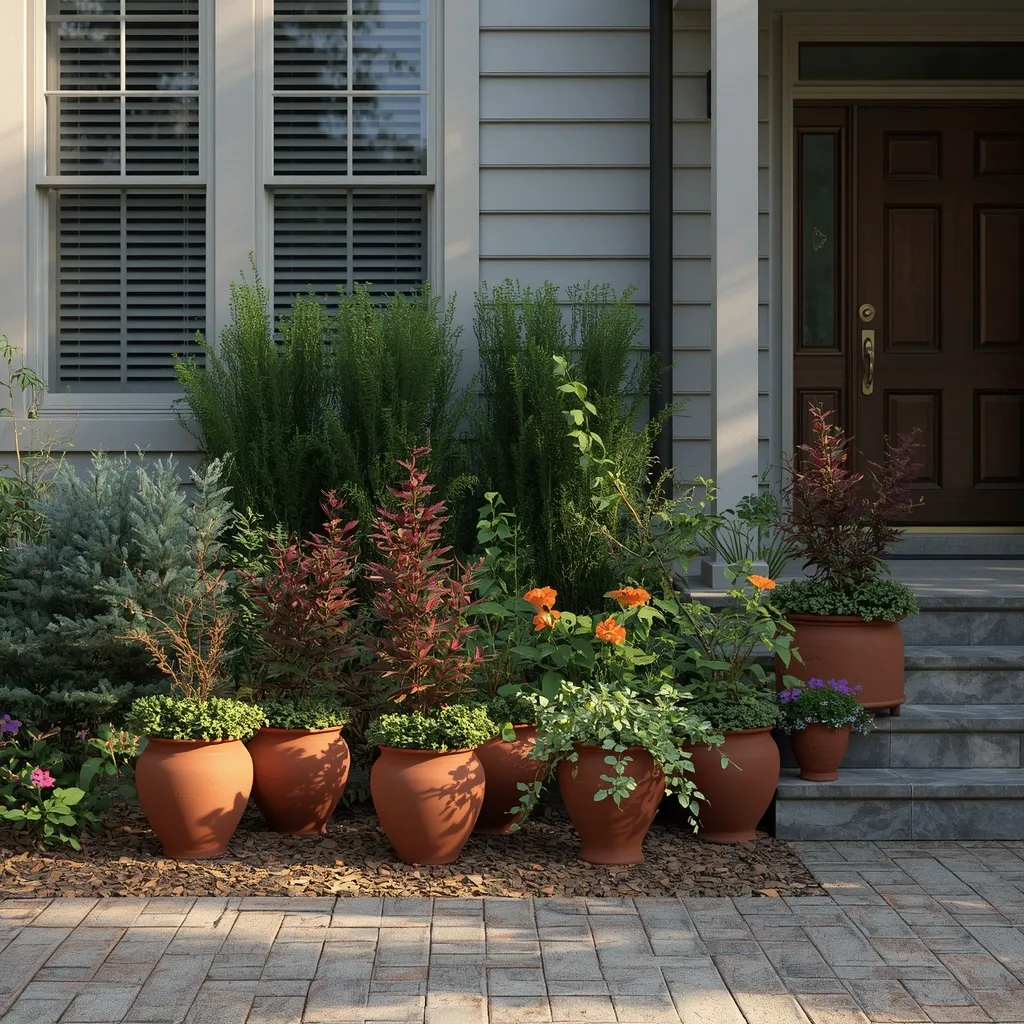
Combining containers with a planted bed adds height and flexibility: pots clustered at the bed’s edge or either side of the door, planted with seasonal color that changes while the bed stays constant. Adaptable and instant, containers fill gaps a bed can’t. Layered, movable, and seasonal.
Cluster containers in odd numbers at varied heights rather than lining them up, choosing pots large enough to hold moisture, anything under about 30 cm (12 in) across dries out within a day in summer heat. Use containers for the seasonal color changes and let the bed carry the permanent structure. Containers need feeding through the growing season since nutrients wash out with every watering. This suits renters, hard-surfaced fronts, and anyone wanting seasonal flexibility.
- Why it works: Containers carry seasonal change while the bed holds permanent structure, so neither has to do both.
- Best for: Renters; hard-surfaced fronts; seasonal flexibility.
- Key elements: odd-numbered clusters, pots over 30 cm, seasonal planting, regular feeding.
29. The Bed Preparation System
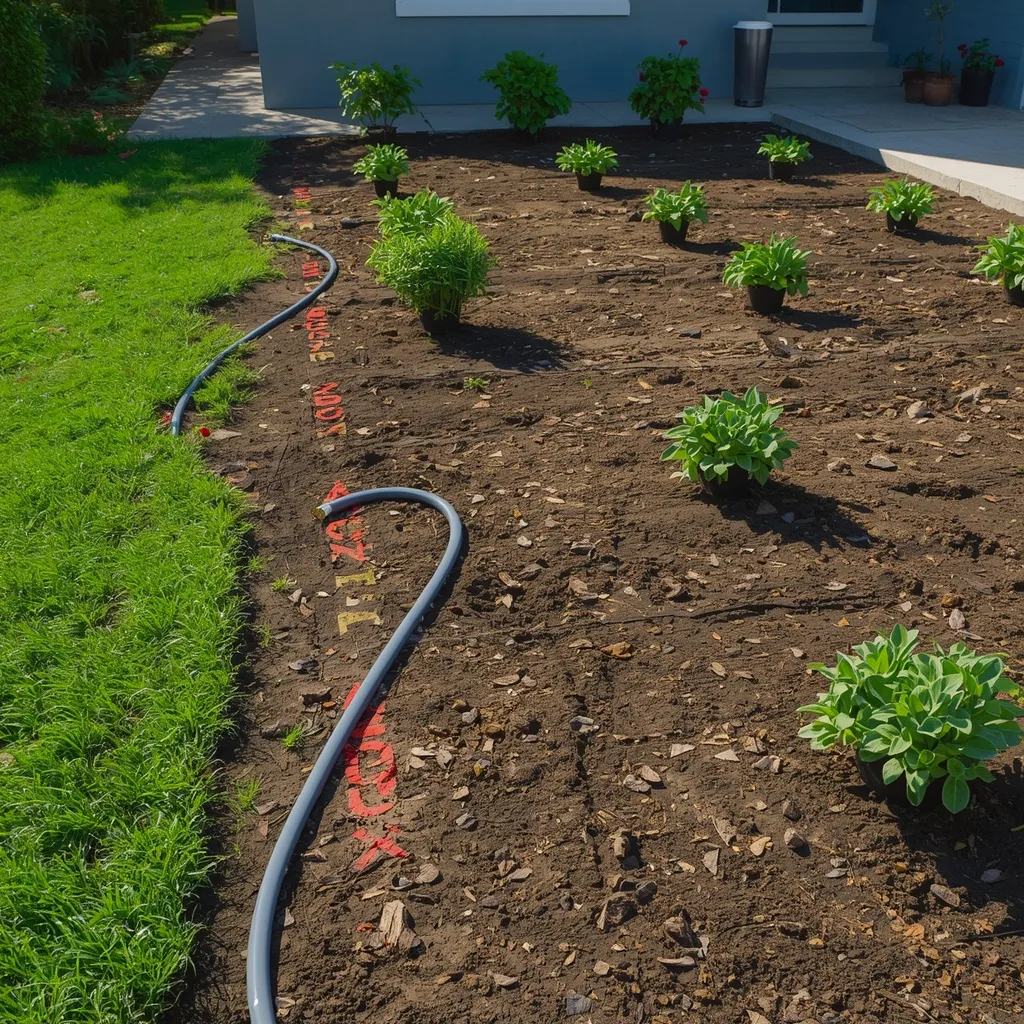
Preparation is what separates a bed that thrives from one that struggles: utilities located, shape trialled, turf removed, soil improved, plants spaced by mature width, and mulch applied last. Methodical and unglamorous, this sequence underpins every design above. Ordered, careful, and worth the day.
Work in order. Contact your utility locating service and wait for marking before any digging. Trial the shape with a hose and view it from the street. Remove turf or smother it with cardboard and mulch over a season. Improve soil with 5–10 cm (2–4 in) of compost worked into the top layer. Set plants out still in their pots, spaced by mature width, and adjust before planting anything. Mulch last, 5–8 cm deep, kept clear of stems and trunks. Wear gloves and eye protection when cutting edges, and use sun protection on exposed front yards. This suits every new bed.
- Why it works: Setting plants out in their pots before digging lets you fix spacing errors while they’re still free.
- Best for: Every new front bed; first-time gardeners.
- Key elements: utilities located first, hose-trialled shape, turf removed, compost worked in, mature-width spacing, mulch last.
How Wide Should a Front Yard Flower Bed Be?
A front yard flower bed should be at least 90 cm (3 ft) deep, and 1.2–1.8 m (4–6 ft) is better for anything running along the house or a boundary. Narrower beds can’t hold layered planting, so they read as trim rather than design. As a rough guide, a foundation bed looks balanced at roughly half the height of the wall behind it, and island beds need at least 1.2 m (4 ft) across to justify their shape.
Practical, plant-led garden advice that works in real conditions is central to the Sunday Abode approach. If the awkward angle where two boundaries meet is your particular problem, our guide to planting a corner flower bed covers that in detail. For more planting inspiration, browse the rest of our flower garden ideas.
Which Front Bed Style Suits Your Yard?
Front bed styles differ considerably in cost, upkeep, and the conditions they need. Use this to narrow the options before committing to a design.
| Bed style | Upfront cost | Upkeep | Best conditions |
| Annual color bed | Low | High; replant yearly | Full sun, regular water |
| Perennial mixed bed | Medium | Moderate | Most conditions |
| Evergreen low-care | Medium | Very low | Most conditions |
| Gravel or rock | Medium to high | Low | Hot, dry, free-draining |
| Raised timber | Medium | Moderate; waters faster | Poor or compacted soil |
| Native pollinator | Low to medium | Low once established | Matched to region |
| Shade bed | Low to medium | Moderate first 2 years | Under mature trees |
Safety notes: contact your national utility locating service before digging anywhere in a front yard, 811 in the United States, with free equivalents in most countries, since water, gas, electricity, and telecoms lines all enter the house through the front and are often shallower than expected. This applies to bed edging trenches and post holes as well as planting holes. Keep dry-stacked stone and timber tiers under about 60 cm (2 ft) each; taller retaining structures usually require engineered design and sometimes a permit, and failures are dangerous. Stone, pavers, and bagged soil are heavy, so lift with your legs, wear gloves and sturdy footwear, and get help with larger pieces. Wear eye protection when cutting edging or using powered tools, and keep sun protection in mind on exposed front yards. Never pile mulch against house siding or tree trunks, since trapped moisture encourages rot and pests. Check whether local rules or a homeowners association govern front yard planting and lawn removal before starting. If you have children or pets, check plant toxicity before planting near a footpath or driveway where they pass, the ASPCA maintains a searchable list of plants toxic to cats and dogs, and several common garden ornamentals including foxglove and oleander are toxic if eaten.
Frequently Asked Questions
What should I plant in a front yard flower bed?
Build around structure first: a third of the planting as shrubs or evergreens for year-round shape, then perennials for summer color and bulbs for spring. Match plants to your actual conditions rather than the photo you liked, sun hours, soil drainage, and hardiness zone decide what survives. For low effort, tough performers like sedum, lavender, ornamental grasses, and hardy geraniums cope with the heat and poor soil common in front yards.
How wide should a front flower bed be?
At least 90 cm (3 ft), and ideally 1.2–1.8 m (4–6 ft) for beds along the house or a boundary. Narrower beds can’t hold layered planting, so they read as edging rather than a designed bed. A foundation bed generally looks balanced at roughly half the height of the wall behind it, and an island bed needs at least 1.2 m (4 ft) across for its shape to make sense.
What’s the cheapest way to make a front yard flower bed?
Spend on soil and mulch rather than mature plants. Small plants catch up with large ones within two to three seasons, while well-prepared soil pays back permanently. Grow annuals like cosmos and calendula from seed, ask neighbors for perennial divisions, most need dividing every three to four years anyway, and smother turf with cardboard and mulch instead of paying for removal.
Do I really need to call before digging in my front yard?
Yes. Front yards are exactly where water, gas, electricity, and telecoms lines enter a house, often at shallower depths than people expect. Contact your national utility locating service, 811 in the United States, with free equivalents in most countries, and wait for the marking before breaking ground. It’s free, takes a few working days, and applies to edging trenches and post holes as well as planting holes.
How far apart should I space plants in a flower bed?
Space by mature width, not by the size of the nursery pot. This is the most common front yard planting mistake: beds planted at pot spacing look full immediately, then become overcrowded and need thinning by the third year. Check the mature spread on the label and trust it, filling the temporary gaps with annuals or a slightly deeper mulch layer for the first season or two.
What are the best low-maintenance front yard flower bed ideas?
Evergreen-led beds, gravel gardens, and ornamental grass beds need the least ongoing work. An evergreen bed with drought-tolerant perennials and 5–8 cm (2–3 in) of mulch mostly looks after itself; a gravel garden planted with Mediterranean species needs watering only through its first season; and a grass-led bed needs essentially one cutback in late winter. Avoid annual bedding if low maintenance is the goal.
Can I plant a flower bed right against my house?
Leave at least 90 cm (3 ft) between planting and the wall. Plants pressed against a house trap moisture, restrict airflow, and make painting, gutter work, and repairs difficult, and dense growth against siding can encourage pests. Never pile mulch against the wall either, keep it clear of siding and tree trunks, since trapped moisture against either encourages rot.
Conclusion
The best front yard flower beds ideas share a few unglamorous fundamentals: enough depth to hold layered planting, plants spaced for the size they’ll actually reach, and preparation done properly before anything goes in the ground. Locate your utilities first, shape the bed with a hose and look at it from the street, improve the soil, then plant. Whether you choose a cottage border, a gravel garden, or a raised timber bed, those steps are what make it still look good in three years. For more planting inspiration, explore the flower garden ideas collection on Sunday Abode.