
Introduction
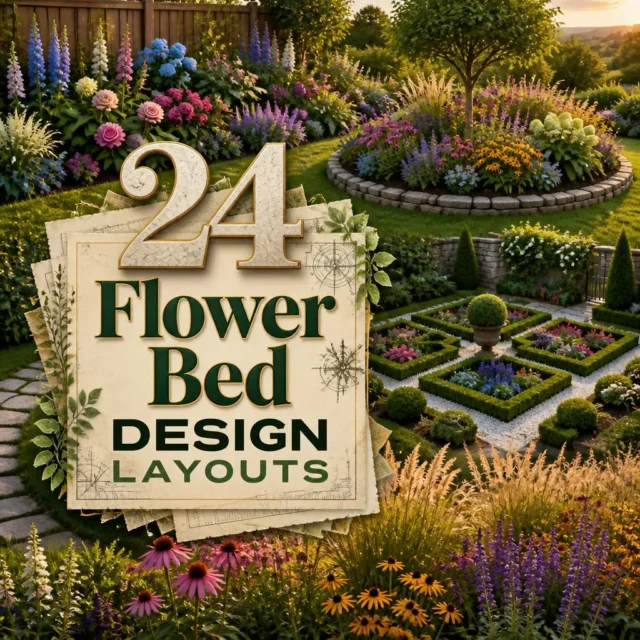
A well-planned bed looks effortless, and that’s exactly what makes it hard to copy from a photo. These flower bed design layouts give you the actual plan behind the picture, the shape, the tiers, the spacing, and the edging that hold a planting together. Whether you’re carving a curved island out of lawn or squeezing a strip along a fence, there’s a workable layout here.
Below are 24 complete bed layouts, covering curved, square, round, and corner shapes, front yard and backyard positions, full-sun and shady sites, and raised, annual, grass-led, and pollinator plantings. Each one explains how the elements combine, with real depths and spacings rather than vague advice. Consider it your guide to planning a bed you’ll enjoy looking at from the windows of your abode for years, not just the week it’s planted.
The three rules behind every layout below: First, tier by height, tallest at the back of a border or down the center of an island bed, stepping down to low edging plants at the front, so nothing hides behind anything else. Second, plant in odd-numbered drifts of three, five, or seven of the same plant rather than single specimens spread thinly; repetition is what makes a bed look designed. Third, space to mature width, not pot size, a new bed that looks correctly planted on day one will be a tangled mess by year three.
24 Flower Bed Design Layouts
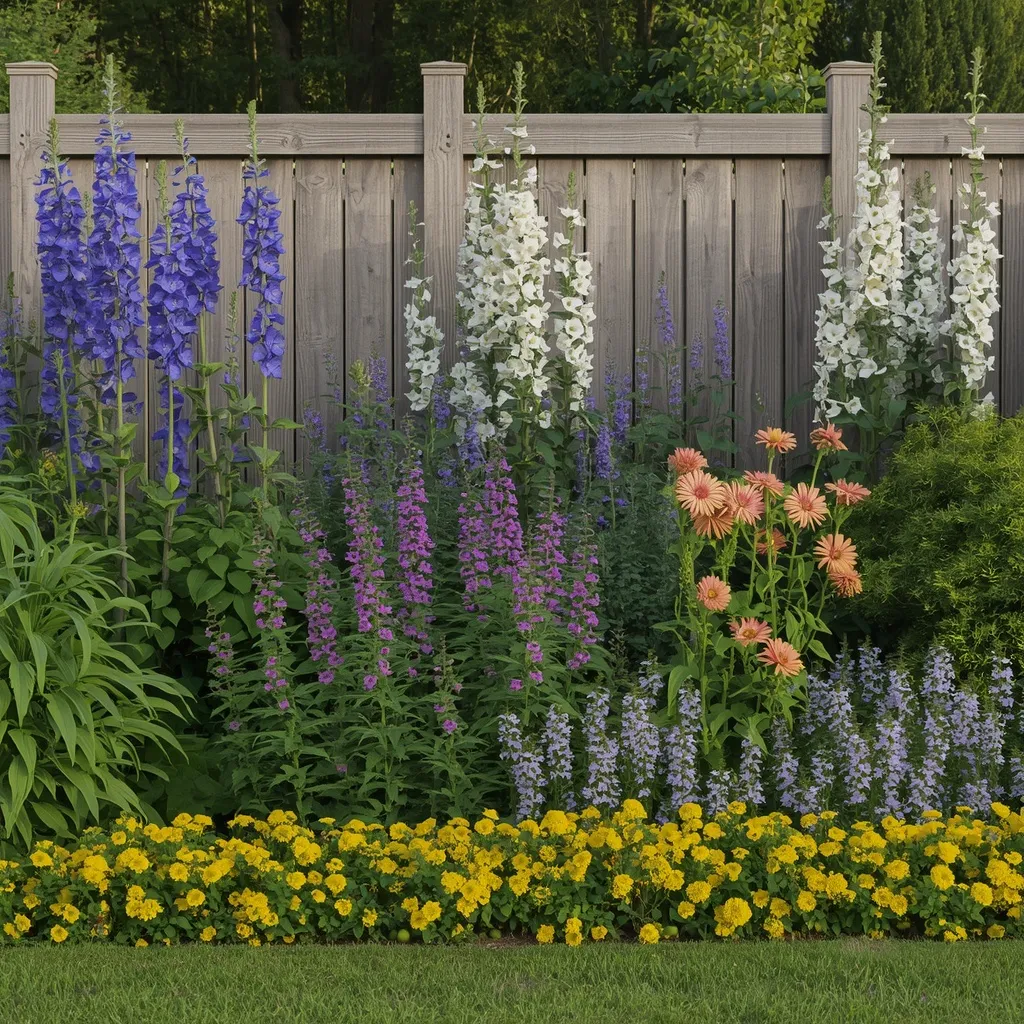
1. Classic Three-Tier Border
The three-tier border is the layout every good flower bed borrows from: tall plants standing against a fence or wall at the back, mid-height perennials filling the middle, and low edging plants spilling softly onto the lawn at the front. Structured and generous, it gives every plant its own stage. Layered, full, and always readable.
Build a border at least 1.2 m (4 ft) deep, since three genuine tiers won’t fit in anything narrower. Put plants reaching 1.2 m (4 ft) or more at the back, 45–75 cm (18–30 in) plants through the middle, and edgers under 30 cm (12 in) at the front, planting each in drifts of three to five rather than singly. Step heights gradually rather than dropping from tall to tiny in one jump. This suits any yard with a fence, wall, or hedge as a backdrop, and it’s the best starting layout for beginners.
- Why it works: Stepped heights mean every plant is visible from the viewing side.
- Best for: Beds against a fence, wall, or hedge; beginners.
- Key elements:2 m depth minimum, three height tiers, drifts of 3–5, gradual stepping.
2. Curved Island Bed
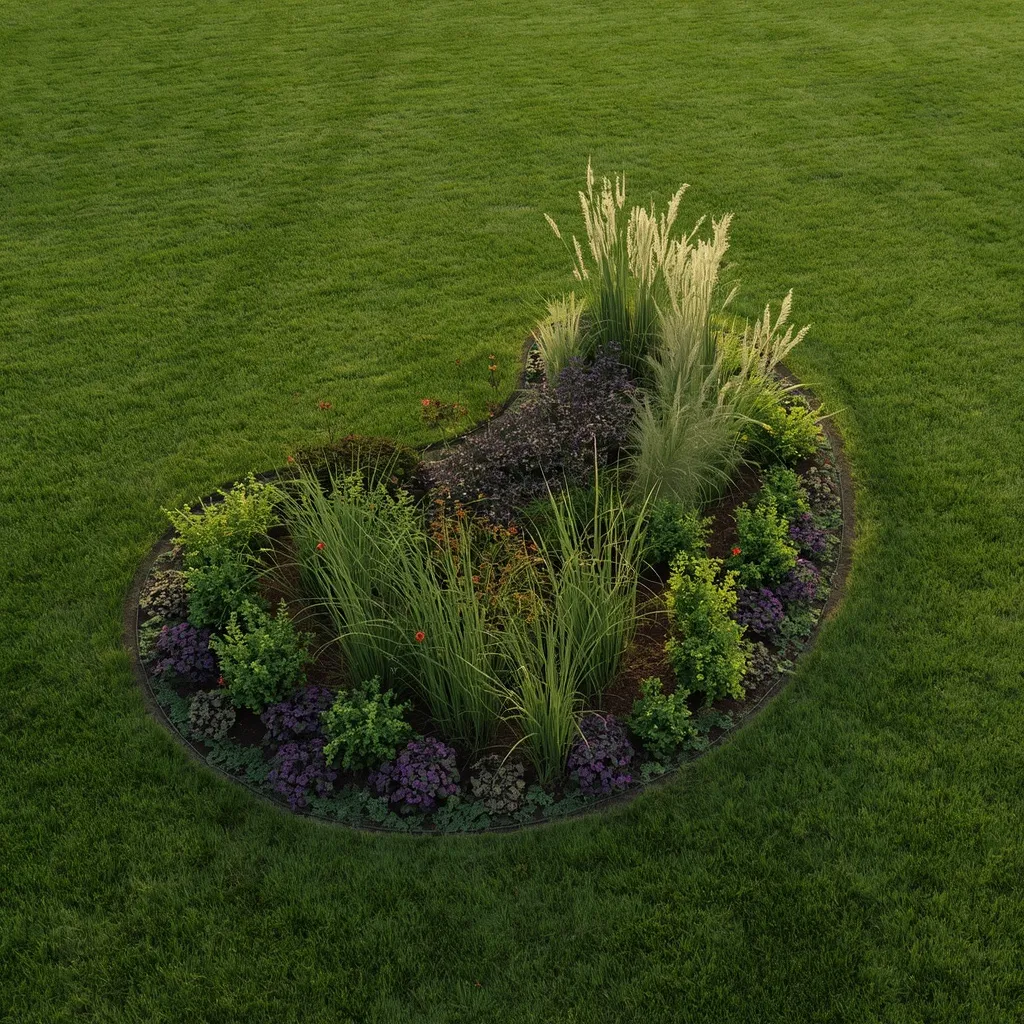
A curved island bed floats in the middle of a lawn, viewed from every side: a sweeping kidney or oval outline with tall plants down the center spine, tapering out to low edgers all the way around. Sculptural and generous, an island bed makes a flat lawn feel designed. Soft-edged, full, and satisfying to walk around.
Lay out the curve with a garden hose before cutting a single edge, then step back and view it from the house windows, most people make island beds too small, and a bed under about 2 m (6–7 ft) across looks like a puddle in a lawn. Keep curves broad and lazy rather than wiggly, wide enough for a mower to follow in one pass. Tallest plants run down the middle, stepping down to all edges. This suits medium and large lawns and gardens needing a focal point.
- Why it works: A central height spine lets an island bed read well from every direction.
- Best for: Medium and large lawns needing a focal point.
- Key elements: hose-marked curve, 2 m+ across, tall center spine, broad mower-friendly curves.
3. Square Formal Parterre
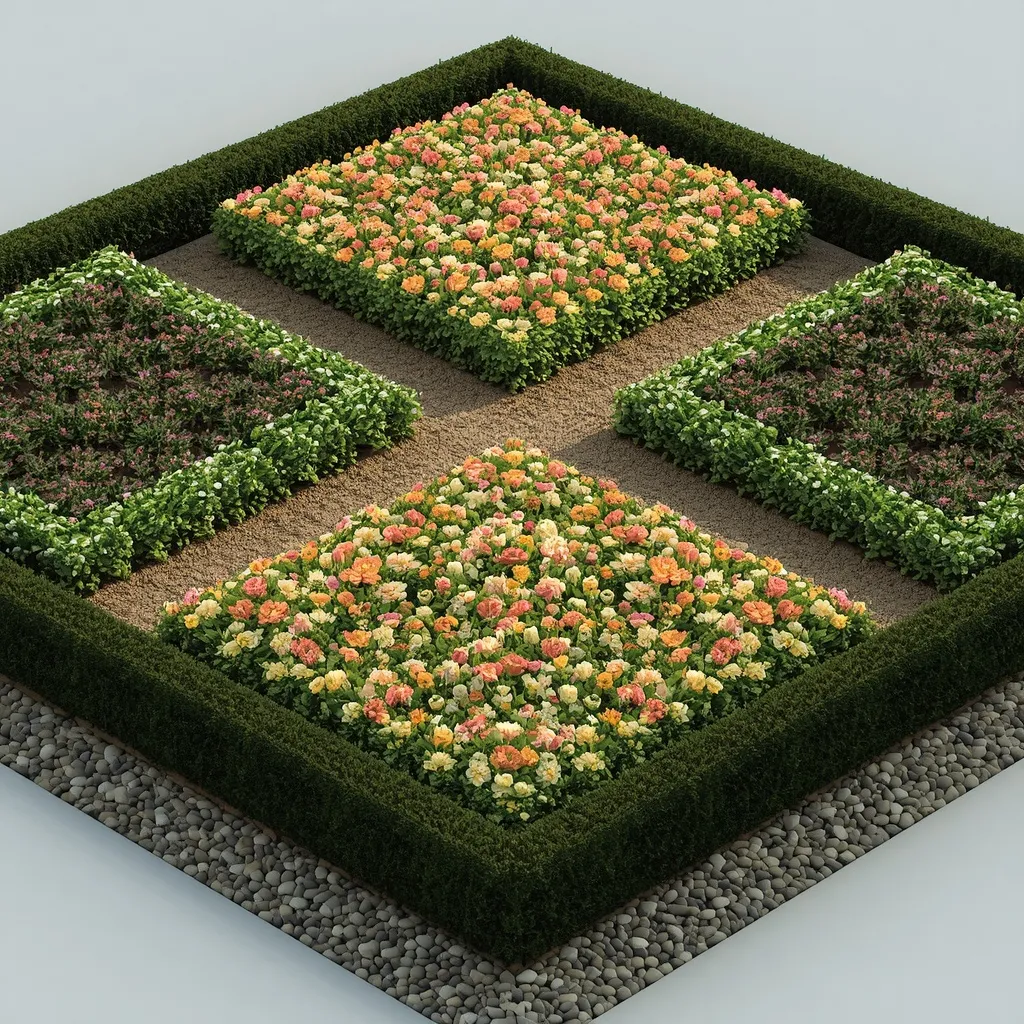
A square bed brings order and geometry to a garden: crisp right-angled edges, a clipped evergreen framework, and blocks of flowers held inside a tidy grid. Formal and architectural, a square layout suits modern and traditional gardens equally. Neat, symmetrical, and quietly disciplined.
Mark a true square with string lines and check the diagonals match before edging, since an out-of-square bed is obvious and impossible to disguise. Frame the perimeter with a low clipped edging plant, box, dwarf hebe, or lavender at 30–40 cm (12–16 in) spacing, and fill the interior with blocks of a single flower for maximum impact. Divide larger squares into four quarters with a narrow gravel cross for a parterre effect. This suits formal gardens, courtyards, and small tidy plots where structure matters more than sprawl.
- Why it works: A clipped evergreen frame holds loose flowers in a crisp geometric shape.
- Best for: Formal gardens, courtyards, tidy small plots.
- Key elements: string-line square, checked diagonals, low clipped edging, single-flower blocks.
4. Round Focal Bed
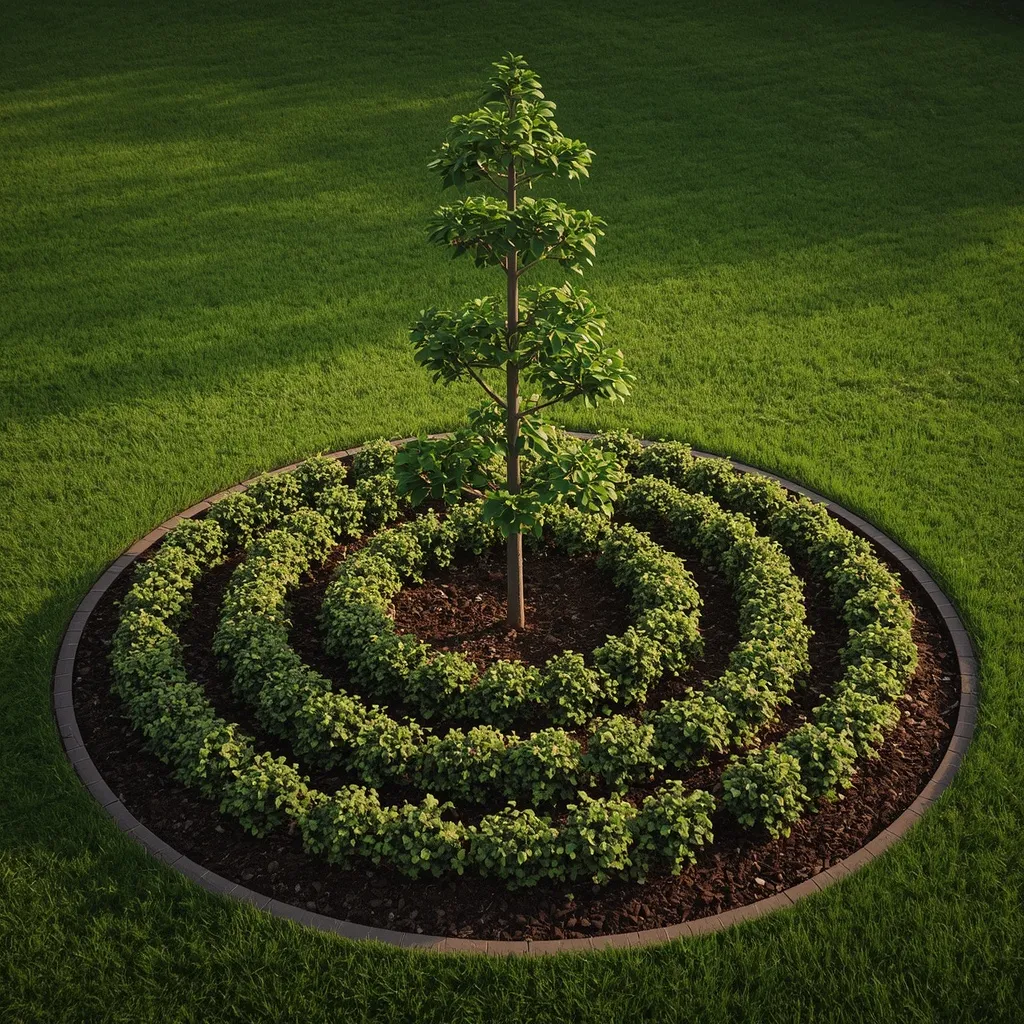
A round bed makes a natural centerpiece: a perfect circle cut into lawn or gravel, planted in concentric rings that rise toward a single tall specimen or small tree at the middle. Balanced and formal, a circle draws the eye and holds it. Symmetrical, calm, and complete from every angle.
Mark the circle with a string tied to a central stake, a simple compass that guarantees a true curve, then plant in rings: a central feature, a mid-height ring around it, and a low edging ring at the perimeter. A diameter of at least 1.8–2.4 m (6–8 ft) keeps the rings readable; smaller circles work better with just two rings. Important caution: never pile mulch against the trunk of a central tree, since a mulch volcano traps moisture and rots the bark. This suits front yards, lawn centers, and driveway turning circles.
- Why it works: Concentric rings around a central feature read as deliberate from every side.
- Best for: Front yards, lawn centers, driveway circles.
- Key elements: string-and-stake circle, 1.8 m+ diameter, three rings, no mulch against trunks.
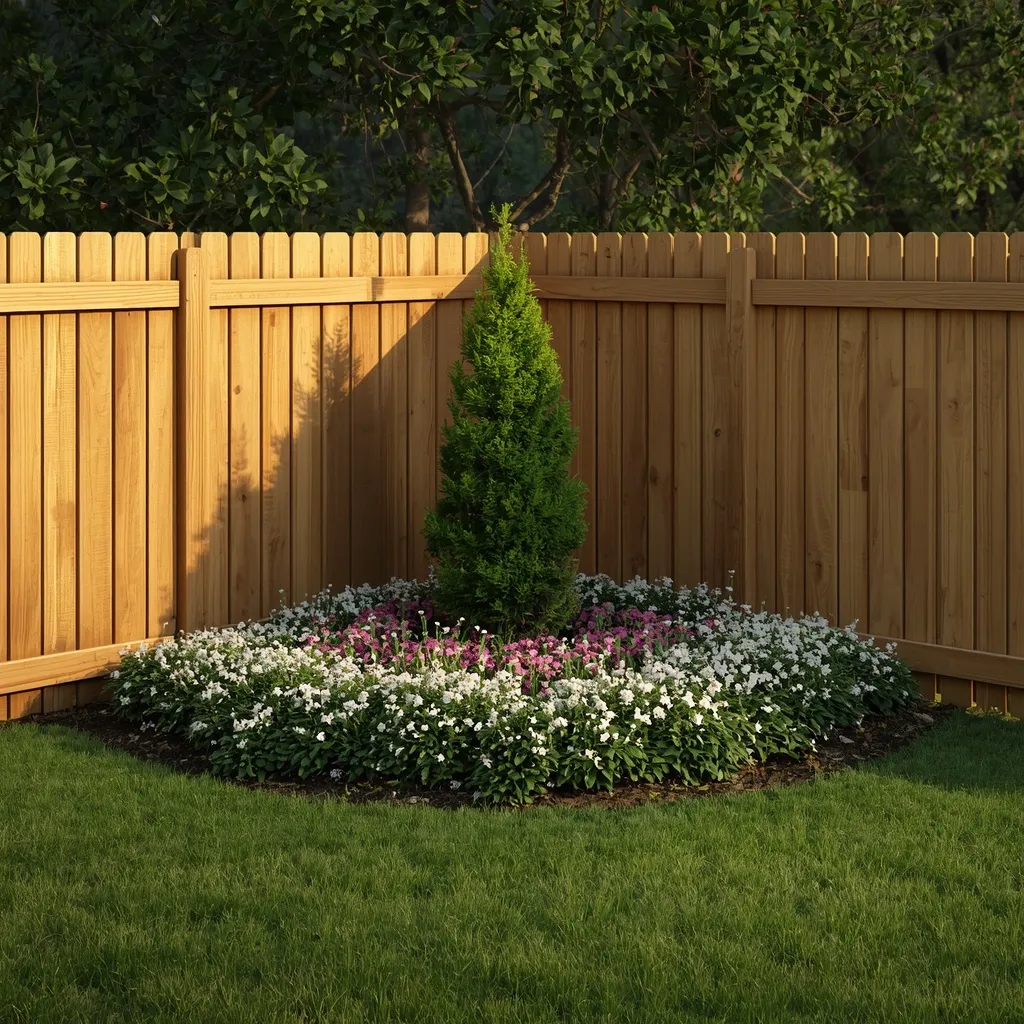
5. Corner Wraparound Bed
A corner bed turns an awkward right angle into a feature: a triangular or curved planting that fills where two fences meet, deepest at the corner point and tapering along both runs. Practical and space-smart, corners are usually wasted ground. Neat, resolved, and surprisingly generous.
Make the bed deepest at the corner itself, around 1.5–1.8 m (5–6 ft), tapering to 60 cm (2 ft) where it runs out along each fence, and soften the right angle with a curved front edge rather than a matching sharp triangle. Place the tallest plant or a small multi-stem shrub right in the corner as an anchor, stepping down in both directions. Corners often sit in partial shade for part of the day, so check the light before choosing plants. This suits small yards, fenced gardens, and anyone with dead corners collecting leaves.
- Why it works: A deep planted corner with a curved front resolves an awkward right angle.
- Best for: Small and fenced yards with unused corners.
- Key elements:5–1.8 m at the corner, tapering to 60 cm, curved front, anchor shrub.
6. Foundation Bed Along the House
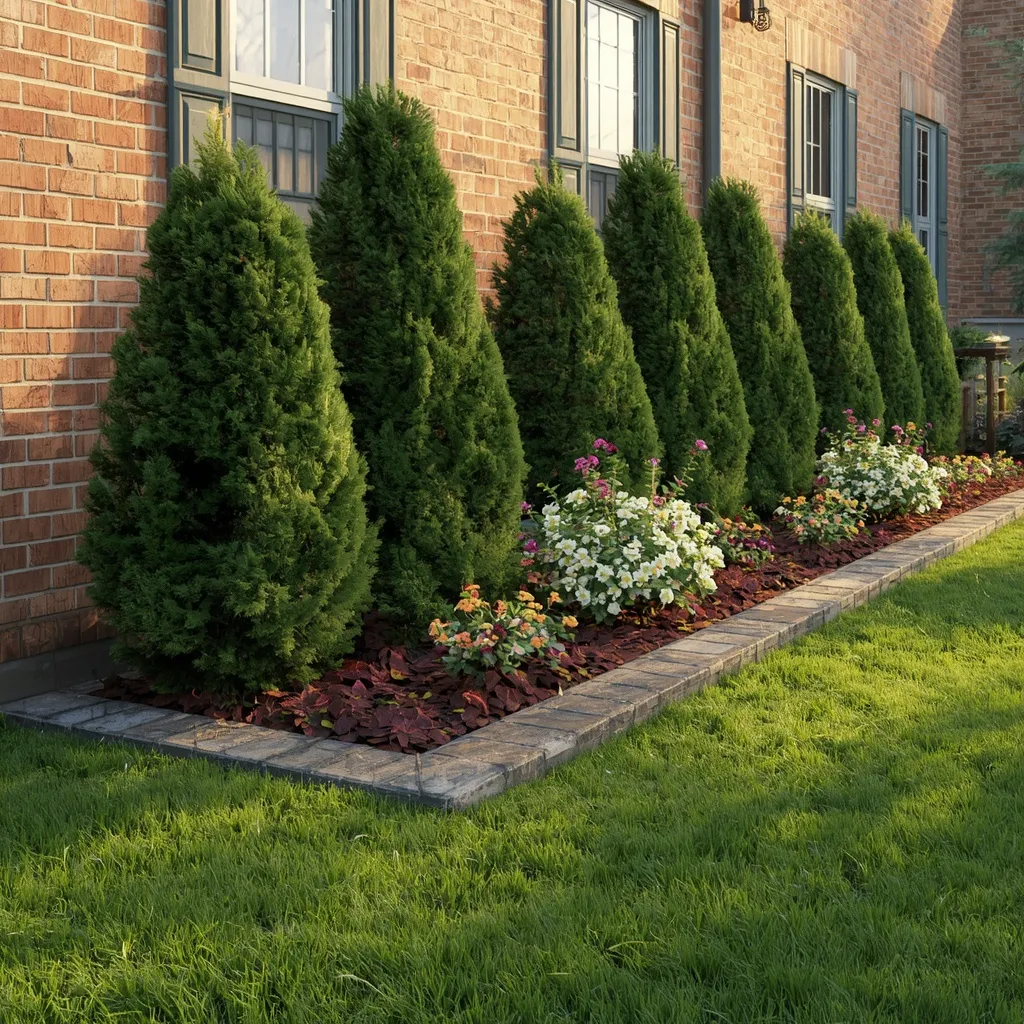
A foundation bed runs along the front of the house, softening the base of the walls: evergreen structure at the back near the brickwork, flowering perennials in front, and a clean edge separating bed from lawn. Grounding and welcoming, it’s the planting that makes a house look settled. Tidy, layered, and high-impact.
Keep the bed at least 90 cm (3 ft) deep so plants aren’t squashed against the wall, and set anything woody far enough out that its mature width won’t press on the render or siding, usually at least 60–90 cm (2–3 ft) from the wall. Use evergreen shrubs for year-round structure with perennials layered in front for seasonal color. Watch for the drip line from the roof, which creates a strip of soil that’s either battered or bone dry. This suits front yards and curb appeal, and it’s the highest-value bed in most gardens.
- Why it works: Evergreen structure with perennials in front keeps the house framed year-round.
- Best for: Front yards; curb appeal priorities.
- Key elements: 90 cm+ depth, shrubs 60–90 cm off the wall, evergreen backbone, drip-line awareness.
7. Symmetrical Entryway Pair
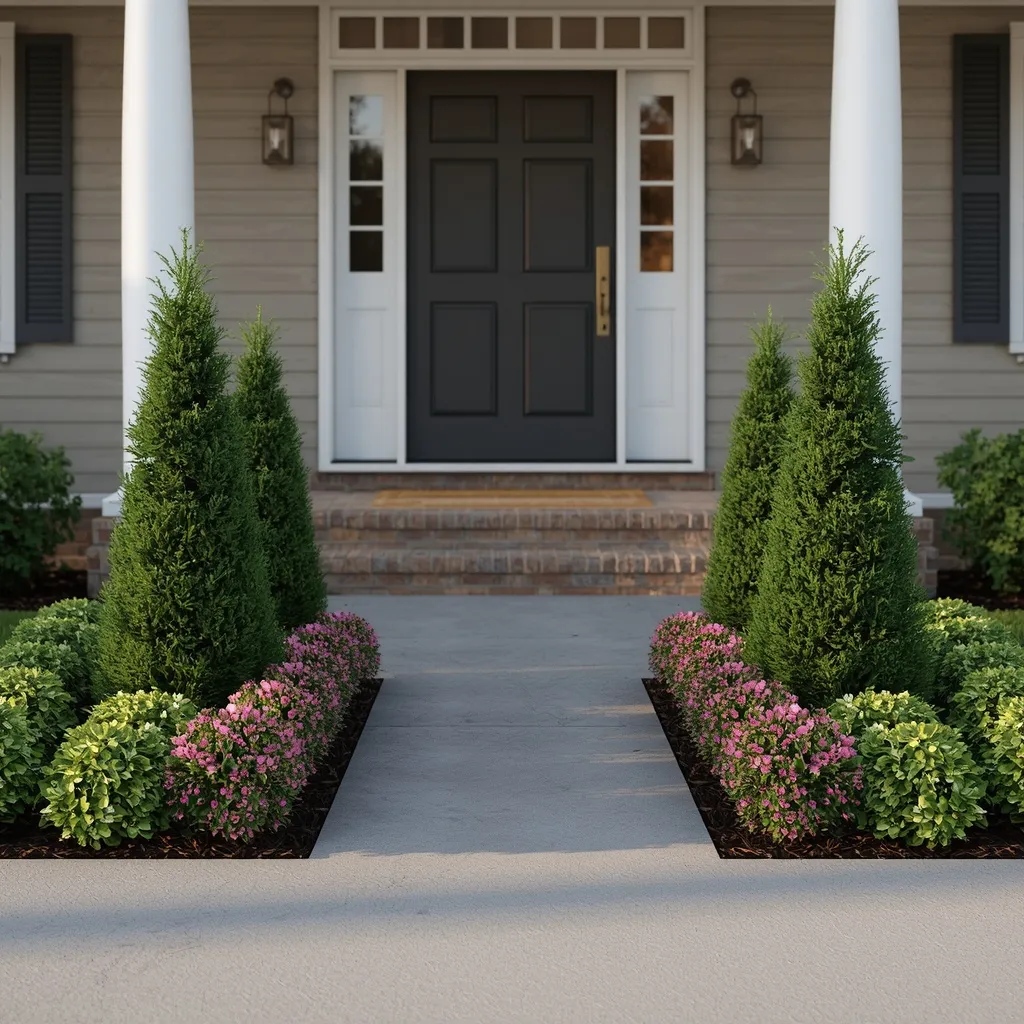
A matched pair of beds flanking the front door creates instant formality: identical plantings left and right, mirroring each other in shape, height, and color. Balanced and welcoming, symmetry signals care before anyone reaches the doorbell. Formal, tidy, and immediately impressive.
Mirror the two beds exactly, same shape, same plants, same numbers, since near-symmetry looks like a mistake while true symmetry looks intentional. Anchor each with a matching evergreen or a clipped shape, then repeat one flowering plant and one edging plant on both sides. Keep everything low enough that sightlines to the door stay clear, generally under 90 cm (3 ft) near the path. This suits front entrances, formal houses, and anyone wanting maximum curb appeal from a small planted area.
- Why it works: Exact mirroring reads as deliberate design rather than coincidence.
- Best for: Front entrances; small-area curb appeal.
- Key elements: identical shape and plant counts, matched evergreen anchors, under 90 cm near the path.
8. Full-Sun Prairie Drift
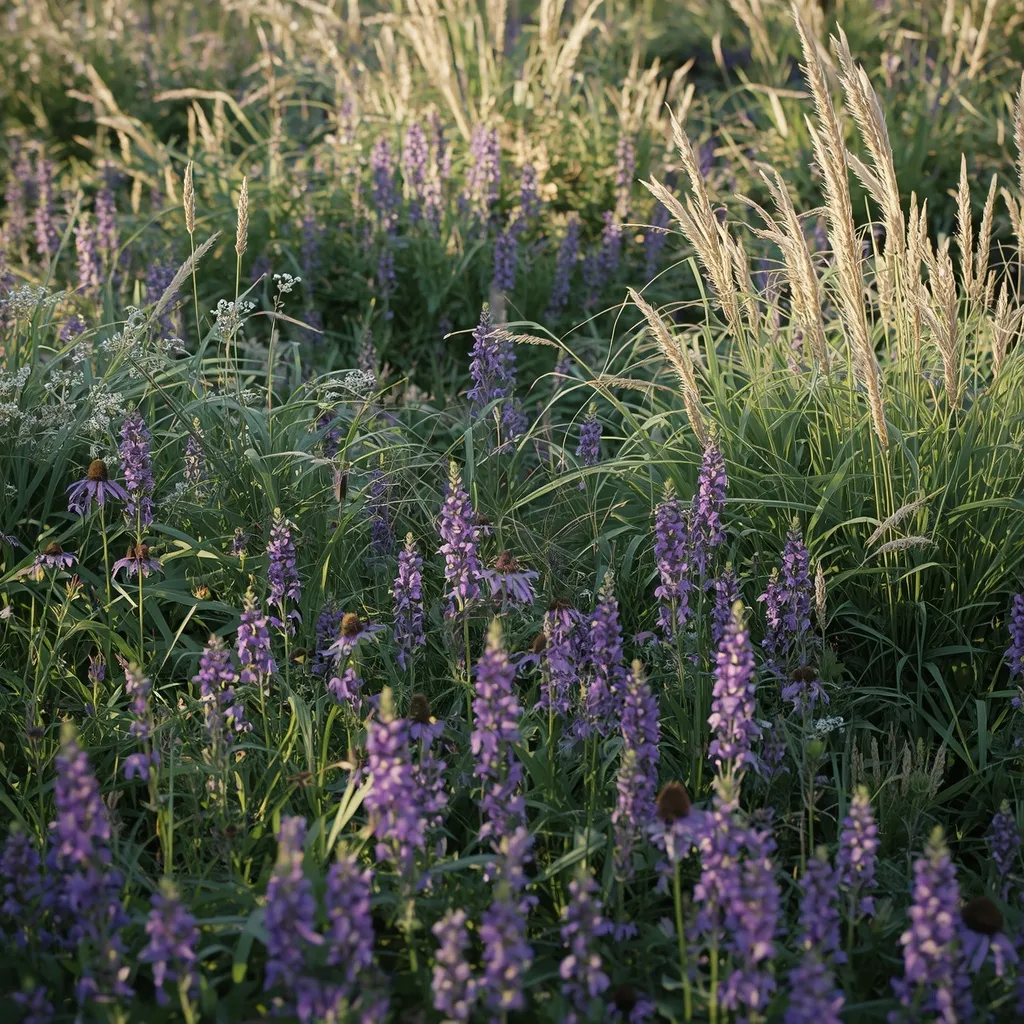
A prairie-style bed in full sun is loose, airy, and alive with movement: broad drifts of coneflowers, rudbeckia, and salvia woven through ornamental grasses, swaying together in the wind. Naturalistic and generous, prairie planting looks wild but is carefully repeated. Sunny, buzzing, and low-maintenance.
Plant in long overlapping drifts rather than blocks, repeating three or four species through the bed so the eye travels along it. Sun-loving perennials like Echinacea purpurea, Rudbeckia fulgida, and Salvia nemorosa handle six or more hours of direct sun and need far less watering once established than thirsty bedding plants. Leave seed heads standing over winter for birds and structure, cutting back in late winter instead. This suits full-sun sites, larger beds, wildlife gardeners, and anyone wanting less watering.
- Why it works: Repeated overlapping drifts make naturalistic planting read as designed.
- Best for: Full-sun sites, larger beds, wildlife gardens.
- Key elements: overlapping drifts, 3–4 repeated species, sun perennials, winter seed heads left standing.
9. Ornamental Grass Movement Bed
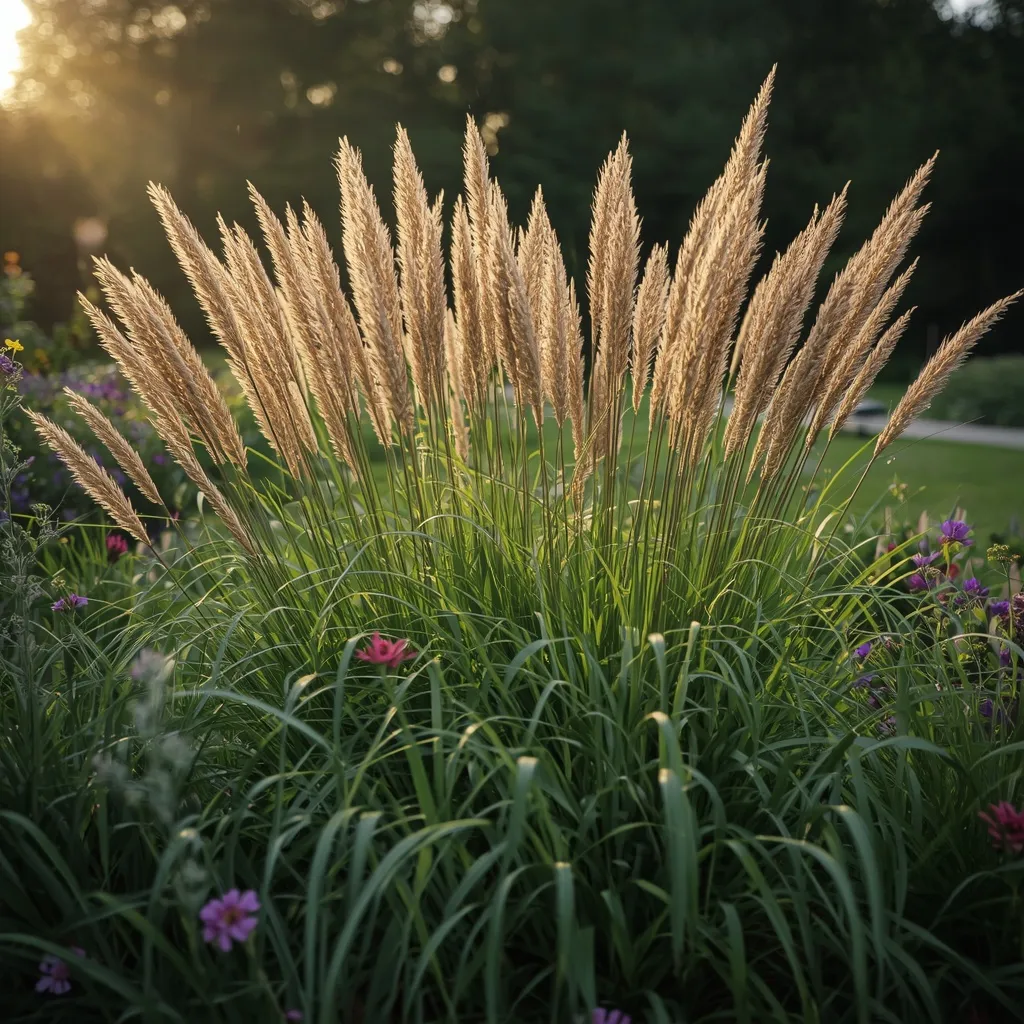
A grass-led bed brings motion and winter presence: fountains of miscanthus and pennisetum catching low sun, with a few flowering perennials threaded between for color. Textural and changeable, grasses do things flowers can’t. Soft, moving, and beautiful for months.
Use grasses as the structural backbone, around half to two-thirds of the planting, with perennials woven through rather than the other way round, and place taller grasses where morning or evening sun will backlight them, which is when they look best. Cut deciduous grasses back to about 10–15 cm (4–6 in) in late winter before new growth starts. One caution: check locally before planting any vigorous running grass or non-native species, as some are invasive in certain regions and your local extension service or equivalent will advise. This suits modern gardens, full-sun beds, and low-maintenance planting.
- Why it works: Grasses supply movement and winter structure that flowering perennials lack.
- Best for: Modern gardens, full sun, low-maintenance planting.
- Key elements: grasses as 50–65% of planting, backlit placement, late-winter cutback, invasiveness check.
10. Raised Rectangular Bed
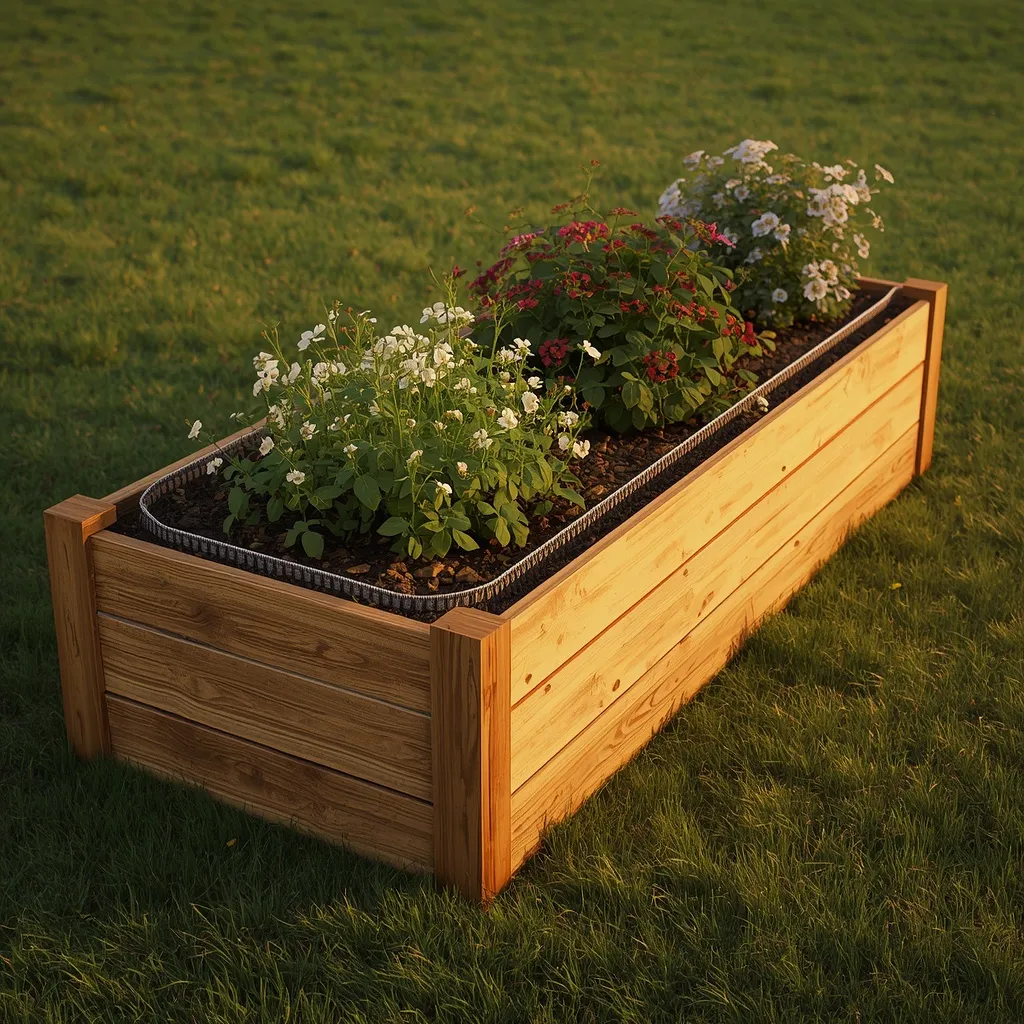
A raised bed lifts the planting into a defined box: timber or stone sides holding rich soil above the surrounding ground, with flowers spilling over the edges. Practical and crisp, raising a bed solves bad soil and bad backs at once. Contained, productive, and easy to tend.
Build raised beds no wider than about 1.2 m (4 ft) so you can reach the middle from either side without stepping on the soil, at a height of 30–45 cm (12–18 in) for good root depth. Raised beds drain faster than open ground, which is an advantage in heavy clay but means more frequent watering in summer. If you’re growing anything edible alongside the flowers, choose untreated or naturally durable timber, or a liner, rather than older treated lumber. This suits poor or compacted soil, wet ground, and gardeners with limited mobility.
- Why it works: Contained good soil at working height solves drainage, soil quality, and access together.
- Best for: Poor or wet soil; limited mobility.
- Key elements: max 1.2 m wide, 30–45 cm high, faster drainage, safe timber choice near edibles.
11. Cottage Garden Mixed Border
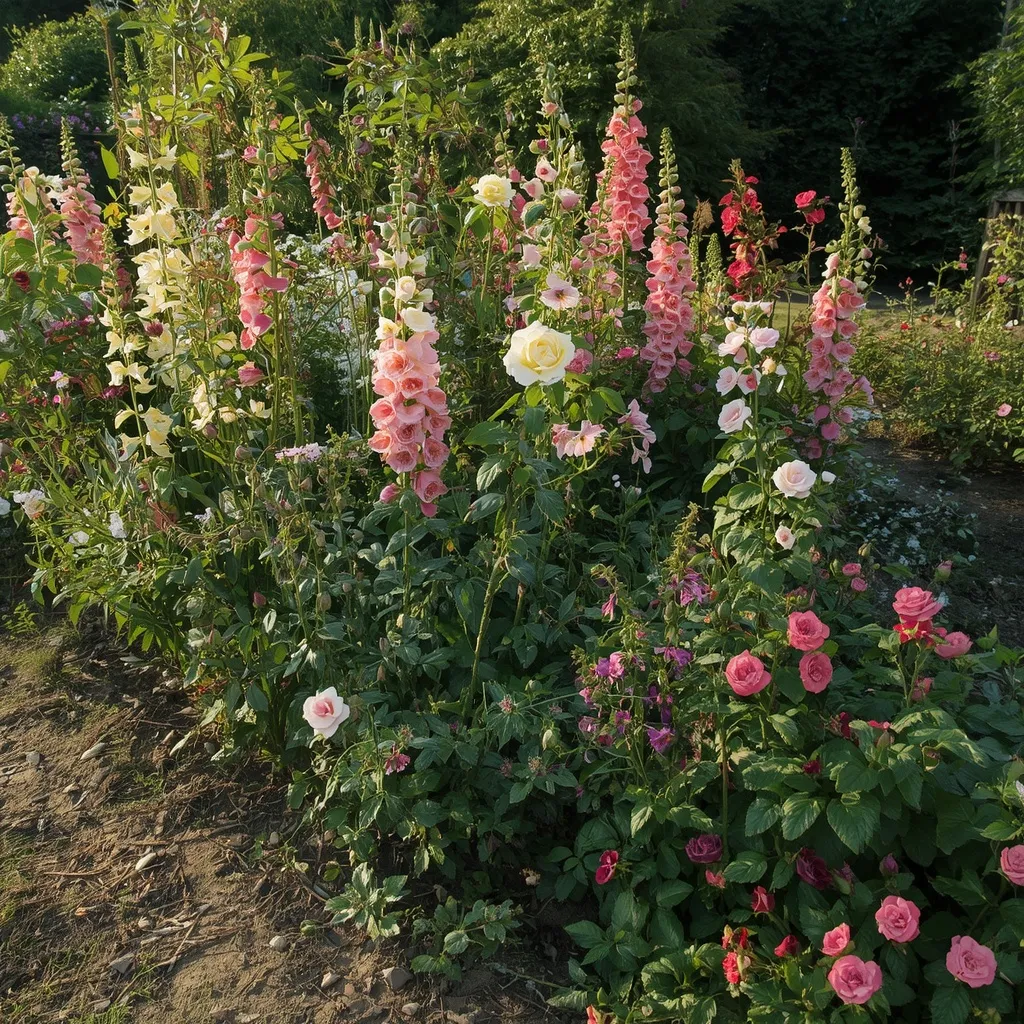
A cottage border is joyful abundance: roses, foxgloves, delphiniums, and hardy geraniums crowding together with barely a gap of soil showing, self-seeders filling every crack. Romantic and informal, cottage planting hides its structure under exuberance. Full, tumbling, and full of life.
Plant more densely than a formal border, cottage style tolerates plants leaning on each other, but keep some backbone by repeating two or three plants along the length so it reads as a scheme rather than a jumble. Allow self-seeders like foxgloves and forget-me-nots to fill gaps, editing out surplus seedlings each spring. Note for households with children or pets that foxglove and delphinium are toxic if eaten, so site them thoughtfully and check the ASPCA lists for pet-specific guidance. This suits informal gardens, cottage houses, and generous plant lovers.
- Why it works: Dense planting with two or three repeated plants keeps abundance from reading as chaos.
- Best for: Informal cottage gardens; plant collectors.
- Key elements: dense planting, 2–3 repeated species, managed self-seeders, toxicity awareness.
12. Annual Color Block Bed
An annual bed delivers pure saturated color for one season: solid blocks of petunias, marigolds, or salvias planted close together in bold sweeps. Vivid and immediate, annuals give a full display in weeks rather than years. Bright, cheerful, and completely changeable.
Plant annuals in generous single-color blocks rather than mixed confetti, spacing them at roughly two-thirds of their mature spread so they knit together into solid color within about six weeks. Annuals are hungry and thirsty compared to perennials, so plan on regular watering and a feed every few weeks through the season. The great advantage is freedom: you can redesign the whole bed next year. This suits new gardeners, renters with a garden, front-of-house display beds, and anyone wanting fast impact on a small budget.
- Why it works: Solid single-color blocks knit into saturated sweeps within about six weeks.
- Best for: New gardeners, renters, fast seasonal impact.
- Key elements: single-color blocks, two-thirds spacing, regular water and feed, annual redesign.

13. Mailbox or Lamppost Circle
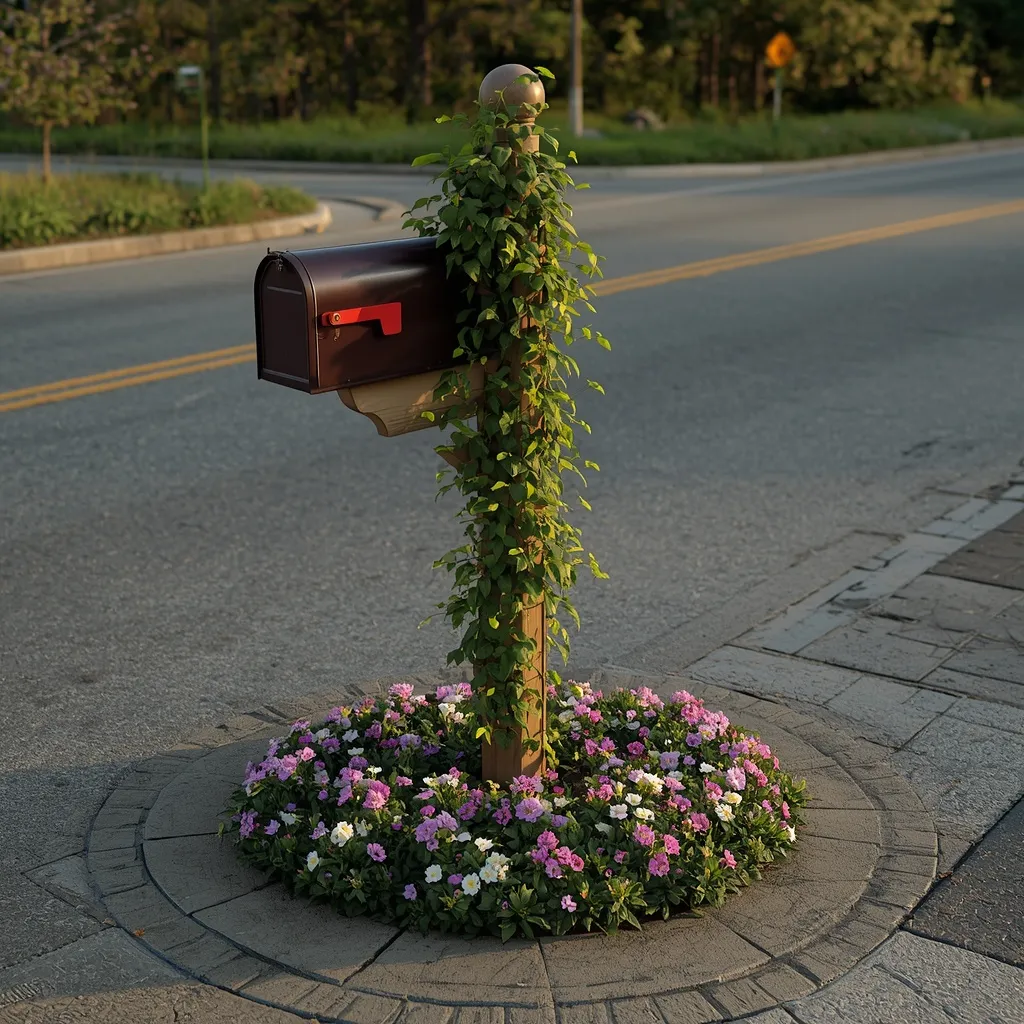
A small circular bed around a mailbox or lamppost turns a plain post into a planted feature: low mounding flowers ringing the base, with something climbing or trailing softening the upright. Compact and charming, it’s the smallest bed with the biggest curb-appeal return. Neat, cheerful, and quick to build.
Keep the circle modest, around 90 cm to 1.2 m (3–4 ft) across, and plant low mounding perennials or annuals that won’t obscure the mailbox door or block the post’s function, staying under about 45 cm (18 in). Add a compact climber only if the post can take it. Two practical cautions: check local rules on planting near roadside mail posts, and keep plants clear of sightlines at a driveway entrance. This suits front yards, roadside plots, and anyone wanting a weekend project with instant effect.
- Why it works: A small ring of low planting turns a functional post into a designed feature.
- Best for: Front yards and roadside plots; weekend projects.
- Key elements: 90 cm–1.2 m circle, plants under 45 cm, access kept clear, sightlines checked.
14. Narrow Fence-Line Strip
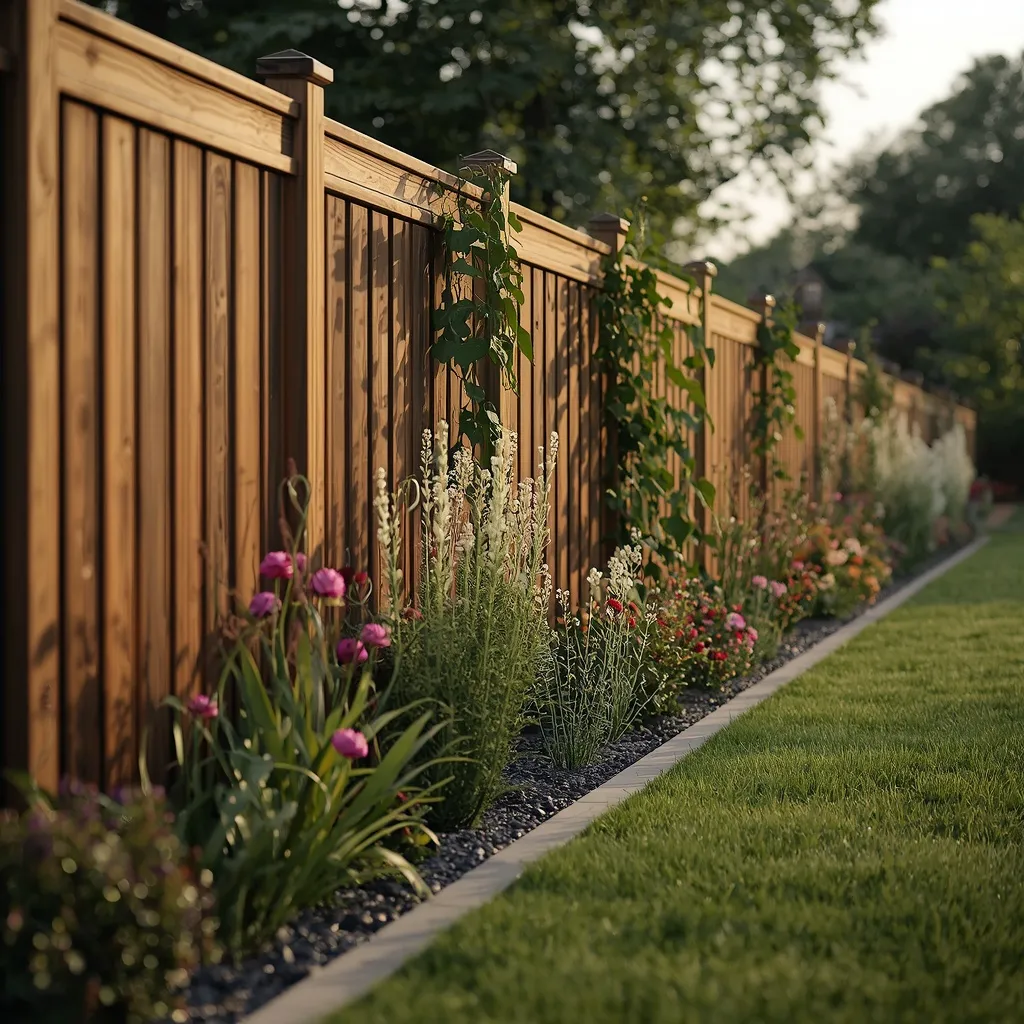
A narrow strip along a fence makes use of the tightest ground: a slim run of upright, well-behaved plants using the fence as a green backdrop. Efficient and tidy, a strip bed proves you don’t need depth to have a border. Slim, vertical, and space-smart.
Where you only have 45–60 cm (18–24 in) of depth, use two tiers rather than three, upright plants at the back against the fence, low edgers in front, and lean on vertical space by training a climber up the fence itself. Choose narrow, upright growers rather than spreading ones, since a wide plant in a narrow bed will flop across the path. Leave a small gap between plants and the fence for airflow and maintenance access. This suits side returns, narrow city gardens, and boundary lines.
- Why it works: Two tiers plus vertical climbing space makes a shallow strip feel like a real border.
- Best for: Side returns, narrow urban gardens, boundaries.
- Key elements: 45–60 cm depth, two tiers only, upright growers, climber on the fence, airflow gap.
15. Kidney-Shaped Lawn Bed
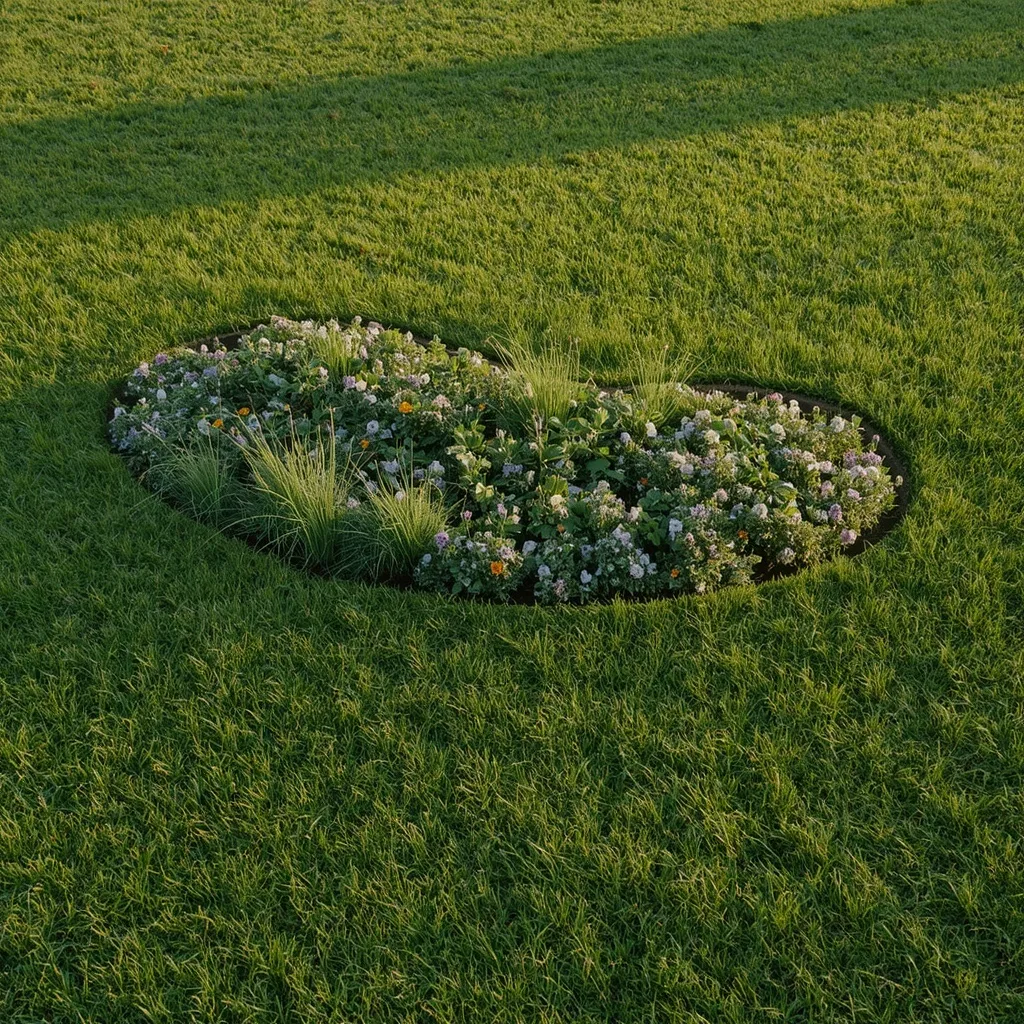
A kidney-shaped bed curves gently into a lawn with one soft concave sweep: an organic outline that feels natural rather than cut out with a template. Relaxed and flowing, the kidney shape suits informal gardens beautifully. Curvy, soft, and easy on the eye.
Lay the shape out with a hose and keep the curve broad, one gentle inward sweep is enough, since multiple wiggles look fussy and are miserable to mow around. Make sure every curve has a radius your mower can follow without a three-point turn, generally at least 60 cm (2 ft). Plant the widest part of the bed with the tallest material so the shape reads clearly from a distance. This suits informal and family gardens, and it’s an easy first bed to cut into an existing lawn.
- Why it works: One broad concave sweep reads as natural while staying easy to mow around.
- Best for: Informal and family gardens; first lawn beds.
- Key elements: hose-marked kidney, one gentle sweep, 60 cm minimum curve radius, height at the widest point.
16. Terraced Slope Bed
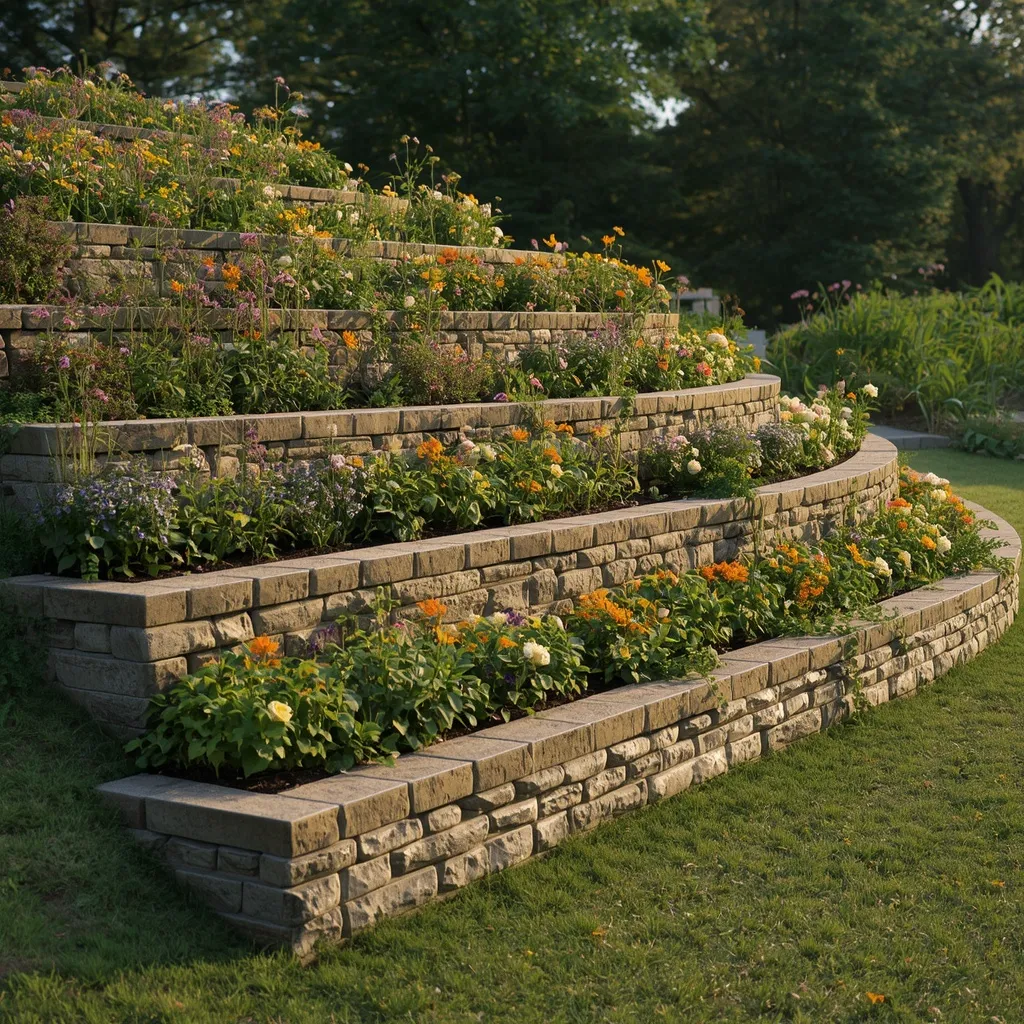
A sloped bed becomes a series of planted terraces: low retaining walls stepping down the hillside, each level holding its own band of planting. Structural and problem-solving, terracing turns unusable slope into the most interesting bed in the garden. Stepped, sculptural, and genuinely practical.
Break a slope into terraces with low retaining walls no more than about 60 cm (2 ft) high each, which most competent DIYers can build safely, anything taller usually needs proper engineering and often permission, so check local building rules. Terracing stops rainwater sheeting down and washing soil away, and each level holds moisture for its plants. Plant trailing species at the wall edges to soften the stonework. This suits sloping gardens, erosion-prone banks, and anyone with ground too steep to plant conventionally.
- Why it works: Level terraces stop soil washing downhill and make a steep bank plantable.
- Best for: Sloping gardens and erosion-prone banks.
- Key elements: walls under 60 cm each, checked local rules, trailing plants at edges, water retained per level.
17. Budget Stone-Edged Bed
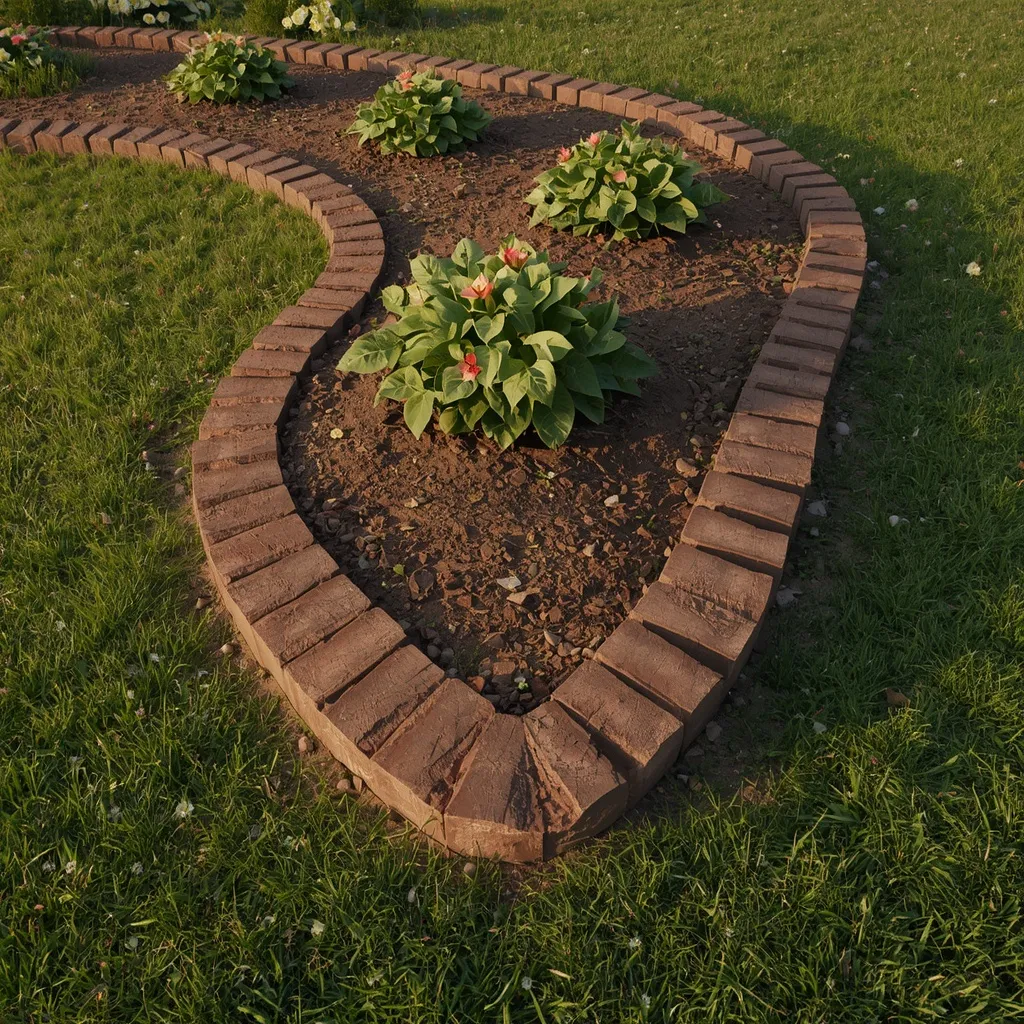
A bed edged with reclaimed stone or brick looks established from day one: a simple planting held by a hand-laid border of salvaged materials. Thrifty and characterful, cheap edging does the same job as expensive edging. Rustic, tidy, and nearly free.
Edge with what you can source cheaply, reclaimed bricks laid on edge, local stone, log rolls, or bricks set at an angle for a traditional sawtooth edge, bedding each piece into a shallow trench about 5 cm (2 in) deep so it doesn’t shift underfoot. A defined edge is what separates a bed that looks maintained from one that looks like it’s dissolving into the lawn. Set edging flush enough to mow over where possible, which saves hours of strimming. This suits budget gardeners, rental gardens, and first-time bed builders.
- Why it works: A defined hand-laid edge makes a simple planting look maintained and deliberate.
- Best for: Budget and rental gardens; first beds.
- Key elements: reclaimed brick or stone, 5 cm bedding trench, mow-over height where possible.
18. Pollinator-Friendly Bed
A pollinator bed hums with life: overlapping waves of nectar-rich flowers timed so something is always blooming, with bees and butterflies working it from spring to autumn. Purposeful and beautiful, a bee bed earns its space twice over. Busy, colorful, and genuinely useful.
Plan for continuous bloom by choosing plants across three windows, spring, midsummer, and late season, and plant each species in a patch of at least 1 m² (about 10 sq ft) where space allows, since pollinators find larger patches far more easily than scattered singles. Single-flowered varieties give better nectar and pollen access than heavily doubled ornamental forms. Avoid spraying insecticides on or near flowering plants; if pest control is unavoidable, follow label guidance and apply outside flowering. This suits wildlife gardeners, full-sun beds, and families teaching children about nature.
- Why it works: Overlapping bloom windows in large patches keeps pollinators fed all season.
- Best for: Wildlife gardeners; family gardens.
- Key elements: three bloom windows, 1 m² patches, single-flowered forms, no spraying on flowers.

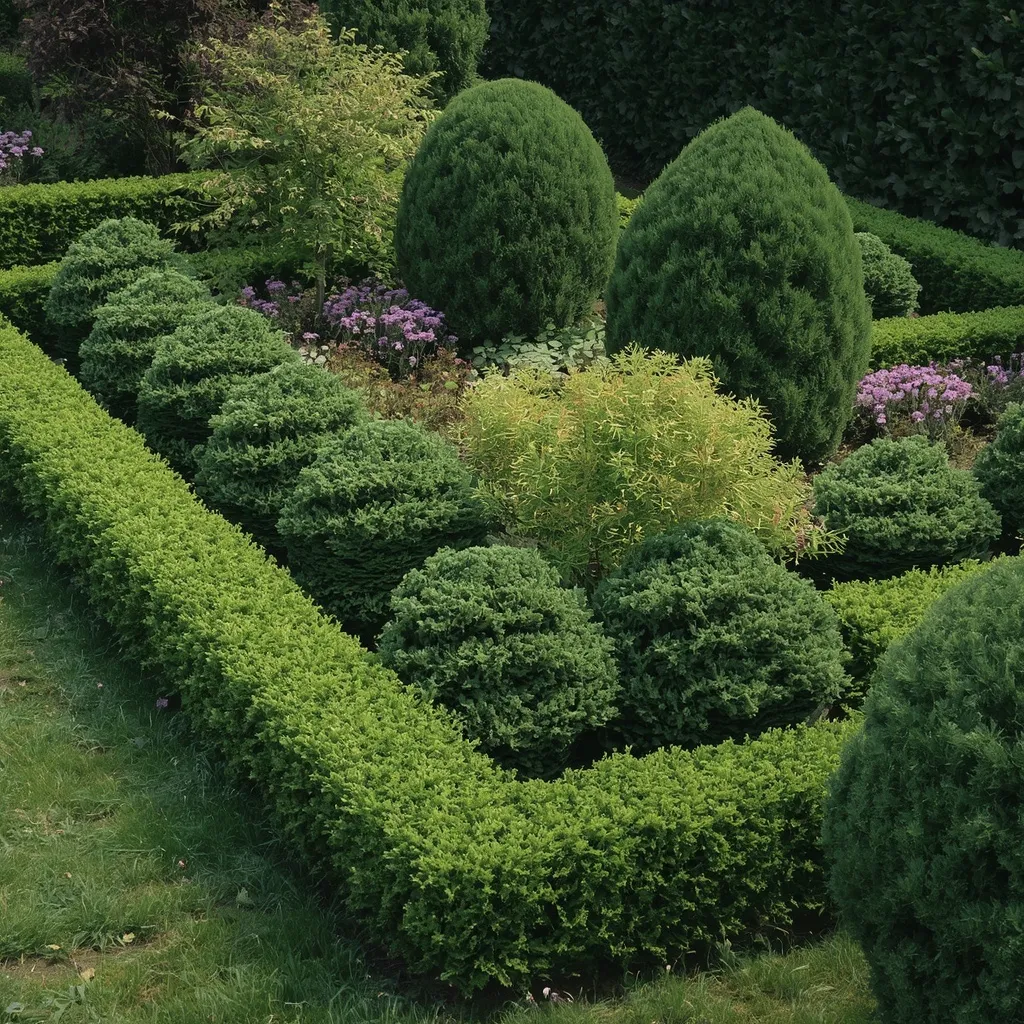
19. Evergreen Structure Bed
An evergreen-backboned bed looks good in February as well as June: clipped and mounding evergreens forming permanent shapes, with flowering perennials filling between them. Reliable and architectural, evergreens are the skeleton every bed needs. Solid, green, and never bare.
Set evergreen shrubs first as the permanent framework, roughly one every 1.5–2 m (5–6 ft) along a border, repeated for rhythm, then plant perennials into the gaps between them. This is the layout trick that stops a perennial bed looking like bare mulch for five months of the year. Vary evergreen forms, a rounded mound, an upright, a low spreader, rather than repeating one shape. This suits cold-winter climates, front yards seen year-round, and low-maintenance gardeners.
- Why it works: A permanent evergreen framework keeps the bed furnished through winter.
- Best for: Cold-winter climates; year-round front yards.
- Key elements: evergreens every 1.5–2 m, varied forms, perennials filling gaps, winter interest.
20. Walkway Ribbon Bed
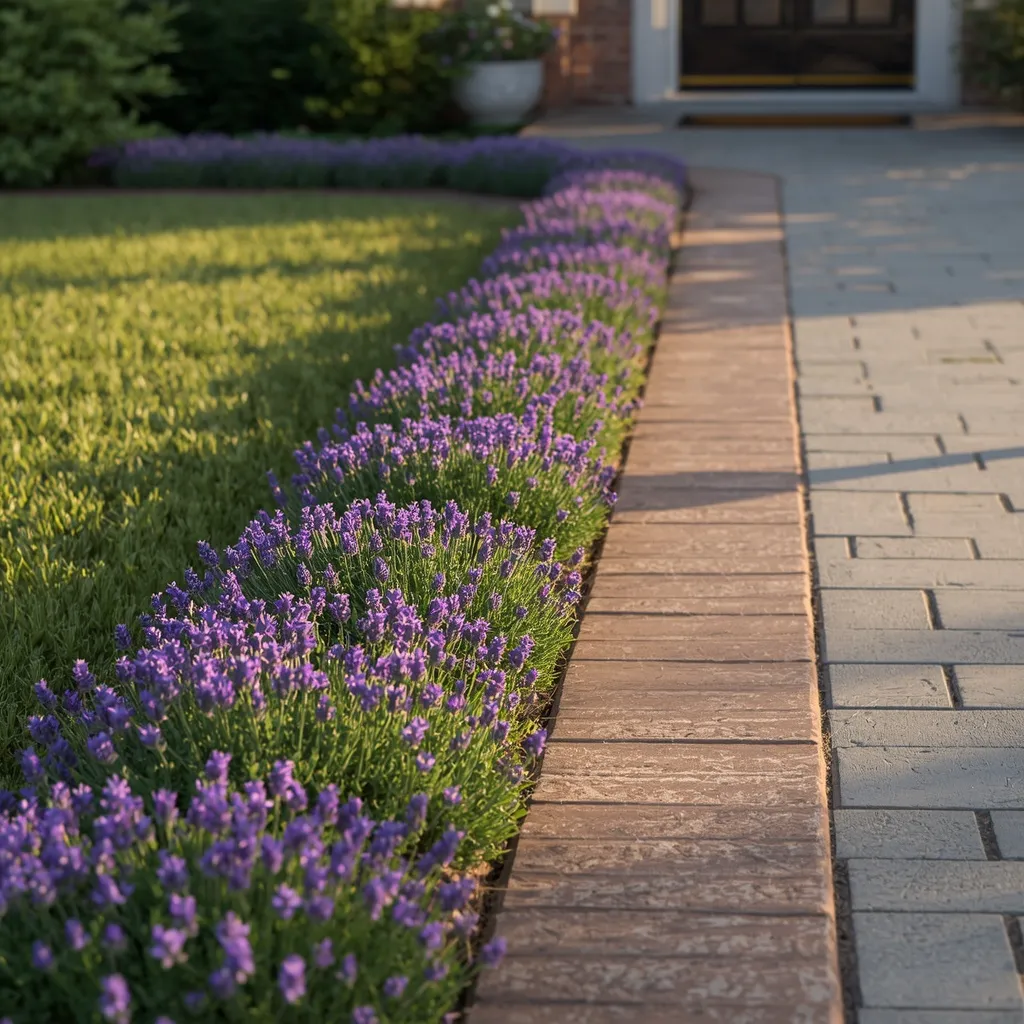
A ribbon bed follows a path: a continuous band of low planting running alongside a walkway, softening the hard edge and guiding people toward the door. Directional and welcoming, a path-side bed makes an arrival feel considered. Flowing, low, and purposeful.
Keep path-side planting low and set back, under about 45 cm (18 in) and 15–20 cm (6–8 in) from the paving, so nothing flops across the walking surface when wet, which is both annoying and a genuine slip and trip hazard. Repeat one or two plants the whole length for rhythm rather than changing every meter. Fragrant plants like lavender or catmint are worth siting here, where people brush past them. This suits front paths, side walkways, and anyone wanting a welcoming approach.
- Why it works: Low, set-back repetition guides the eye along the path without obstructing it.
- Best for: Front paths and walkways.
- Key elements: plants under 45 cm, 15–20 cm setback, one or two repeated species, fragrance at brushing height.
21. Moonlight White Garden
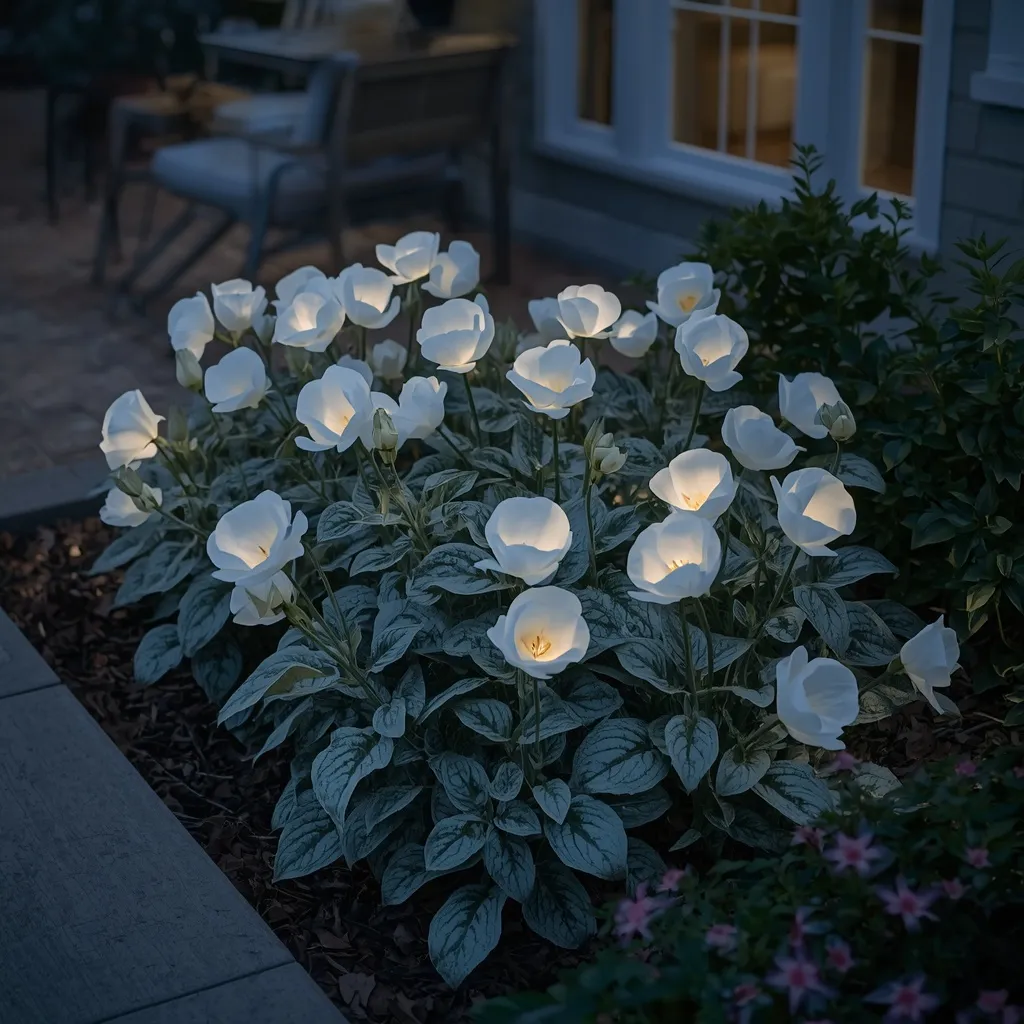
A white garden glows after dark: silver foliage and white flowers catching the last light and moonlight, staying visible long after colored blooms have disappeared into the dusk. Elegant and atmospheric, a white bed is designed for evenings. Luminous, cool, and quietly dramatic.
Restrict the palette to white flowers and silver or grey foliage, siting the bed where you’ll actually be in the evening, beside a patio, along a path, or under a window you sit by. White and pale silver reflect low light far better than saturated colors, which is why the bed keeps working after sunset. Add night-scented plants such as nicotiana for a second layer of evening interest. This suits evening entertainers, patio-side beds, and anyone home mainly after work.
- Why it works: White and silver reflect low light, staying visible when colors disappear at dusk.
- Best for: Patio-side beds; evening gardeners.
- Key elements: white flowers, silver foliage, sited near evening seating, night-scented additions.
22. Layered Shade Bed
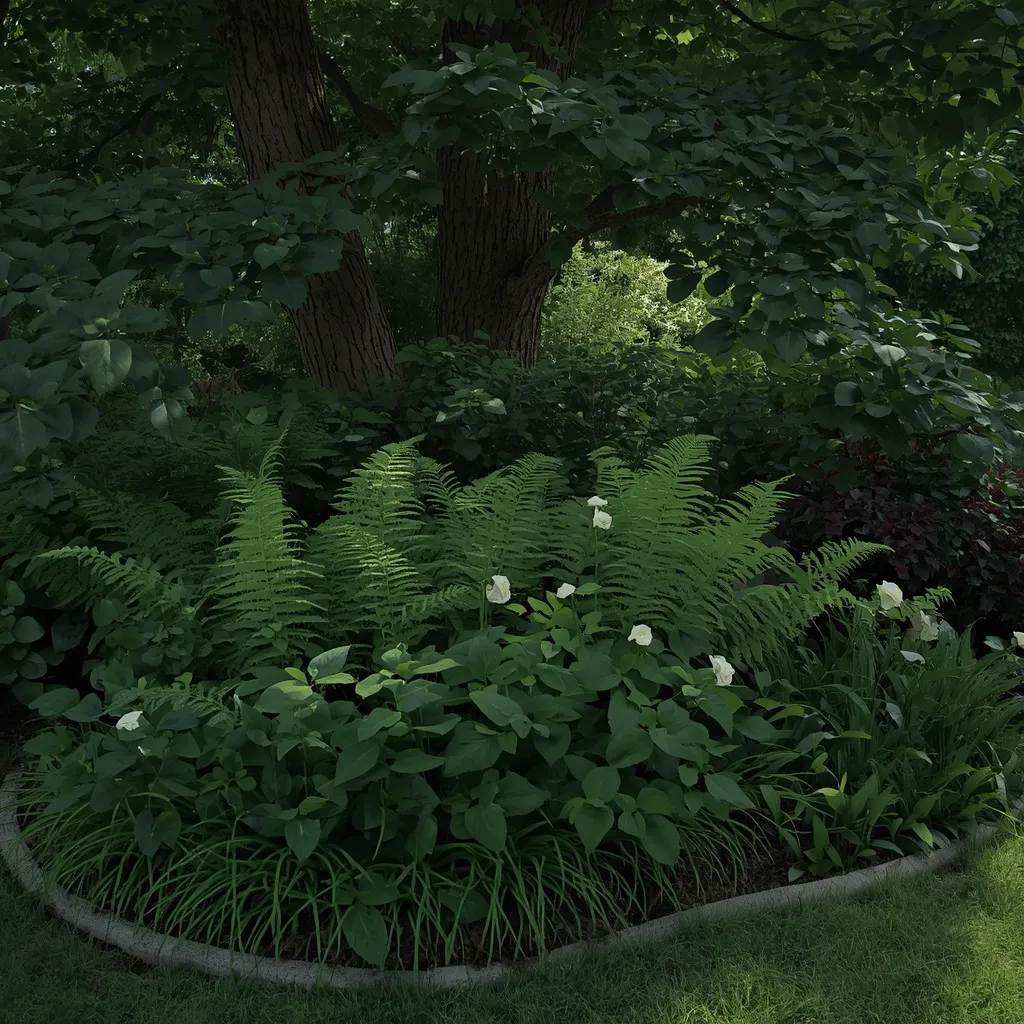
A shade bed under trees is all about foliage: hostas, ferns, and heucheras layered in contrasting leaf shapes and tones, with pale flowers lifting the gloom. Cool and textural, shade planting is quieter but no less designed. Lush, leafy, and restful.
Design shade beds around leaf shape, size, and color rather than flowers, broad hosta leaves against fine fern fronds against deep heuchera tones, and use pale or white flowers, which show up in low light where deep purples vanish. Dry shade directly under mature trees is the hardest situation in any garden, so improve the soil with organic matter and water well for the first two seasons while plants establish. Avoid severing major tree roots when digging. This suits north-facing beds, gardens with mature trees, and anyone frustrated by a dark corner.
- Why it works: Contrasting leaf shapes carry a shade bed where flower color can’t.
- Best for: North-facing beds; gardens under mature trees.
- Key elements: foliage contrast, pale flowers, improved soil, careful digging around tree roots.
23. Gravel and Rock Dry Bed
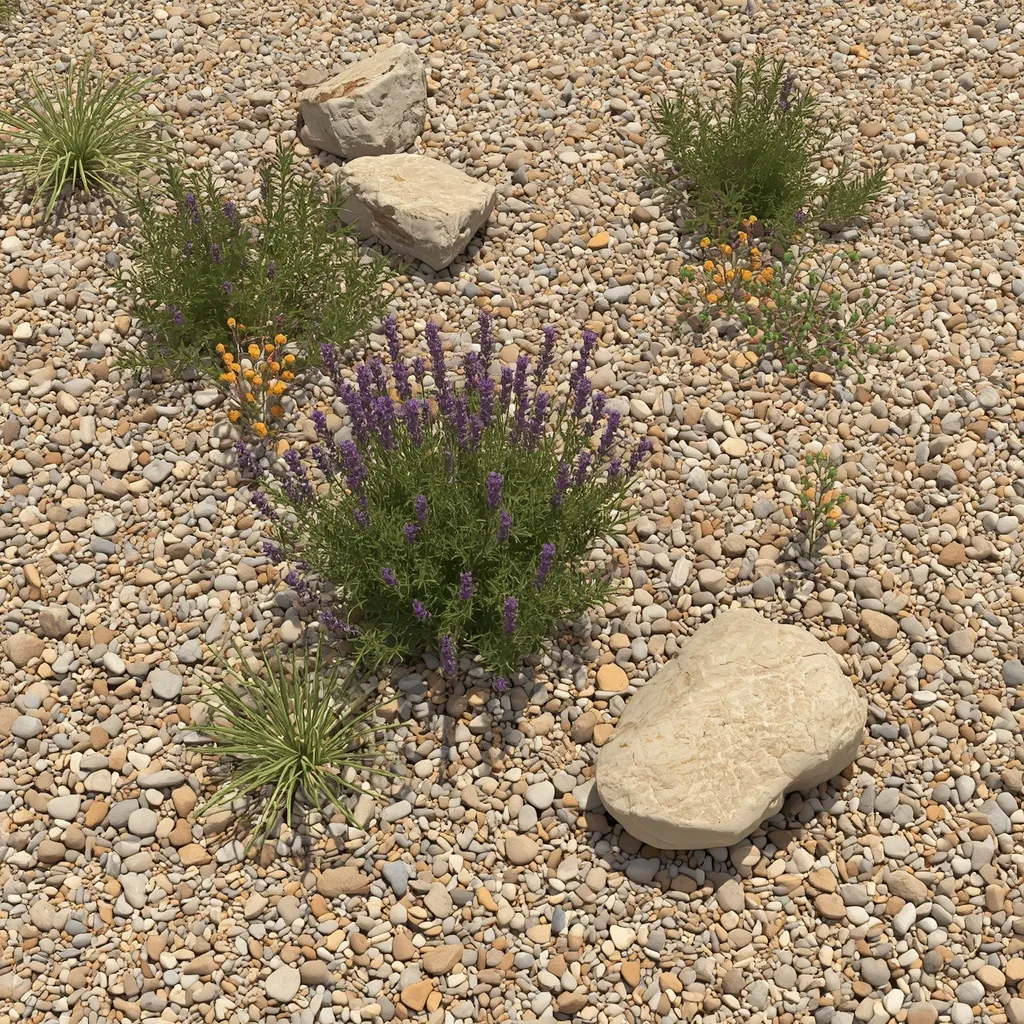
A gravel bed is sun-baked and sculptural: drought-tolerant plants set into stone mulch, with rocks and low mounding forms creating a Mediterranean or alpine feel. Tough and water-wise, gravel gardens thrive where borders struggle. Sparse, textural, and beautifully low-effort.
Plant sun-loving, drought-tolerant species, lavender, sedum, thyme, santolina, into free-draining soil, then top with 5–7 cm (2–3 in) of gravel, which suppresses weeds and keeps plant collars dry. This layout suits hot, dry, poor-soil sites where conventional beds fail. It’s genuinely water-wise once established, though every new planting needs regular watering through its first season regardless of how drought-tolerant it becomes later. Space plants generously and let the gravel show. This suits hot climates, water restrictions, and low-maintenance gardeners.
- Why it works: Gravel mulch suppresses weeds and keeps drought-lovers dry at the crown.
- Best for: Hot dry sites, poor soil, water-conscious gardens.
- Key elements: drought-tolerant species, free-draining soil, 5–7 cm gravel, generous spacing, first-season watering.
24. Cutting Garden Rows
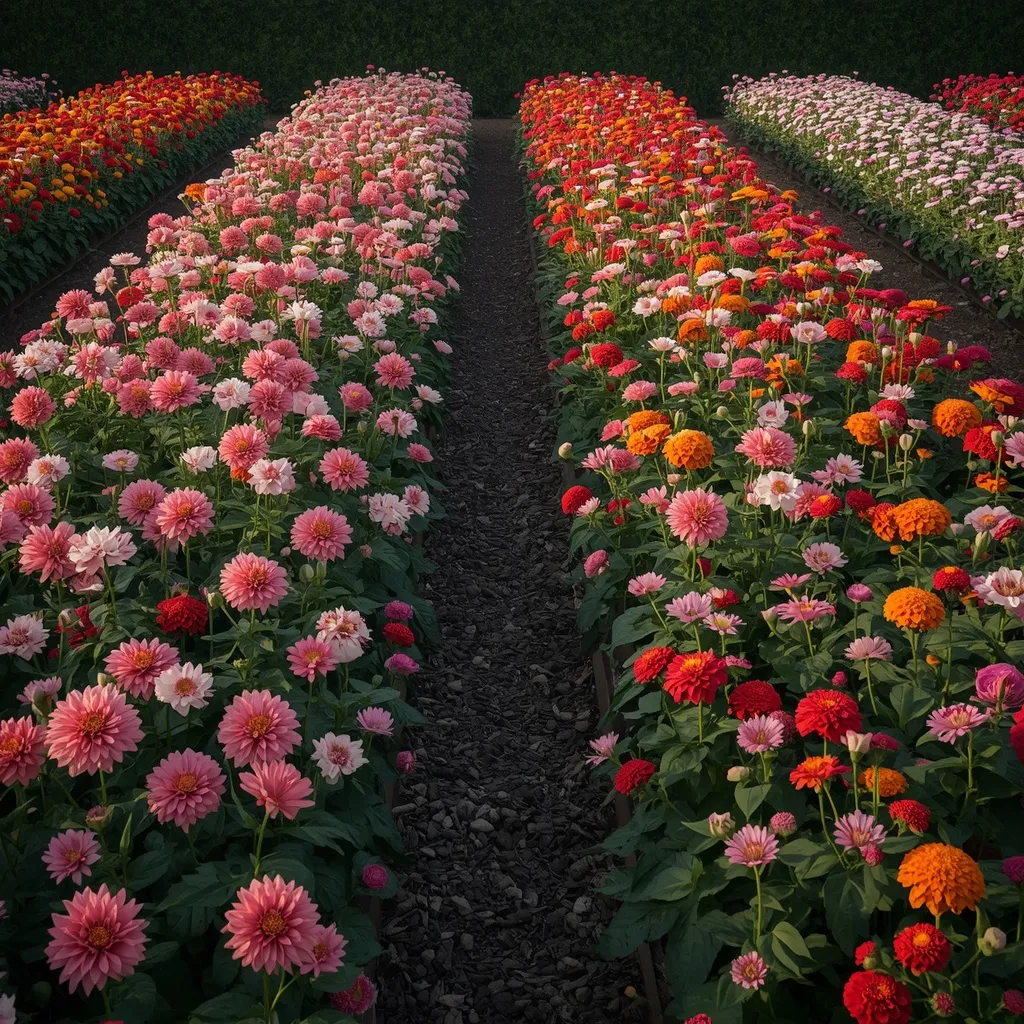
A cutting bed is planted for the vase rather than the view: straight rows of dahlias, zinnias, cosmos, and sweet peas grown like a productive crop, ready to be picked armfuls at a time. Practical and abundant, a cutting bed means flowers indoors all summer. Ordered, generous, and endlessly productive.
Plant in straight rows with 45–60 cm (18–24 in) between them so you can walk in and cut without trampling, and grow varieties with long stems specifically bred for cutting. The key habit is picking regularly: most annual cut flowers produce more the more you harvest, so cutting every few days genuinely increases the yield. Site the bed somewhere out of the main view, behind a hedge or beside a shed, since a picked-over cutting bed looks patchy by design. This suits keen gardeners, flower arrangers, and anyone with space for a working bed.
- Why it works: Row planting and regular cutting maximize yield the way a productive crop does.
- Best for: Flower arrangers; gardens with space for a working bed.
- Key elements: rows 45–60 cm apart, long-stemmed cutting varieties, harvest every few days, sited out of view.
How Do You Lay Out a Flower Bed?
Lay out a flower bed by settling three things in order: shape, tiers, and spacing. Mark the outline on the ground with a hose or string and view it from the house before cutting. Then assign heights, tallest at the back of a border or down the center of an island bed, stepping down to low edgers at the front. Finally, space every plant to its mature width and group species in odd-numbered drifts of three, five, or seven.
Planning a garden that works in practice, not just in photographs, is central to the Sunday Abode approach. If your project is specifically out front, our guide to flower beds for the front yard covers plant choices for curb appeal in more detail. For more on shaping an outdoor space, browse the rest of our garden design ideas.
How Deep Should a Flower Bed Be?
Bed depth decides how many height tiers you can fit, and it’s the measurement most people get wrong. A bed that’s too shallow forces every plant into a single line; a deep bed lets you build real layers. Use this quick reference when marking out.
| Bed depth | Tiers it holds | Max plant height | Best for |
| 30–45 cm (12–18 in) | One | Under 30 cm (12 in) | Path edging, tight strips |
| 60 cm (2 ft) | Two | Around 60 cm (2 ft) | Fence lines, narrow yards |
| 90 cm (3 ft) | Two, generous | Around 90 cm (3 ft) | Foundation beds |
| 1.2 m (4 ft) | Three | 1.2 m+ (4 ft+) | Classic borders |
| 1.8 m+ (6 ft+) | Three or more | No practical limit | Island beds, deep borders |
Safety & practical notes: before digging any new bed, have underground utilities located, gas, electricity, water, and telecoms lines are often shallower than people expect. In the United States this is a free call to 811; the UK, Australia, Canada, and most of Europe have equivalent services, so check your national provider before breaking ground. Wear gloves and sturdy footwear, use eye protection when cutting edging materials, and lift with your legs when moving stone or soil. Several popular garden plants, including foxglove, delphinium, lily of the valley, and daffodil bulbs, are toxic if eaten, so site them thoughtfully in gardens used by children, and check the ASPCA toxic plant lists for pet-specific guidance. Never pile mulch against tree trunks or plant stems, since trapped moisture rots bark. Check locally before planting vigorous non-native grasses or spreaders, as some are invasive in certain regions and your local extension service or equivalent authority will have region-specific guidance.
Frequently Asked Questions
How do you lay out a flower bed for beginners?
Start with shape, then tiers, then spacing. Mark the outline with a garden hose and look at it from the house windows before cutting anything, since shapes look very different from a distance. Place the tallest plants at the back of a border or down the center of an island bed, stepping down to low edgers at the front. Then space everything to mature width and plant in groups of three or five.
How deep should a flower bed be?
For a classic three-tier border you need at least 1.2 m (4 ft) of depth. A 90 cm (3 ft) bed gives you two generous layers and suits foundation planting along a house, while 60 cm (2 ft) supports two modest tiers along a fence. Anything under about 45 cm (18 in) realistically holds a single row of low edging plants. Depth, not length, is what limits a bed’s design.
What should you plant in the front of a flower bed?
Low, mounding, or spreading plants under about 30 cm (12 in) work best at the front, where they soften the edge and hide the bare stems of taller plants behind them. Choose things that look tidy for a long season rather than flowering briefly, since the front edge is the most visible part. Repeating one or two edging plants along the length ties the whole bed together.
How far apart should you space plants in a flower bed?
Space according to each plant’s mature width, not the size of the pot it came in, check the label and allow that full spread. This means a correctly planted new bed looks slightly sparse in its first year, which is normal and correct. Planting too closely is the most common beginner mistake and leads to overcrowding, poor airflow, and more disease within two or three seasons.
What flower bed shape works best?
It depends on your garden’s style and how the bed is viewed. Curved and kidney shapes suit informal gardens and read naturally in lawns; squares and rectangles suit formal or modern spaces and small tidy plots; circles make strong focal points; and corner or triangular beds resolve awkward angles. Whatever shape you choose, keep curves broad enough for a mower to follow in one pass.
What’s the cheapest way to edge a flower bed?
Reclaimed brick, local stone, and log rolls all cost little or nothing and look better with age. Bed each piece into a shallow trench about 5 cm (2 in) deep so it stays put, and set edging low enough to mow over where you can, which saves considerable trimming time. A crisply cut spade edge with no materials at all is free and looks excellent, though it needs recutting once or twice a season.
How do you keep a flower bed looking good all year?
Build in permanent structure rather than relying only on flowers. Set evergreen shrubs roughly every 1.5–2 m (5–6 ft) as a framework and plant perennials into the gaps between them, which prevents the bare-mulch look through winter. Ornamental grasses and plants with strong seed heads extend interest into the cold months, and leaving them standing until late winter also feeds birds.
Conclusion
The difference between a bed that looks planted and one that looks designed comes down to a few decisions made before anything goes in the ground. The best flower bed design layouts settle shape first, then height tiers, then spacing to mature width, and repeat plants in drifts so the eye reads rhythm rather than randomness. Whether you’re cutting a curved island into a lawn, terracing a slope, or squeezing two tiers along a fence, mark it out with a hose and live with the shape for a day before you commit. For more ways to plan an outdoor space, explore the garden design ideas collection on Sunday Abode and save the layout that fits your plot.