

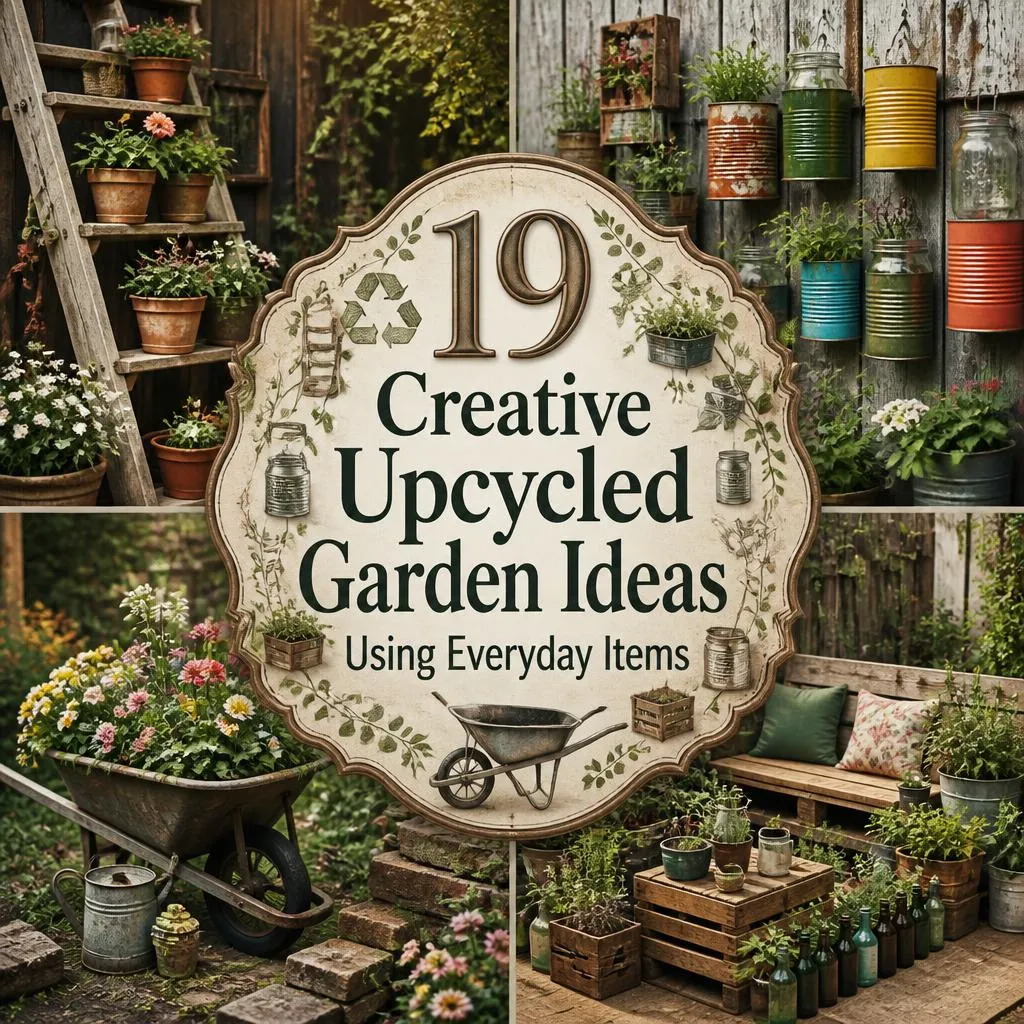
A cracked teapot, a rusted wheelbarrow, and a pair of worn rain boots are not trash, they are the beginning of a garden with real personality. Upcycled garden ideas turn ordinary castoffs into planters, art, and structure that no big-box shelf can replicate, and they do it without spending much or sending anything to a landfill. Whether the space in question is a sprawling backyard or a narrow balcony, the objects already sitting in a garage, kitchen drawer, or the nearest thrift store can become the feature everyone asks about. This guide walks through nineteen genuinely distinct upcycling projects, each with the styling logic, practical steps, and safety notes needed to build them with confidence, so the finished garden feels curated rather than cluttered.
This kind of resourceful, character-first approach to outdoor styling sits at the center of everything Sunday Abode publishes, whether the room in question is a kitchen or a garden bed. The ideas below are grouped into four categories, from purely decorative yard art to functional structures built to last a full growing season.
Whimsical Yard Art From Everyday Objects
These pieces are decorative first, though several double as functional planters too. Each one earns its place by being looked at as much as it is planted.
1. Ladder Plant Display Tower
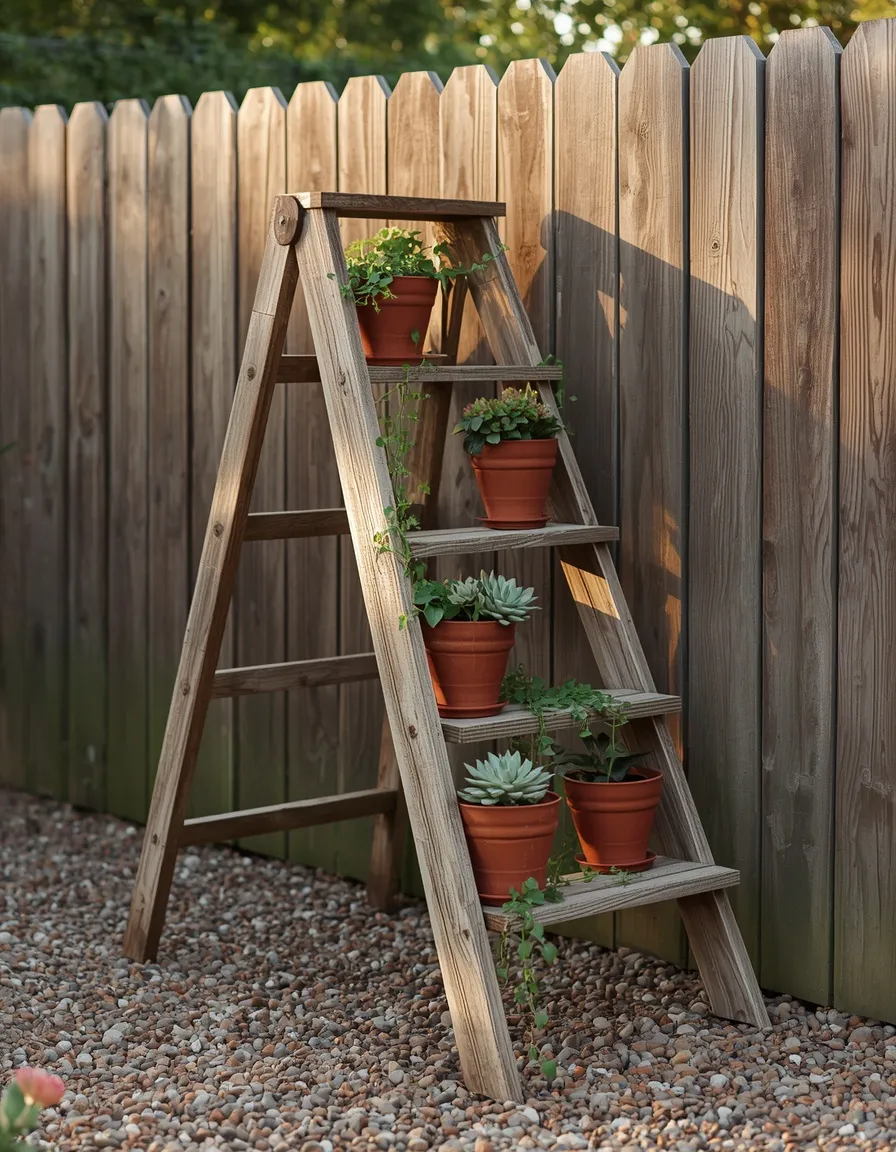
Lean a weathered wooden step ladder against a sunny wall or fence and stagger terracotta pots across its rungs, and a forgotten tool becomes the vertical focal point a small garden has been missing. The rungs naturally stair-step plants back from the viewer, so trailing ivy or petunias spill from the top while compact succulents sit within easy reach near the bottom.
A freestanding A-frame step ladder is the safer choice because it holds its own footing on grass, gravel, or a patio without extra bracing; a straight extension ladder needs to rest against a solid wall and should be secured with a strap or screw eye so it cannot slide sideways. Sand any rough or splintering rungs before setting pots on them, and keep the heaviest ceramic containers on the bottom two rungs rather than the top, since a high center of gravity is what causes these displays to tip in strong wind. This works especially well in narrow side yards or balconies where floor space for pots is limited, and it looks equally at home holding a cottage-style plant mix or a single repeated variety for a cleaner, more modern look.
- Solves the flat, single-level look of a typical container garden by adding height and tiers
- Ideal for narrow side yards, patios, and balconies with little ground space
- A-frame ladders offer built-in stability without extra hardware
- Works with both cottage-style plant mixes and single-variety modern displays
2. Wheelbarrow Flower Centerpiece
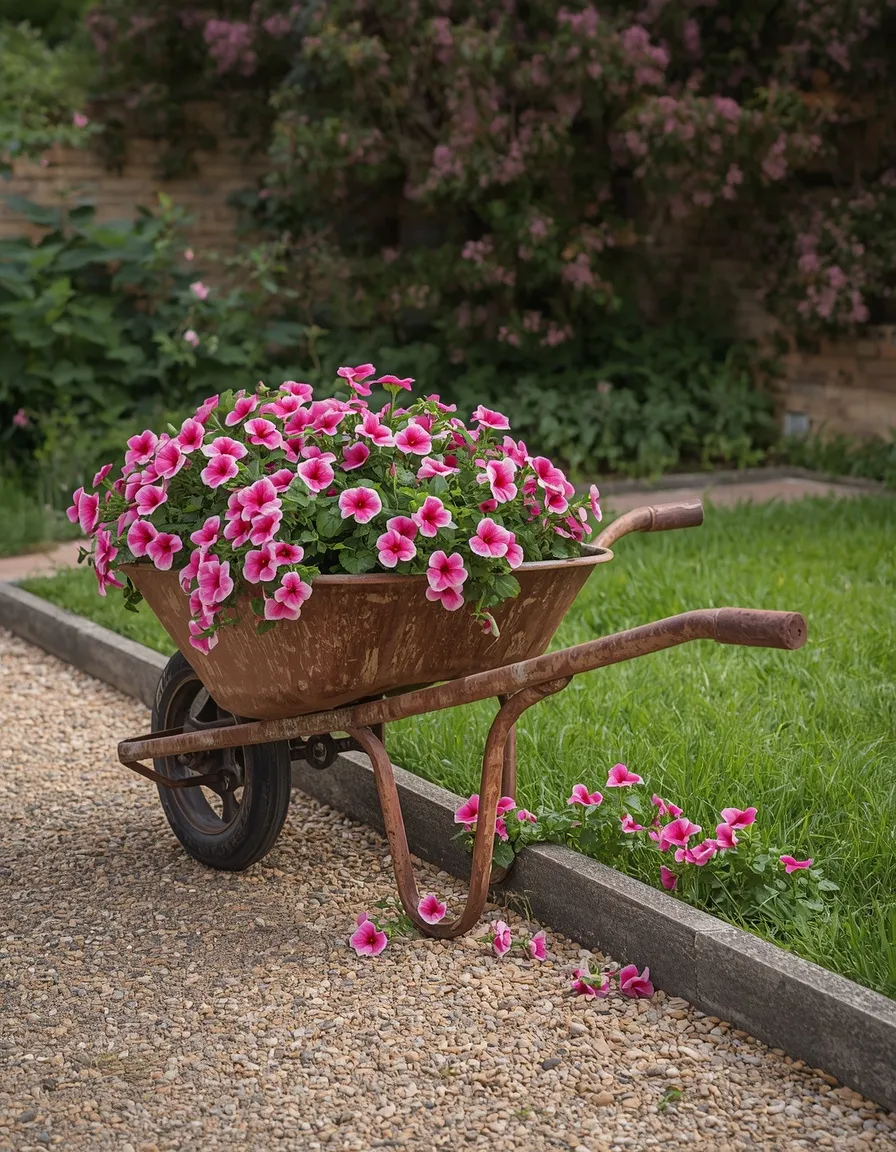
A retired metal or wooden wheelbarrow, filled to the brim with cascading annuals like petunias, lobelia, and sweet alyssum, reads like a still-life parked at the edge of a driveway or lawn. The natural curve of the tray does the hard work of composition, cradling a mounded planting the way a standard container rarely can.
Drill several drainage holes in the lowest points of the tray before filling it with a lightweight potting mix, since standing water will rust a metal wheelbarrow from the inside out within a season. Wooden wheelbarrows should be lined with landscape fabric or a plastic liner, slit for drainage, to slow rot in the wood. Position the piece where it gets at least four to six hours of sun for most flowering annuals, and tilt the handles slightly upward on a brick or paver for a more dynamic silhouette rather than a flat, parked look. A common mistake is leaving the wheel resting directly on damp soil, which speeds up rust and rot; set it on a paver or piece of slate instead.
- Instant, ready-made focal point for a driveway entrance or front lawn
- No building required, just drainage holes and a liner
- Movable, so it can be relocated as sun patterns shift through the season
- Works for both metal garden carts and wooden farmhouse-style wheelbarrows
3. Vintage Bathtub Planter Pond
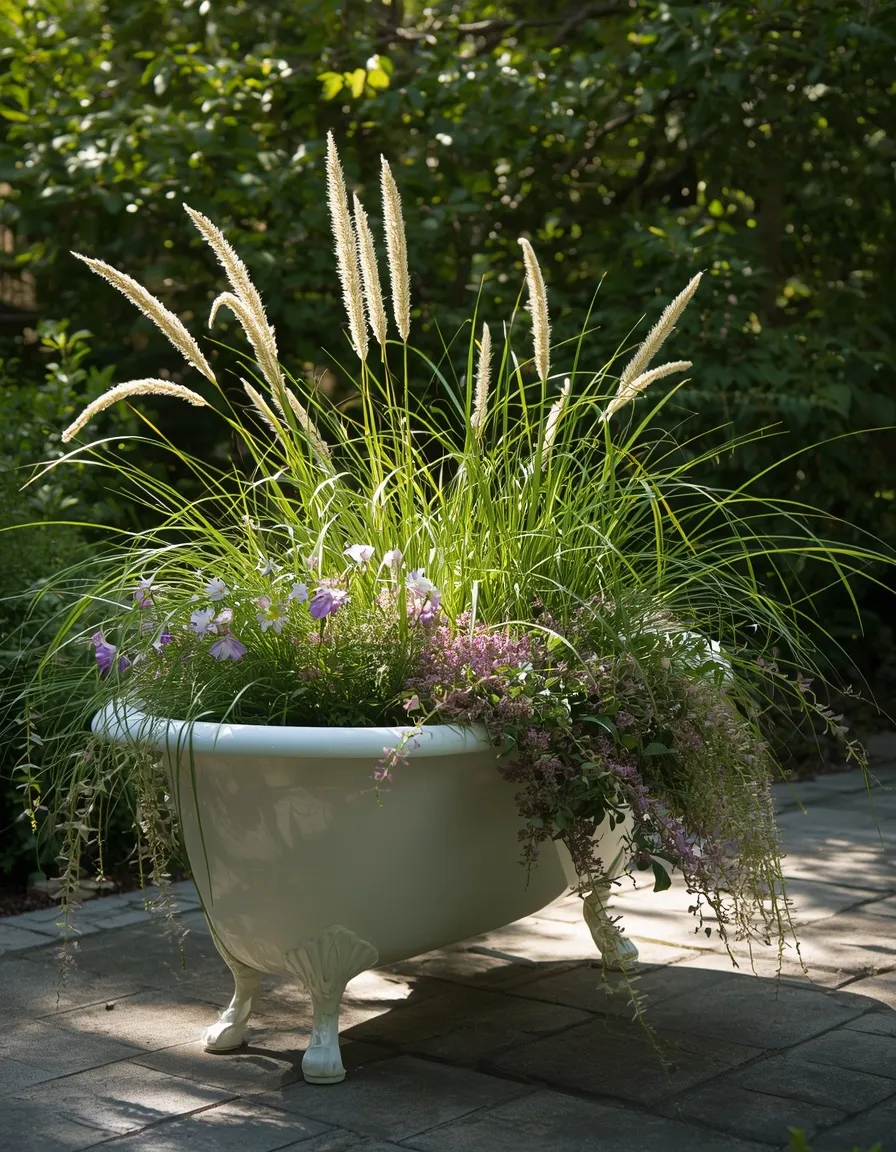
An old clawfoot or cast-iron tub pulled from a bathroom renovation has enough volume to become either a dramatic raised planter overflowing with ornamental grasses or a small still-water pond edged with river stone and marginal plants like pickerel weed. Its rolled edge and generous proportions give a garden a grounded, architectural anchor that a standard raised bed cannot match.
For a planter, have a professional core-drill several drainage holes through the enamel and cast iron at the lowest point, since cast iron is too hard for a standard masonry bit and will crack the enamel if forced. For a pond version, skip drainage entirely and add a small solar-powered pump to keep the water moving and reduce mosquito breeding. Cast-iron tubs are extremely heavy once filled, so set the tub on its final, level, compacted base before adding soil or water, since moving a full tub afterward is not realistic. Because these tubs often carry decades-old enamel, avoid sanding a chipped or discolored surface dry, and rinse the area thoroughly before planting anything edible nearby.
- Doubles as either a raised planter or a small wildlife-friendly water feature
- Rolled sides create a strong architectural anchor point in the garden
- Best positioned before filling, since a full cast-iron tub cannot easily be moved
- Works well as a centerpiece in cottage gardens and reclaimed-material landscapes
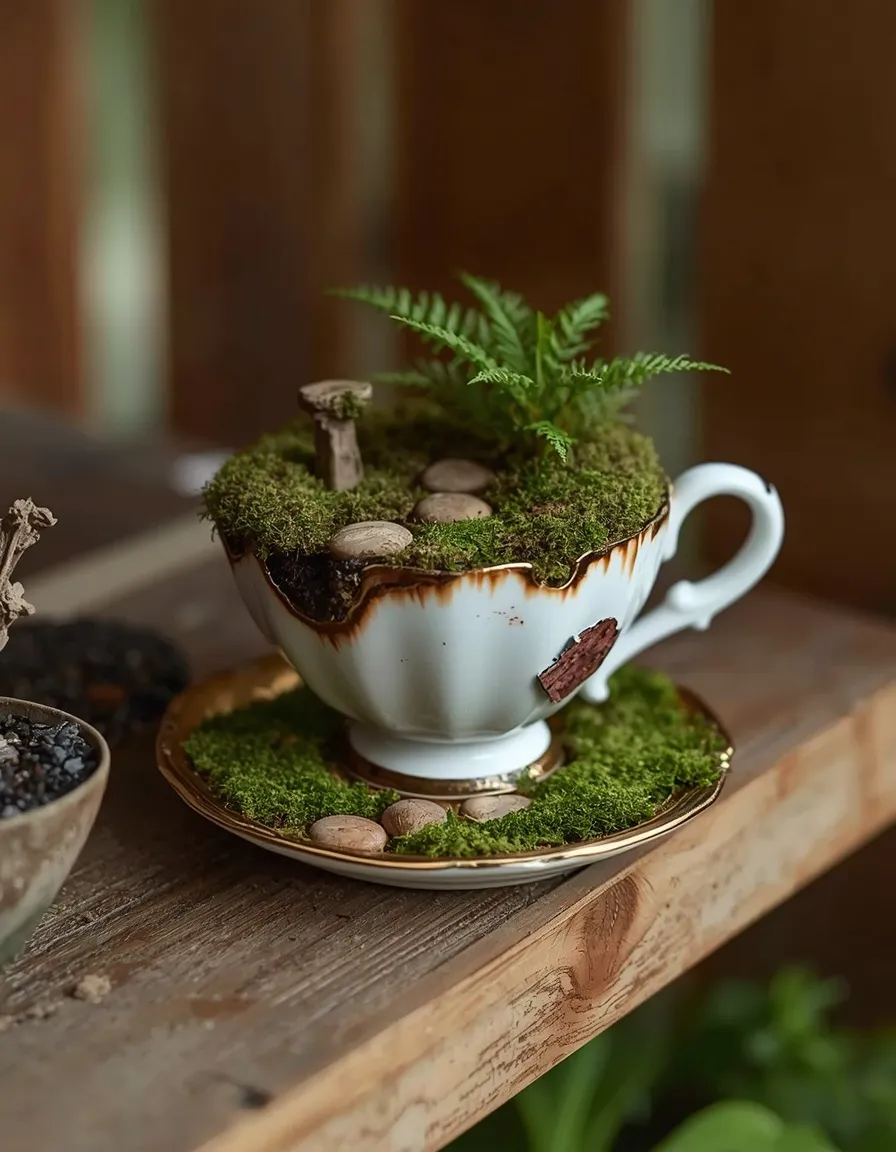
4. Teacup Fairy Garden
A single chipped teacup and saucer, planted with moss, a miniature fern, and a thumbnail-sized clay path, turns a windowsill or shaded garden ledge into a tiny scene that stops visitors mid-step. This is one of the simplest whimsical garden ideas to try first, since it needs no tools beyond a drill bit and costs almost nothing if the cups already exist in a cupboard.
Use a diamond-tipped drill bit with a slow, steady hand and running water to add one drainage hole to the bottom of the teacup, since dry-drilling ceramic almost always cracks it. Fill with a fast-draining succulent or moss mix rather than standard potting soil, which stays too wet in such a small vessel. Place the finished piece in dappled shade if it holds moss and ferns, or full sun if planted with tiny sedums, and group two or three cups of different heights on a stump or shelf for a more layered scene rather than a single lonely cup.
- Extremely low-cost and beginner-friendly, ideal for a first upcycling project
- Perfect scale for windowsills, entryway shelves, and shaded garden ledges
- Works as a thoughtful handmade gift when planted in a keepsake cup
- Groups well with other miniature pieces for a layered fairy garden vignette
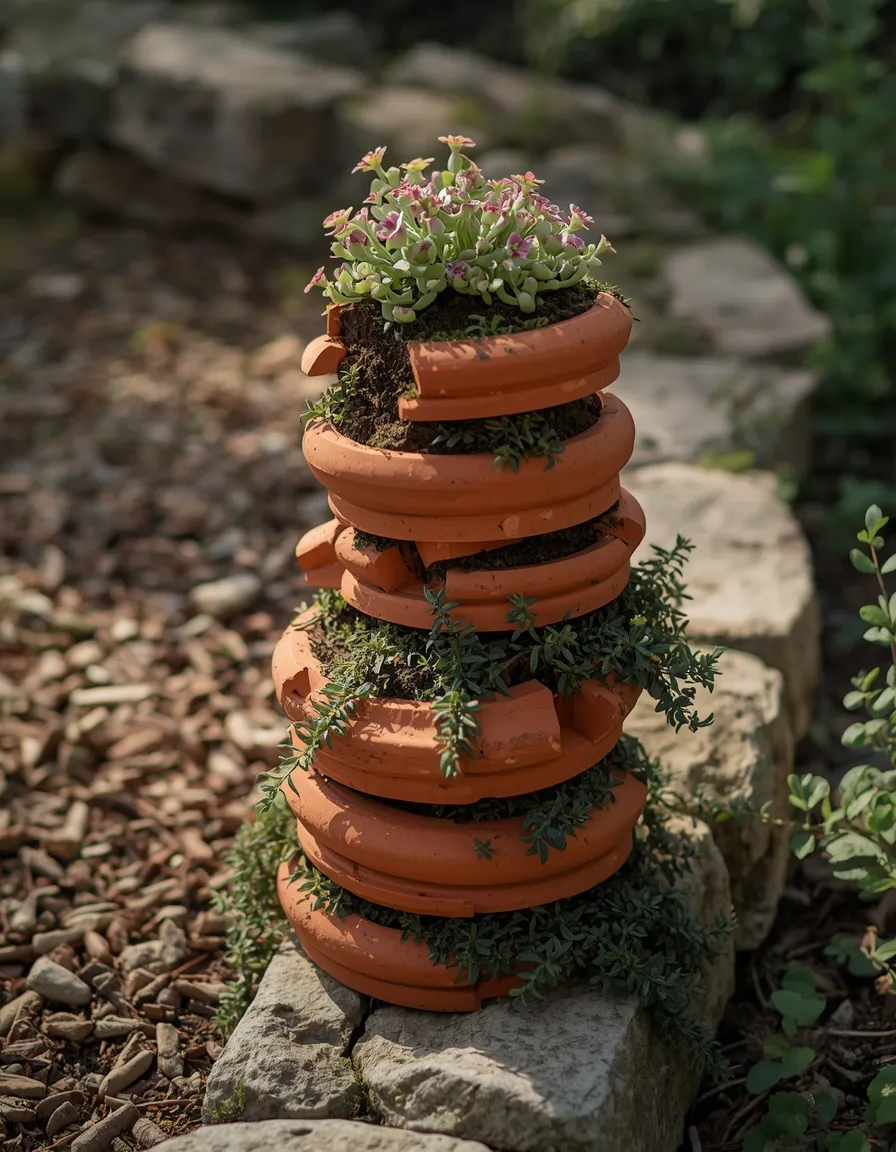
5. Broken Pottery Fairy Stack
Instead of tossing a cracked terracotta pot, stack the largest shard flat on the ground, lean the next size behind it at an angle, and tuck the smallest piece on top, then plant each tier with hens-and-chicks or creeping thyme to build a tiered ruin that looks decades old. The broken edges, once softened, read as intentional texture rather than damage.
Wear gloves when handling the shards and use a rasp or sandpaper wrapped around the broken rim to dull sharp points, since terracotta breaks into edges sharp enough to cut skin. Nest the pieces into the soil rather than stacking them freestanding, which keeps the arrangement stable even if someone brushes past it, and back-fill with grit-heavy soil so the shallow-rooted succulents that suit this project do not sit in moisture. This idea is best placed at the front of a border or along a path edge, where its low profile will not be lost behind taller plants, and it is a genuinely good way to use the two or three broken pots most gardeners already have in a shed.
- Rescues broken terracotta that would otherwise be thrown away
- Best positioned at border fronts or path edges where its low height reads clearly
- Sanding sharp edges first is a simple but essential safety step
- Suits drought-tolerant succulents and creeping ground covers that need little soil depth
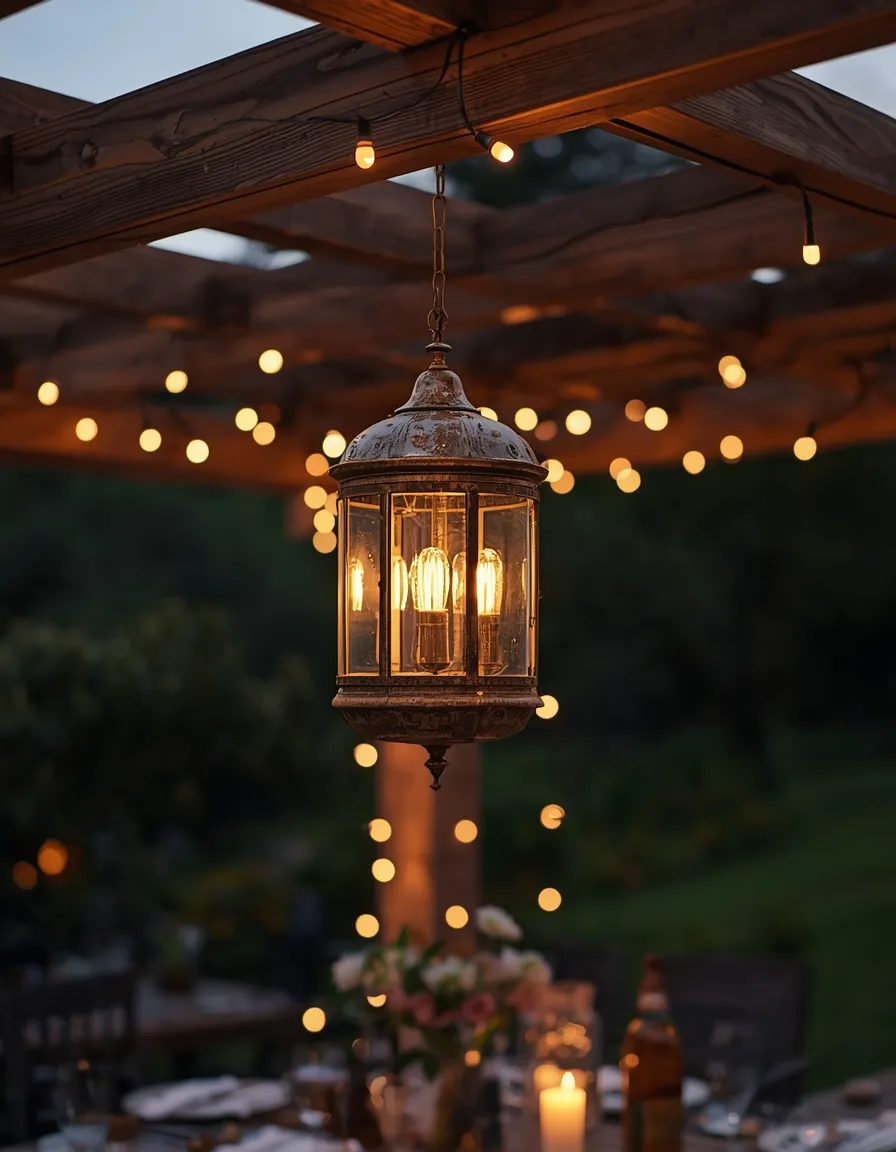
6. Chandelier Solar Light Feature
A tarnished brass or crystal chandelier, rewired with small solar-powered fairy lights in place of its original sockets, becomes an unexpectedly elegant focal point hanging from a pergola beam or an old tree branch, glowing softly once the sun goes down without a single outdoor extension cord in sight.
Strip out the original wiring completely rather than working around it, since old fixtures are not rated for outdoor moisture and mixing solar add-ons with household wiring creates a real electrical hazard; solar string lights threaded through the arms avoid that problem entirely because there is no mains current involved. Hang the chandelier from a load-rated hook or a thick branch, never from the fixture’s original decorative chain alone, and check the mounting point after the first few weeks, since wind sway loosens hardware faster outdoors than indoors. This works best over a dining area, a fire pit seating circle, or a garden arbor, where its light can be appreciated in the evening without competing with daylight glare.
- Removes the need for outdoor electrical wiring by relying on solar power
- Creates ambient evening light over patios, arbors, and fire pit seating
- Requires a sturdy, load-rated mounting point rather than the original chain alone
- Suits ornate brass or crystal fixtures better than plain modern ones
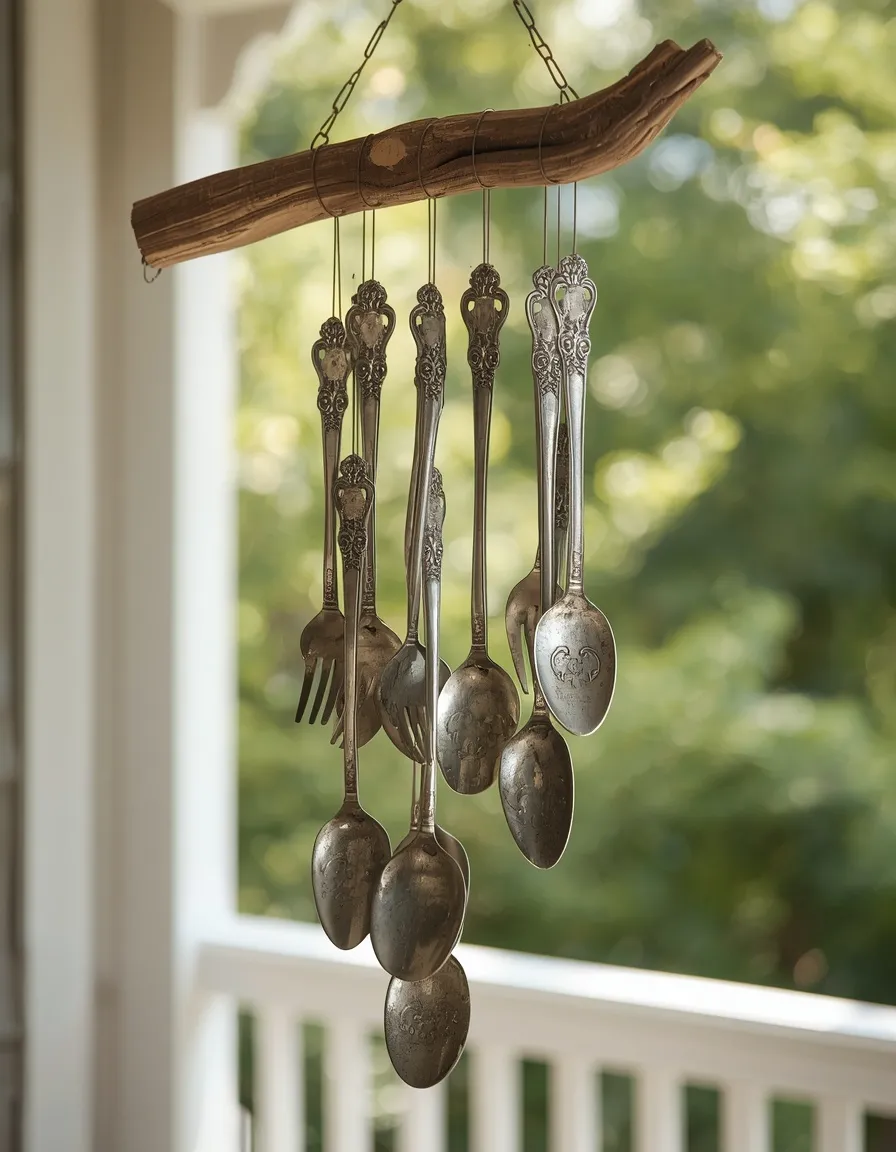
7. Cutlery Wind Chime
A handful of mismatched forks, spoons, and butter knives, drilled and strung on fishing line or garden wire beneath a small hoop or driftwood branch, catches the slightest breeze and produces a soft, metallic ring that feels far more considered than a store-bought chime.
Drill through the handle of each piece using a metal drill bit at slow speed, clamping the utensil down first, since spinning cutlery is a genuine hand-injury risk and safety glasses are worth wearing for this step. Bend the bowls of a few spoons slightly with pliers before hanging them, which adds visual movement and slightly changes their tone when they knock together. Vary the length at which each piece hangs, since chimes of identical length tend to move in unison and produce far less sound than a staggered arrangement. Hang the finished piece near a porch, doorway, or reading nook rather than directly over a play area, since dangling metal at head height is best kept away from spaces where children run.
- Turns a mismatched or incomplete cutlery set into a functional garden feature
- Staggered hanging lengths produce noticeably better sound than uniform lengths
- Best hung near porches or seating areas, away from active play zones
- A genuinely good use for silver-plate pieces too tarnished for the table
Container Gardens Made From Reclaimed Objects
This group focuses on objects that already have a shape suited to holding soil, so the work is mostly drainage, drainage, and more drainage.
8. Rain Boot Wall Planters
A row of old rubber rain boots, mounted boot-shelf style along a fence or the side of a shed and filled with trailing plants like nasturtiums or creeping Jenny, turns a bare vertical surface into a playful, color-blocked planting wall that costs nothing but the boots themselves.
Drill three or four drainage holes through the sole of each boot before mounting, and add a two-centimeter (about one-inch) layer of gravel at the bottom to keep the holes from clogging with soil. Screw a batten of wood to the fence first, then screw through the back of each boot’s ankle into the batten, which spreads the weight evenly instead of loading it all onto a single fence panel. Choose plants that tolerate the fairly small soil volume a boot holds, and lean toward pet-safe flowering annuals such as nasturtium or calendula if dogs or cats have access to the yard, since the ASPCA’s plant safety guidance is worth checking before any planter sits at nose height for a curious pet. Group boots in mismatched sizes and colors for a relaxed, collected look, or line up matching pairs for a more graphic, orderly effect.
- Uses worn or single boots that would otherwise be discarded
- Mounting to a wooden batten distributes weight better than screwing directly into fencing
- Small soil volume suits shallow-rooted trailing annuals rather than deep-rooted plants
- Choosing pet-safe blooms matters if the display sits within reach of dogs or cats

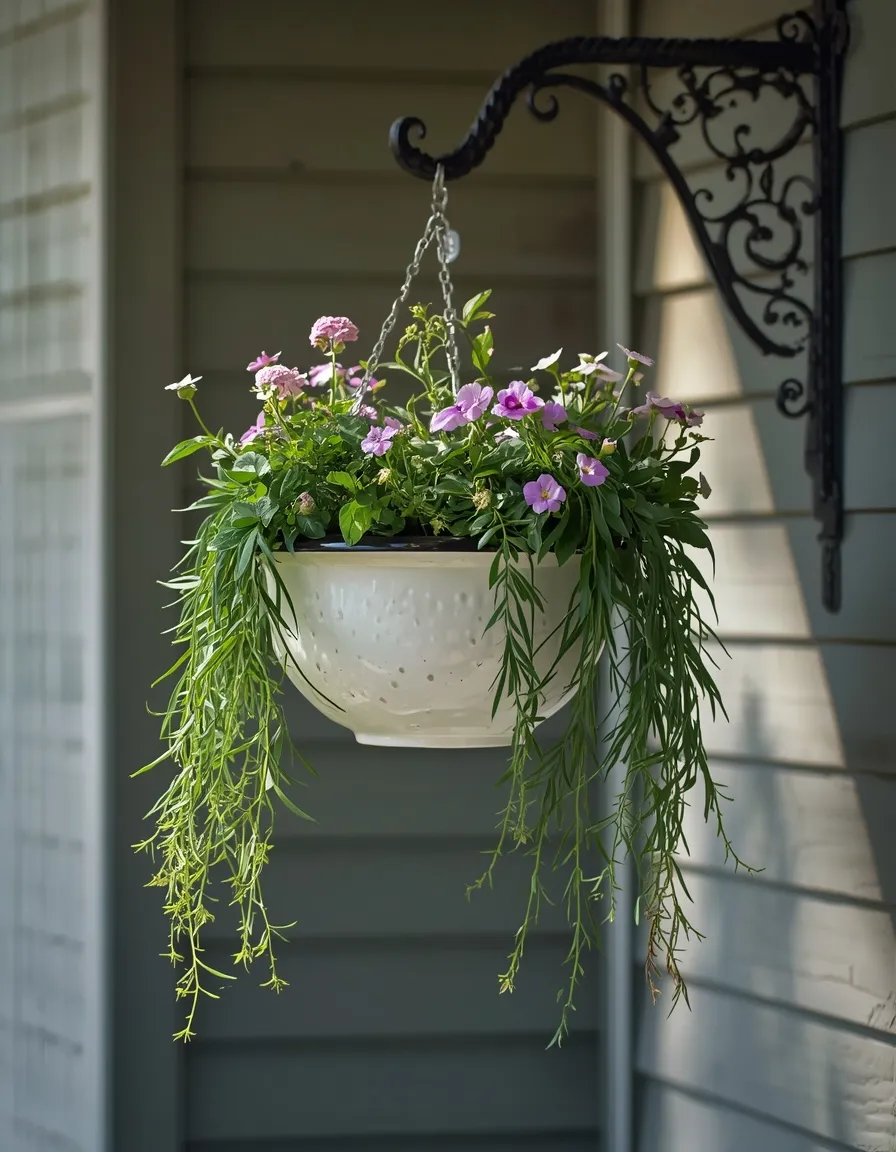
9. Colander Hanging Planter
A dented metal or enamel colander, already full of holes, needs almost no modification to become a hanging planter with built-in drainage, its perforated sides letting roots breathe in a way a solid plastic pot never could.
Line the inside with a coconut coir liner or a folded layer of burlap before adding soil, which keeps the potting mix from sifting straight out through the larger holes while still allowing excess water to escape. Attach three lengths of sturdy garden wire or paracord to the existing handles, or drill three evenly spaced holes near the rim if the colander has none, and hang it from a bracket rated for the combined weight of soil, water, and plant. Enamel colanders with chipped spots are fine to use outdoors but will rust faster at the chip; a light coat of outdoor-rated paint on bare metal slows this down. This project suits herbs and trailing flowers equally well and is one of the fastest upcycled garden decor diy projects to finish in under half an hour.
- Built-in drainage means almost no modification beyond a liner
- Ideal for porches, pergolas, and shepherd’s hooks where floor space is limited
- A liner keeps soil in place without blocking necessary drainage
- One of the quickest projects on this list to complete start to finish
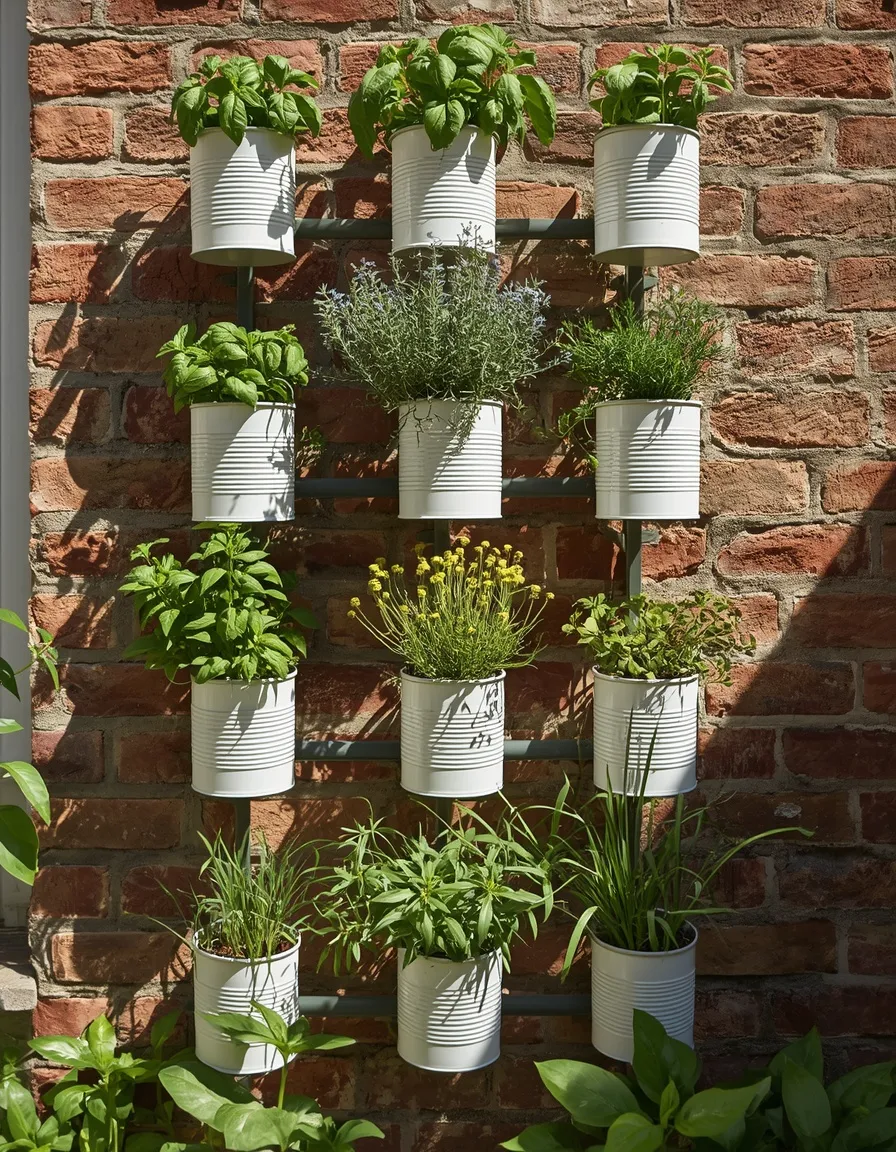
10. Tin Can Herb Wall
A cluster of cleaned soup or coffee cans, painted in a coordinated palette and mounted in a grid on a sunny wall, turns a blank exterior surface into a working herb garden that keeps basil, thyme, and chives within arm’s reach of the kitchen door.
File down the inside rim of each can with a metal file or wrap it with duct tape, since a freshly opened can leaves an edge sharp enough to cut a hand during planting or watering. Punch two or three drainage holes in the base with a hammer and nail before painting, and prime bare metal with a rust-inhibiting spray primer so the finish holds up through a full season of watering. Mount cans to a wooden board or into mortar joints using screw-through cleats on the back rather than nails through the front, which keeps the visible face clean. This wall works best with at least five hours of sun, since most culinary herbs sulk in deep shade, and it is a genuinely space-saving option for renters without ground to dig.
- Turns wall-mounted vertical space into usable growing area for herbs
- Filing sharp can rims first prevents cuts during everyday watering and harvesting
- Rust-inhibiting primer extends the life of painted cans left outdoors
- Well suited to renters and apartment dwellers without access to garden beds
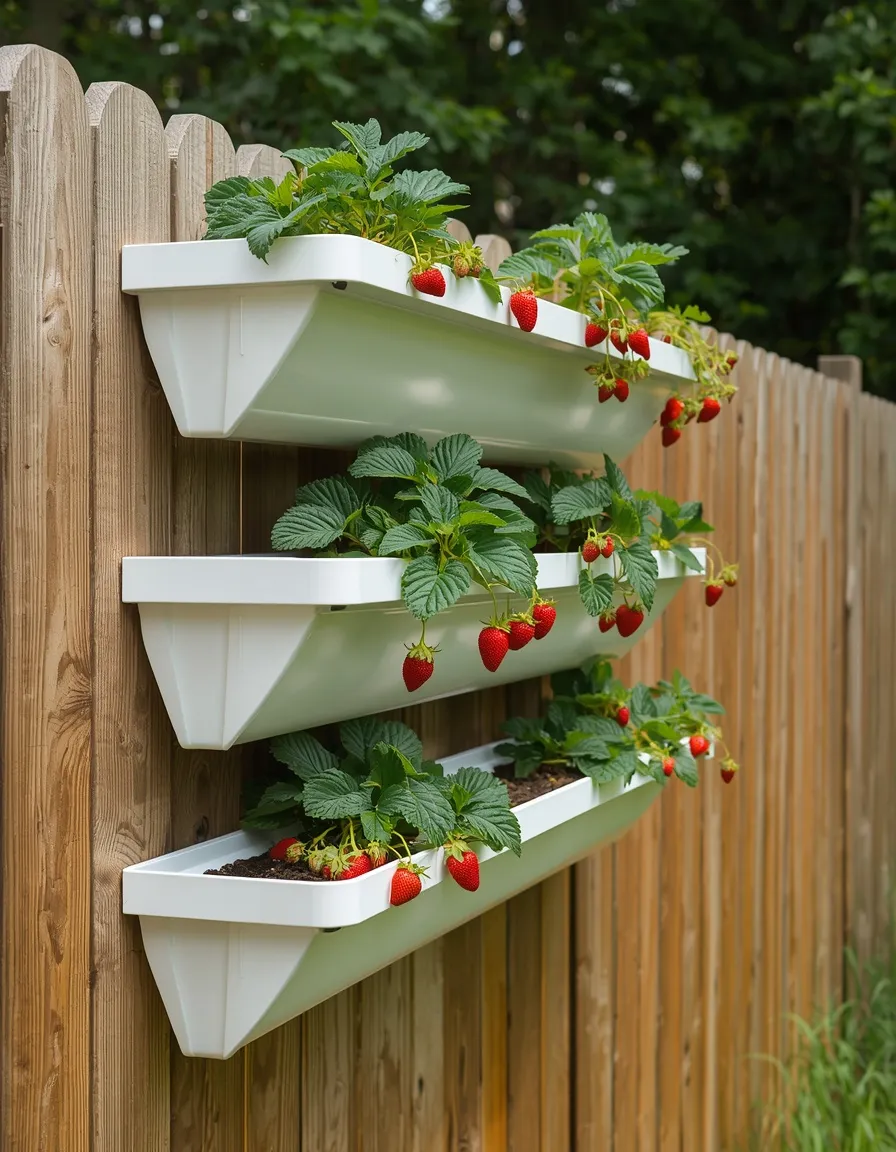
11. Gutter Strawberry Planter
A length of leftover vinyl or aluminum guttering, capped at both ends and mounted in tiers along a fence or wall, creates a narrow, self-contained bed that is ideal for strawberries, since it lifts the fruit away from slugs and soil-borne rot while keeping the growing footprint slim.
Cut the guttering to length with a hacksaw, sand the cut edges smooth, and drill drainage holes every 15 to 20 centimeters (roughly 6 to 8 inches) along the base before capping both ends with the matching end pieces sold for that gutter profile. Mount runs in a staggered, tiered arrangement rather than a single long row, which lets strawberry runners cascade down from the tier above and makes far better use of vertical wall space. Check the shallow soil more often than an in-ground bed, since it dries out noticeably faster in summer heat. This project also works well for shallow-rooted lettuces and herbs if strawberries are not the goal.
- Lifts strawberries off the ground, reducing slug damage and fruit rot
- Tiered mounting makes efficient use of narrow wall or fence space
- Shallow soil depth means more frequent watering than an in-ground bed
- Adaptable to lettuces and herbs as well as strawberries
Functional Garden Structures Built to Last
These projects take a little more time and hardware, but they hold up as genuine garden structure rather than temporary decoration.
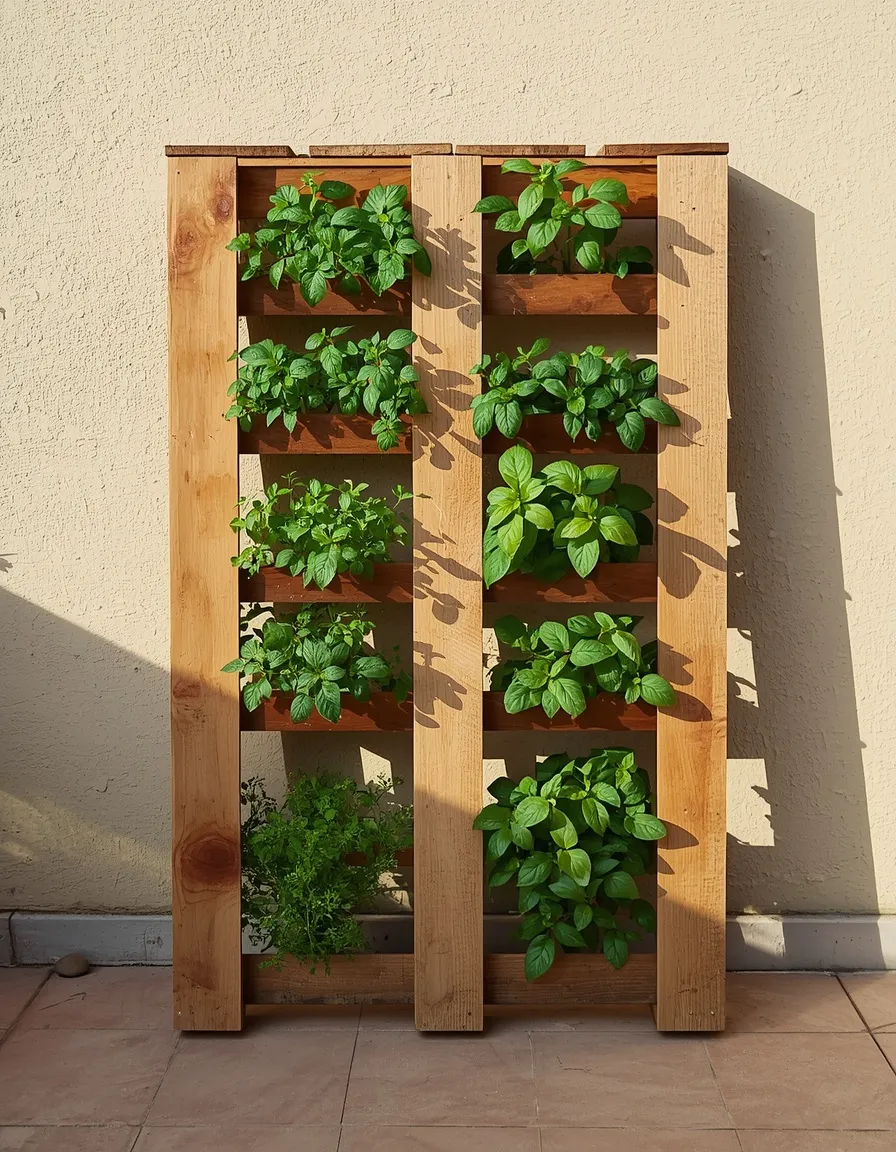
12. Pallet Vertical Herb Garden
A single wooden shipping pallet, stood on end and lined with landscape fabric, becomes a freestanding vertical herb garden with a slot for a different plant between each slat, turning shipping packaging into one of the most space-efficient small-garden structures around.
Check the stamp on the pallet before using it. A stamp reading HT means the wood was heat-treated and is safe for garden use, while a stamp reading MB means it was fumigated with methyl bromide and should never be used near edible plants. Staple a double layer of landscape fabric to the back and base to contain the soil, stand the pallet upright and let it settle for a day before planting so the fabric can take the weight, then plant from the top down, working sideways as each layer fills to avoid soil spilling from the gaps below. Lean the pallet against a solid wall or brace it with two ground stakes, since a soil-filled pallet is front-heavy and can tip forward once fully planted.
- Turns free or low-cost shipping pallets into a working vertical herb garden
- Checking for an HT stamp is essential before growing anything edible in it
- Suits patios, balconies, and small courtyards with limited ground space
- Bracing against a wall or with stakes prevents forward tipping once planted
13. Dresser Drawer Raised Bed
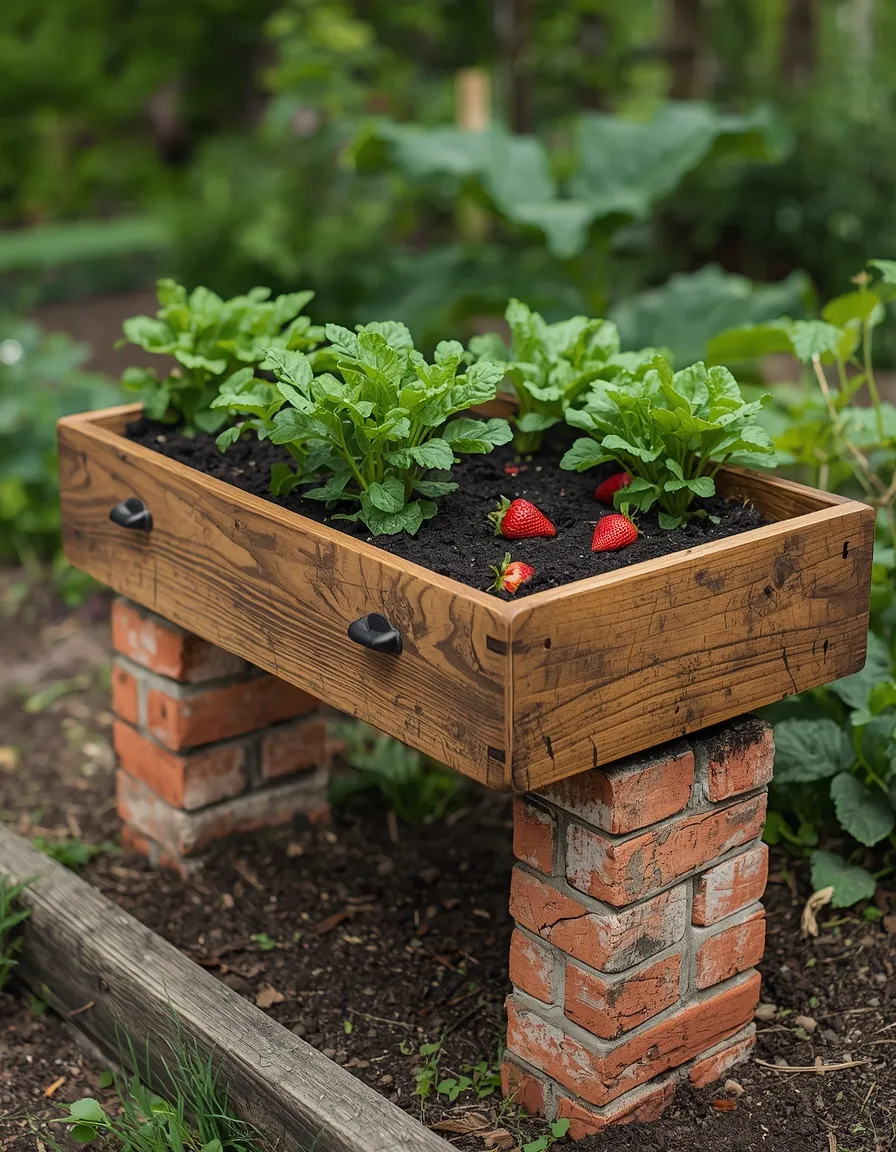
A single deep drawer pulled from an otherwise ruined dresser, set on short legs or bricks and filled with soil, makes a charming knee-high raised bed with a built-in frame that already looks finished, no fresh lumber required.
Drill several drainage holes through the drawer bottom before adding soil, and line the inside with landscape fabric to slow the wood’s decay, since most dresser drawers are built from thinner material than dedicated garden lumber. If the dresser is older and the paint or varnish is flaking, treat it with caution rather than sanding it back to bare wood; painted furniture made before 1978 may contain lead-based paint, and the EPA’s guidance on lead-safe renovation work applies to garden furniture refinishing just as much as it does indoors. Raise the finished drawer on bricks or short furniture legs so air can circulate underneath, which meaningfully extends how many seasons the wood will last outdoors. This idea suits shallow-rooted crops like lettuce, herbs, and strawberries better than anything needing real root depth.
- Gives a ruined dresser a genuinely useful second life as a raised bed
- Lining with landscape fabric slows decay in furniture-grade wood
- Checking for pre-1978 lead paint matters before sanding an old drawer
- Best suited to shallow-rooted crops rather than deep-rooted vegetables
14. Reclaimed Door Garden Gate
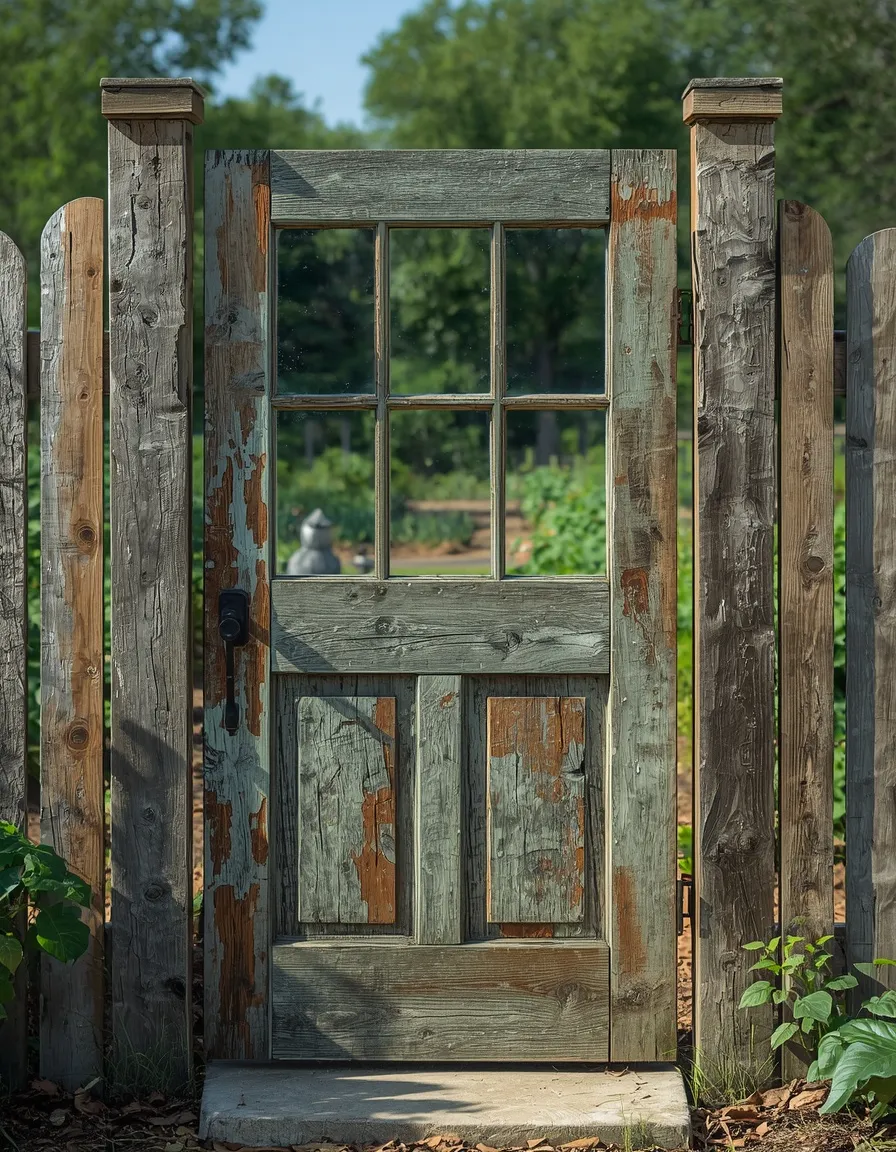
An old wooden or wrought-iron door, hung between two sturdy posts at the entrance to a vegetable patch or side garden, turns a purely functional barrier into a genuine design moment, especially when the original paint, glass panes, or hardware are left visibly worn rather than restored to a showroom finish.
Hang the door on heavy-duty gate hinges rated for its actual weight rather than the lighter hinges sold for interior doors, and set the posts in concrete rather than simply driving them into soil, since a gate that racks or sags within a season is almost always a sign of an undersized post foundation. Trim roughly two centimeters (about three-quarters of an inch) off the bottom if the door drags on uneven ground, and add a simple slide bolt or gate latch at a height that suits the household rather than assuming a standard door handle placement will feel right at garden scale. These structural choices sit at the heart of good garden design: a gate should announce a transition from one part of the garden to another, not just fill a gap in a fence.
- Marks a clear entrance point between garden zones rather than a plain fence gap
- Heavy-duty hinges and concreted posts prevent sagging under the door’s real weight
- Worn original paint or glass reads as intentional character rather than disrepair
- Works for both cottage vegetable gardens and more formal courtyard entries
15. Window Shutter Trellis Panel
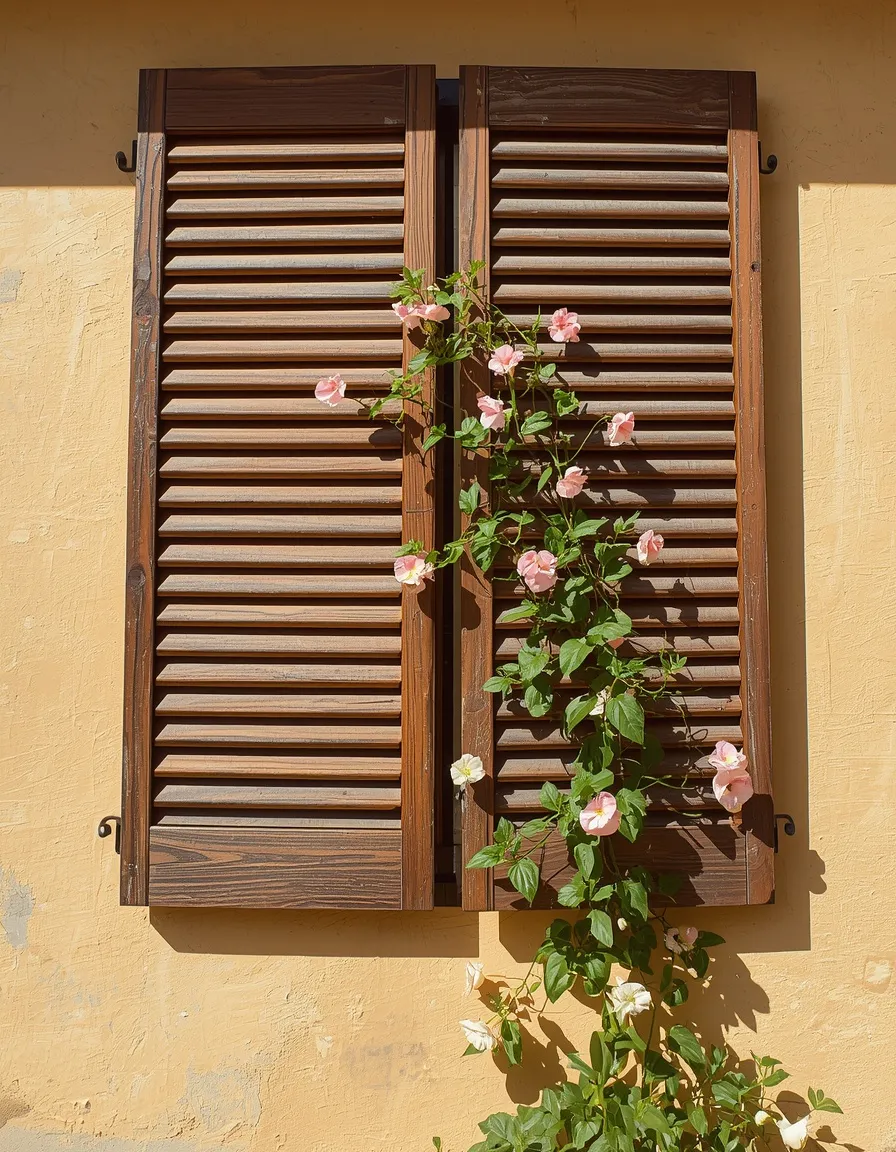
A pair of louvered wooden shutters, hinged together or mounted flat against a wall, gives climbing plants like clematis, sweet peas, or climbing nasturtium a ready-made lattice to grip, while doubling as a piece of architectural wall art even before a single vine reaches the top slat.
Sand any peeling paint back to a sound surface and finish with an exterior-grade paint or sealant, since shutters were originally designed for painted exposure but not necessarily for direct contact with damp soil at the base. Mount the shutters roughly five centimeters (two inches) off the wall using batten spacers, which gives climbing stems room to wind behind the slats the way they would on a true trellis, rather than being pinned flat against a solid surface. Pair heavier woody climbers with reinforced screws into wall studs or masonry anchors, since a mature clematis or climbing rose can weigh more than the shutter itself once established. This idea suits sunny, sheltered walls best, since louvered slats offer less wind resistance than solid panel fencing but still need a stable mount.
- Gives climbing plants an attractive, ready-made grid to grow through
- Mounting slightly off the wall lets stems wind naturally behind the slats
- Works well on sunny, sheltered exterior walls with reinforced anchoring
- Doubles as decorative wall art even before plants fill in
16. Bicycle Wheel Climbing Trellis
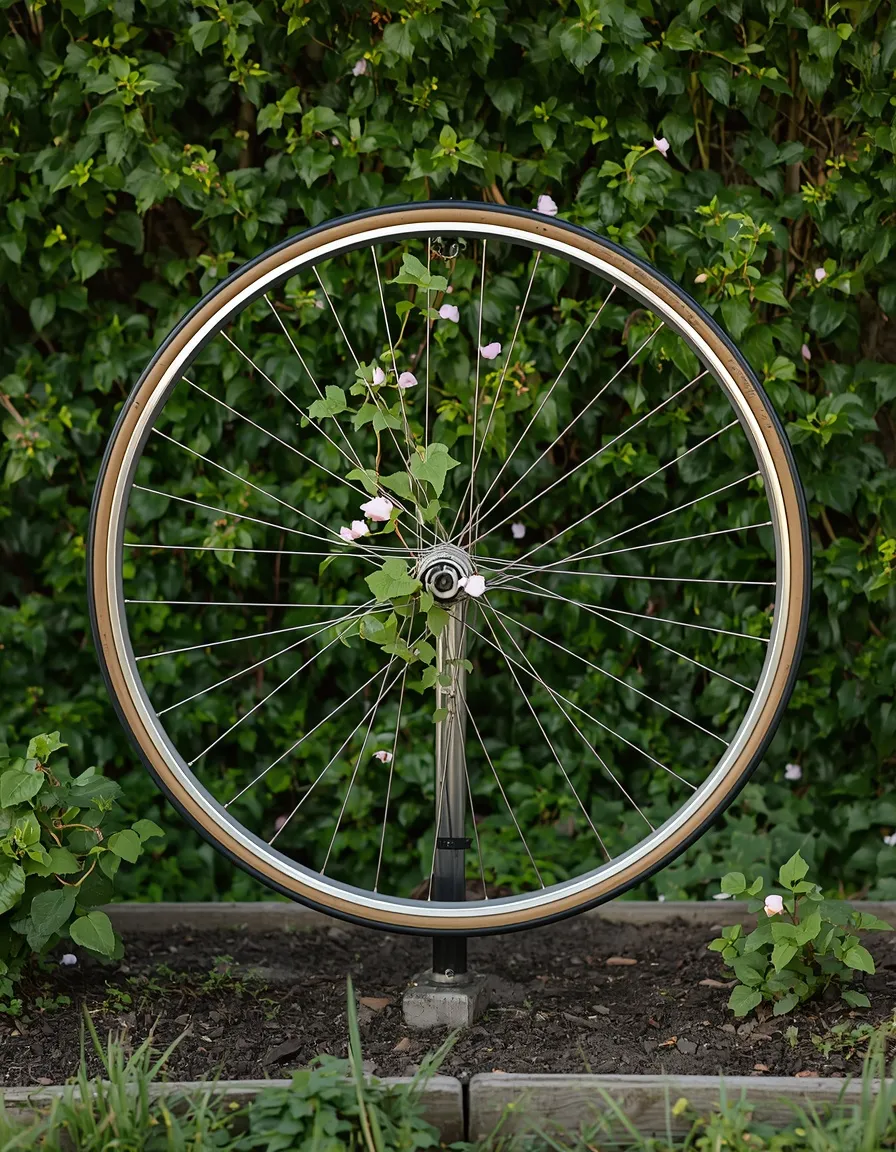
A bare bicycle wheel, spokes intact and tire removed, mounted flat against a fence or staked upright in a border, gives climbing sweet peas, morning glory, or beans a striking circular frame to scale, turning the geometry of the spokes into the plant’s support structure.
Remove the tire and inner tube, then check the spokes for rust or sharp broken ends before handling; file down any protruding spoke ends and wear gloves during this step, since bent spokes can snag skin easily. Mount the wheel to a fence with U-bolts or wire ties through the rim, or weld it to a length of rebar for a freestanding version driven into the ground, and angle it slightly rather than mounting it perfectly vertical, which helps young climbing stems find the spokes faster. A single wheel suits a narrow gap between larger plantings, while two or three wheels of different sizes overlapped together create a more sculptural, layered trellis for a larger sunny border.
- Repurposes a wheel that would otherwise go to scrap metal recycling
- Filing sharp spoke ends first is an important safety step before handling
- Works as a single accent trellis or layered into a larger sculptural piece
- Suits fast climbers like sweet peas, morning glory, and pole beans
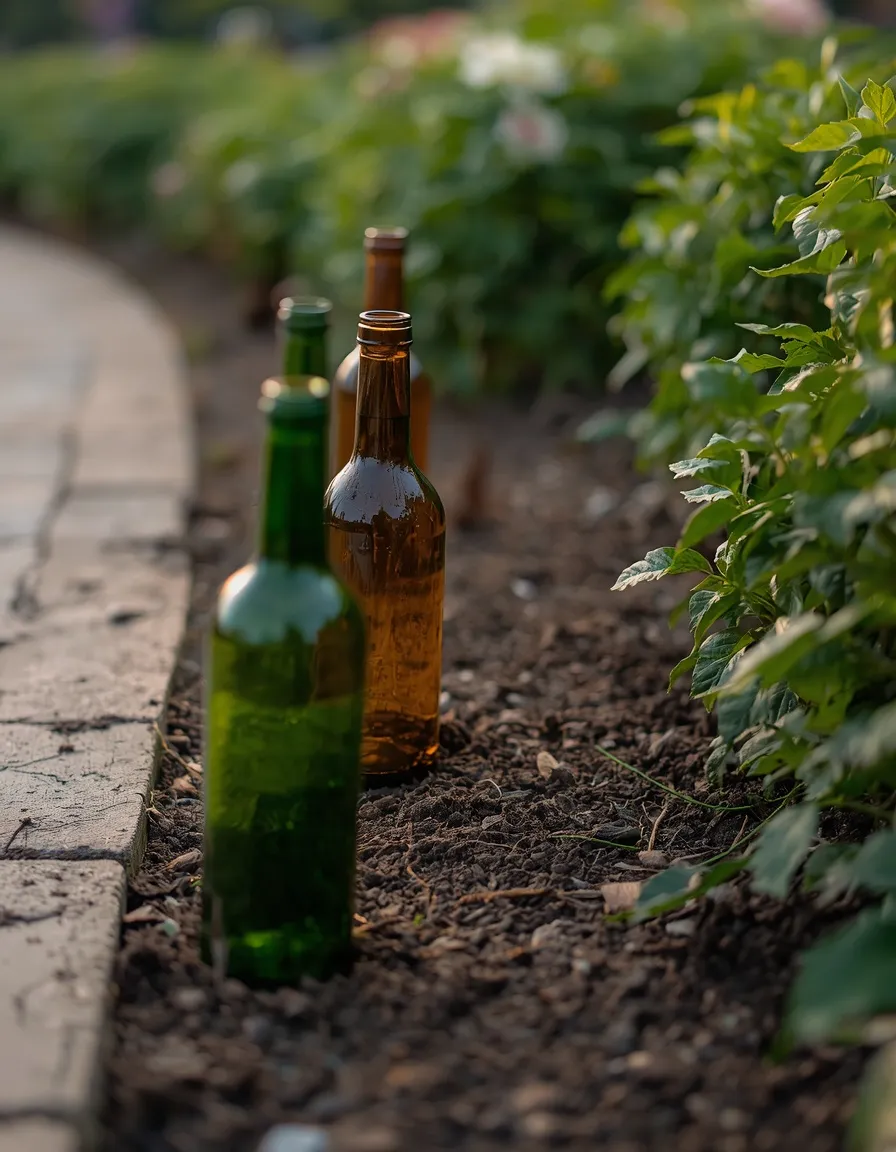
17. Wine Bottle Edging Border
A row of empty wine or beer bottles, pushed neck-down into the soil along a path or bed edge, creates a clean, glinting border that catches low morning and evening light in a way that plastic or timber edging never quite manages.
Choose bottles with thicker glass, such as sparkling wine or heavier spirit bottles, since thin glass is more prone to cracking when driven into compacted or stony soil. Dig a narrow trench first rather than forcing bottles directly into hard ground, and bury at least a third of each bottle’s length so wind and foot traffic near the path cannot dislodge them. Always wear gloves when handling bottles for this project, and if one chips or cracks during installation, discard it rather than using it, since a broken edge at ground level near a path is a genuine cut hazard for bare feet and pets. Mixing bottle colors, such as green and amber, creates a more varied, mosaic-like edge than an entirely uniform row.
- Creates a durable, weather-resistant edge from bottles otherwise headed for recycling
- Thicker glass bottles resist cracking better than thin ones when installed
- Burying a third of the bottle’s length keeps the border stable underfoot
- Mixing bottle colors adds visual variation along a path or bed edge
Upcycled Garden Projects for Kids and Everyday Gardening
The last two ideas are less about display and more about how a garden actually gets used day to day, by the smallest members of the household and by the person doing the digging.
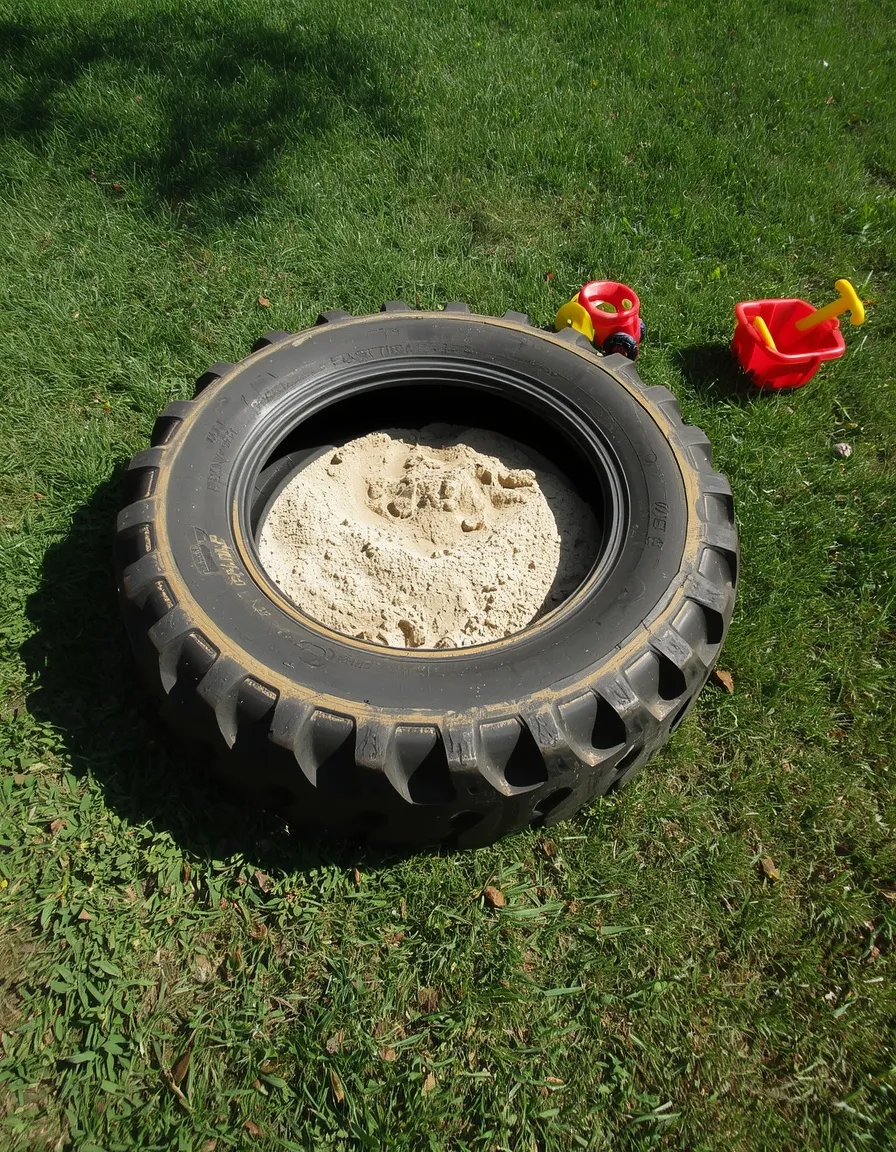
18. Tire Sandbox Planter
A large tractor or car tire, cleaned, painted, and laid flat, makes either a bold circular planter for sprawling squash and pumpkins or, filled with sand instead of soil, a simple sandbox for younger children, all from a tire that would otherwise cost money to dispose of responsibly.
Drill a handful of drainage holes through the sidewall if using the tire as a planter, and line the inside with landscape fabric before adding soil or sand. According to Cooperative Extension guidance, most documented concerns about tires and harmful chemicals relate to burning or shredding them into mulch rather than leaving them intact as a planter, though gardeners who want extra reassurance can reserve a tire planter for ornamentals and flowers rather than root vegetables. Sand any exposed steel belting at the cut edge of the tire, since a worn tire can expose small wire ends that snag skin, and always position a sandbox tire in a shaded or partly shaded spot, since black rubber absorbs heat quickly enough to become uncomfortably hot in full summer sun.
- Diverts a hard-to-dispose-of tire into either a planter or a play feature
- Best positioned in shade, since dark rubber heats up quickly in sun
- Suits ornamental plants best if extra caution around edible growing is preferred
- Checking for exposed steel belting is an easy but important safety step
19. Denim Garden Work Apron
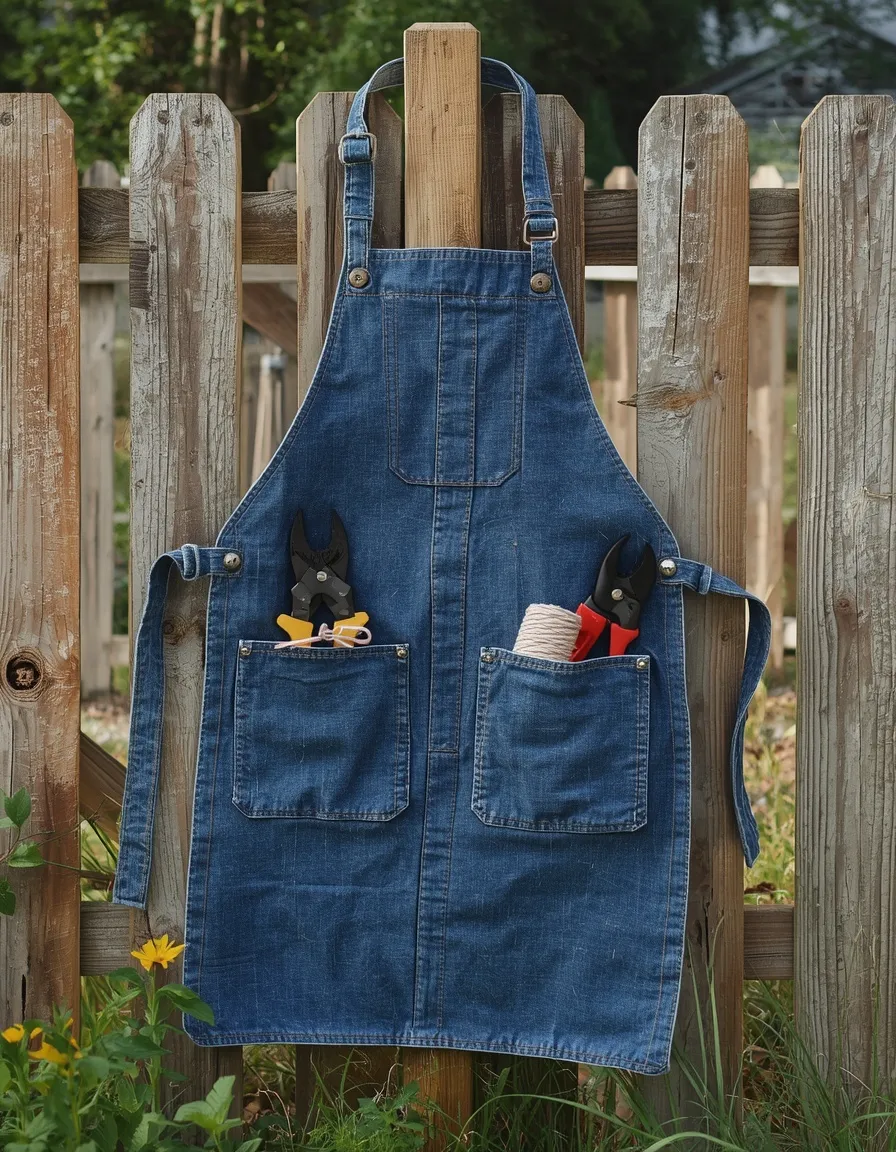
A pair of jeans too worn to wear, cut apart and restitched into a double-pocketed work apron, turns denim’s natural toughness into a genuinely useful gardening tool, one with pockets deep enough for pruners, plant tags, and a phone, sized exactly to the person wearing it.
Use the back panel and legs of the jeans as the main body, since these are the least-worn, sturdiest sections of most old denim, and reinforce pocket seams with a double row of stitching, since pruners and trowels put real stress on a single seam. Add the original belt loops near the waist as anchor points for a garden trowel or twine, and finish raw edges with a simple zigzag stitch or pinking shears to stop fraying through repeated washing. This is one of the more practical upcycled garden decor diy projects on this list precisely because it is not decor at all; it earns its place by getting used every time the wearer heads outside, and it is an approachable first sewing project for anyone comfortable with a basic straight stitch.
- Turns worn-out jeans into a genuinely functional gardening tool rather than decor
- Double-stitched pockets hold up better under the weight of tools
- Belt loops double as anchor points for a trowel or twine
- An approachable first sewing project for basic straight-stitch skill level
Bringing It All Together
From a fairy garden built inside a chipped teacup to a raised bed built from an old dresser drawer, these upcycled garden ideas prove that memorable outdoor spaces rarely start with a single trip to the garden center. What ties all nineteen projects together is restraint: matching each object’s original shape and material to a genuinely useful new job, rather than forcing a look that fights what the piece already is. Pick two or three projects that fit whatever is already sitting in the shed or garage this weekend, and let the rest wait for the next piece of curbside furniture or empty bottle to come along. For more ways to build a garden with real structure and story, browse the garden design category next.
Frequently Asked Questions
Do upcycled garden decorations need special sealant to survive outdoors?
Most porous materials, like unsealed wood or terracotta, benefit from an exterior-grade sealant or paint before they go outside, since untreated surfaces absorb moisture and break down faster through repeated wet-dry cycles. Metal pieces like tin cans or bicycle wheels last longer with a rust-inhibiting primer, while glass and enamel items such as wine bottles or bathtubs generally need no sealant at all.
Which upcycled garden ideas work best for small balconies or rented spaces?
Container-based projects that need no permanent fixing, such as the colander hanging planter, teacup fairy garden, or a tin can herb wall mounted on a portable trellis, are the easiest to take along at the end of a lease. Anything requiring posts set into the ground, like the reclaimed door gate, suits a garden the gardener actually owns.
Is it safe to grow vegetables in upcycled containers like tires or old furniture?
It depends on the material. Cooperative extension research generally finds the biggest documented risks with tires relate to burning or shredding rather than intact use as a planter, though gardeners who want extra reassurance can reserve tire planters for flowers rather than root crops, and should always check old painted furniture for pre-1978 lead paint before sanding it back for a raised bed.
How do I keep upcycled metal planters like colanders or tin cans from rusting too quickly?
Priming bare metal with a rust-inhibiting spray primer before painting slows corrosion significantly, and drilling drainage holes so water never sits inside the container removes the main cause of rapid rust. A light annual touch-up coat on any spot where paint has chipped will extend the life of a metal planter by several more seasons.
What upcycled garden ideas are appropriate for children to help build?
Lower-risk projects with no sharp cutting or power tools, such as painting a tire sandbox planter, decorating a wheelbarrow centerpiece, or planting a teacup fairy garden after an adult drills the drainage hole, are the most age-appropriate for kids to help with directly. Anything involving broken glass, ceramic shards, or metal cutting is best handled by an adult, with children joining in for the planting and decorating stages instead.
Can several upcycled garden ideas be mixed in one small yard without it looking cluttered?
Yes, as long as the pieces share a coordinating thread, such as a single paint color used across two or three projects, a consistent material like reclaimed wood, or a clear zone for each idea rather than scattering everything at random. Grouping three or four related pieces, like the broken pottery stack and wine bottle edging along the same path, tends to read as curated rather than mismatched.
What is the difference between upcycling and simply recycling garden materials?
Recycling breaks a material down to be remade into something new elsewhere, while upcycling keeps the original object mostly intact and gives it a new function without processing it first, which is why a wheelbarrow becomes a planter rather than scrap metal. Most of the projects in this guide are upcycling projects specifically because they preserve the personality and shape of the original object rather than disguising it completely.